- 09-ObjectOrientedGraphics

Содержание
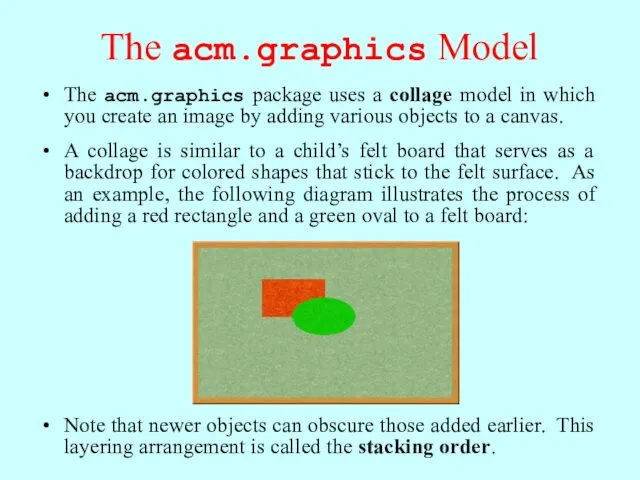
- 2. The acm.graphics Model The acm.graphics package uses a collage model in which you create an image
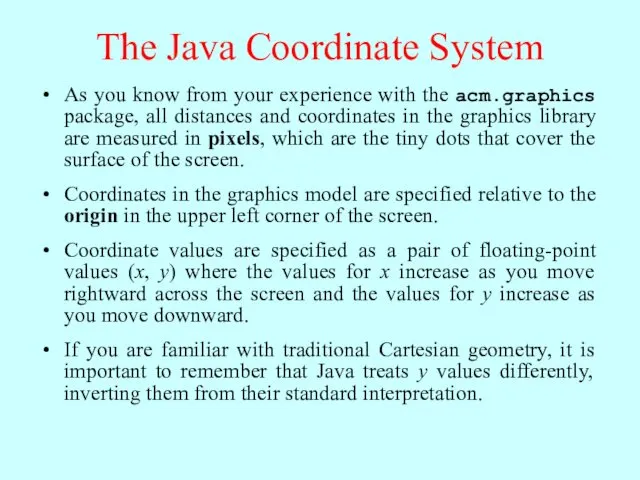
- 3. The Java Coordinate System As you know from your experience with the acm.graphics package, all distances
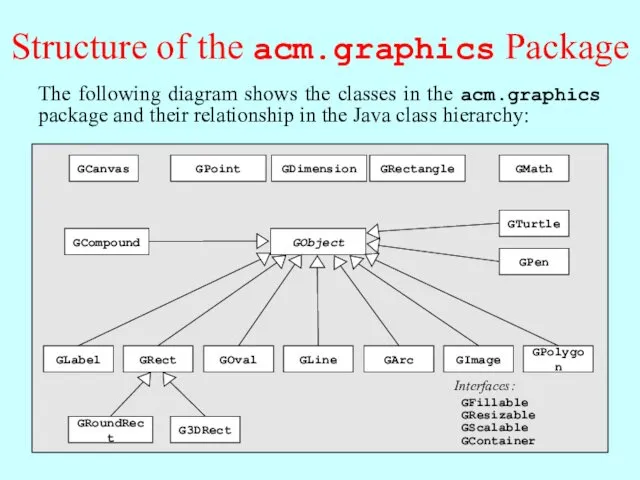
- 4. Structure of the acm.graphics Package The GObject class forms the root of the hierarchy of graphical
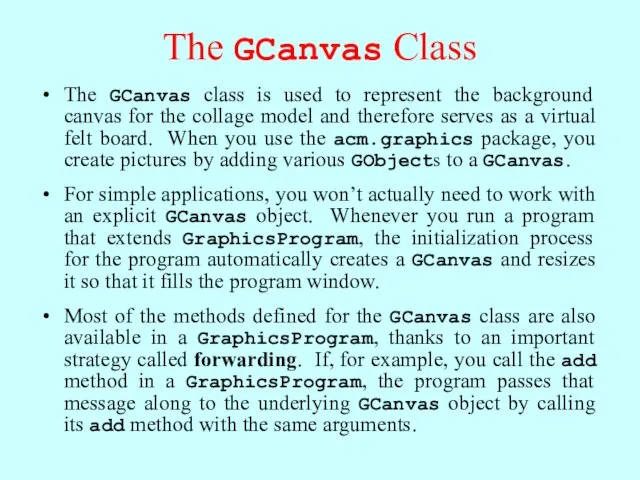
- 5. The GCanvas Class The GCanvas class is used to represent the background canvas for the collage
- 6. Methods in the GCanvas Class The following methods are available in both the GCanvas and GraphicsProgram
- 7. The Two Forms of the add Method The add method comes in two forms. The first
- 8. Encapsulated Coordinates The acm.graphics package defines three classes—GPoint, GDimension, and GRectangle—that combine geometric information about coordinates
- 9. The GMath Class The GMath class exports the following static methods:
- 10. Methods Common to All GObjects
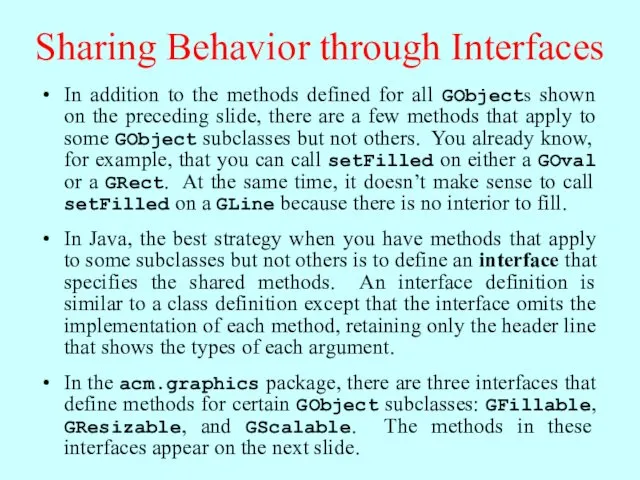
- 11. Sharing Behavior through Interfaces In addition to the methods defined for all GObjects shown on the
- 12. Methods Defined by Interfaces
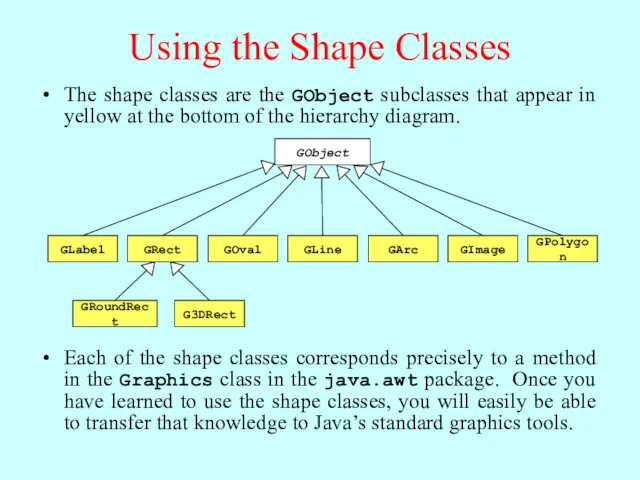
- 13. Using the Shape Classes The shape classes are the GObject subclasses that appear in yellow at
- 14. The GLabel Class You’ve been using the GLabel class ever since Chapter 2 and already know
- 15. The Geometry of the GLabel Class The GLabel class relies on a set of geometrical concepts
- 16. Centering Labels The following update to the “Hello World” program centers the label in the window:
- 17. The GRect Class The GRect class implements the GFillable, GResizable, and GScalable interfaces but does not
- 18. GRoundRect and G3DRect As the class hierarchy diagram indicates, the GRect class has two subclasses. In
- 19. The GOval Class The GOval class represents an elliptical shape defined by the boundaries of its
- 20. The GLine Class The GLine class represents a line segment that connects two points. The constructor
- 21. Setting Points in a GLine public void run() { GLine line = new GLine(0, 0, 100,
- 22. The GArc Class The GArc class represents an arc formed by taking a section from the
- 23. Exercise: GArc Geometry GArcExamples Suppose that the variables cx and cy contain the coordinates of the
- 24. Filled Arcs The GArc class implements the GFillable interface, which means that you can call setFilled
- 25. The GImage Class The GImage class is used to display an image from a file. The
- 26. Images and Copyrights Most images that you find on the web are protected by copyright under
- 27. Example of the GImage Class EarthImage Courtesy NASA/JPL-Caltech
- 28. The GPolygon Class The GPolygon class is used to represent graphical objects bound by line segments.
- 29. Constructing a GPolygon Object The GPolygon constructor creates an empty polygon. Once you have the empty
- 30. Using addVertex and addEdge The addVertex and addEdge methods each add one new vertex to a
- 31. Drawing a Diamond (addVertex) skip simulation public void run() { GPolygon diamond = createDiamond(100, 75); diamond.setFilled(true);
- 32. Drawing a Diamond (addEdge) skip simulation public void run() { GPolygon diamond = createDiamond(100, 75); diamond.setFilled(true);
- 33. Using addPolarEdge In many cases, you can determine the length and direction of a polygon edge
- 34. Drawing a Hexagon skip simulation public void run() { GPolygon hexagon = createHexagon(50); add(hexagon, getWidth() /
- 35. Defining GPolygon Subclasses The GPolygon class can also serve as the superclass for new types of
- 36. Drawing a Five-Pointed Star As a second example of a new class that extends GPolygon, the
- 37. The GStar Class /** * Defines a new GObject class that appears as a * five-pointed
- 38. Using the GStar Class public void run() { for (int i = 0; i GStar star
- 39. Exercise: Using the GPolygon Class Define a class GCross that represents a cross-shaped figure. The constructor
- 40. Solution: The GCross Class class GCross extends GPolygon { public GCross(double size) { double edge =
- 41. The addArc Method To make it easier to display shapes that combine straight and curved segments,
- 42. Using the addArc Method The following class definition creates a new GPolygon subclass that appears as
- 43. Creating Compound Objects The GCompound class in the acm.graphics package makes it possible to combine several
- 44. Creating a Face Object The first example of the GCompound class is the DrawFace program, which
- 45. import acm.graphics.*; /** Defines a compound GFace class */ public class GFace extends GCompound { /**
- 46. import acm.graphics.*; /** Defines a compound GFace class */ public class GFace extends GCompound { /**
- 47. Specifying Behavior of a GCompound The GCompound class is useful for defining graphical objects that involve
- 48. /** * Defines a GObject subclass that displays a stoplight. The * state of the stoplight
- 49. /** * Defines a GObject subclass that displays a stoplight. The * state of the stoplight
- 50. /** Sets the state of the stoplight */ public void setState(Color color) { if (color.equals(Color.RED)) {
- 51. Exercise: Labeled Rectangles Define a class GLabeledRect that consists of an outlined rectangle with a label
- 52. /** Defines a graphical object combining a rectangle and a label */ public class GLabeledRect extends
- 53. /** Defines a graphical object combining a rectangle and a label */ public class GLabeledRect extends
- 54. The GCompound Coordinate System As noted on an earlier slide, the components of a GCompound object
- 55. Graphical Object Decomposition The most important advantage of using the GCompound class is that doing so
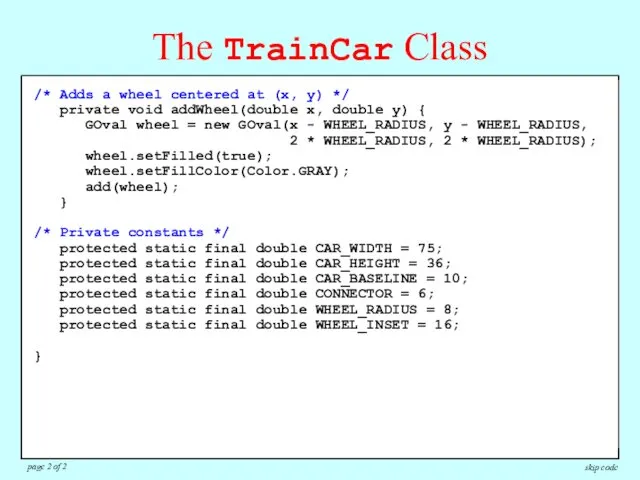
- 56. The TrainCar Hierarchy The critical insight in designing an object-oriented solution to the train problem is
- 57. import acm.graphics.*; import java.awt.*; /** This abstract class defines what is common to all train cars
- 58. import acm.graphics.*; import java.awt.*; /** This abstract class defines what is common to all train cars
- 59. /** * This class represents a boxcar. Like all TrainCar subclasses, * a Boxcar is a
- 60. Nesting Compound Objects Given that a GCompound is also a GObject, you can add a GCompound
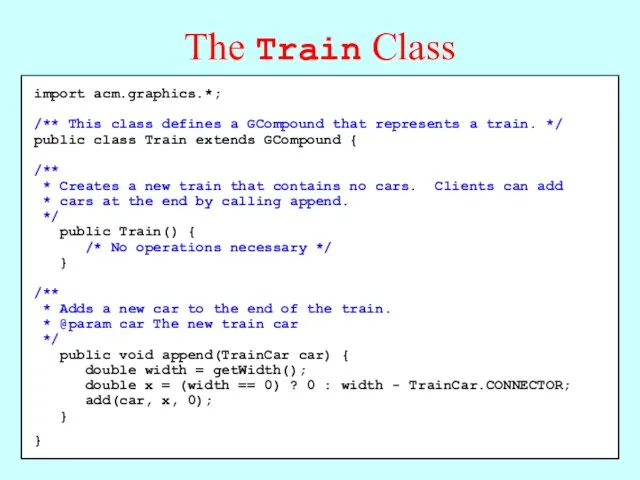
- 61. import acm.graphics.*; /** This class defines a GCompound that represents a train. */ public class Train
- 63. Скачать презентацию
The acm.graphics Model
The acm.graphics package uses a collage model in which
The acm.graphics Model
The acm.graphics package uses a collage model in which
The Java Coordinate System
As you know from your experience with the
The Java Coordinate System
As you know from your experience with the
Structure of the acm.graphics Package
The GObject class forms the root of
Structure of the acm.graphics Package
The GObject class forms the root of
The GCanvas Class
The GCanvas class is used to represent the background
The GCanvas Class
The GCanvas class is used to represent the background
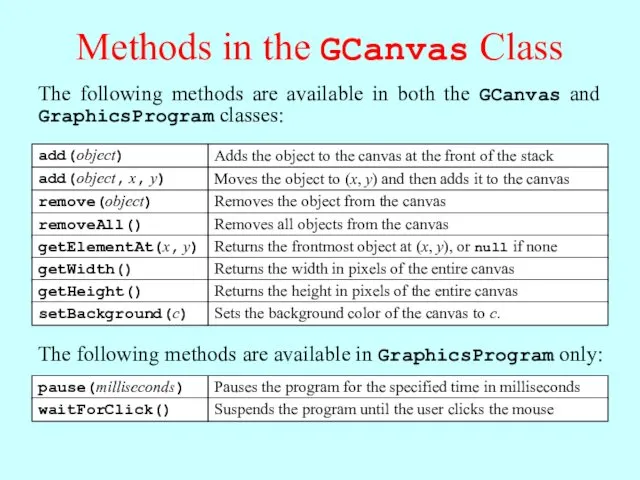
Methods in the GCanvas Class
The following methods are available in both
Methods in the GCanvas Class
The following methods are available in both
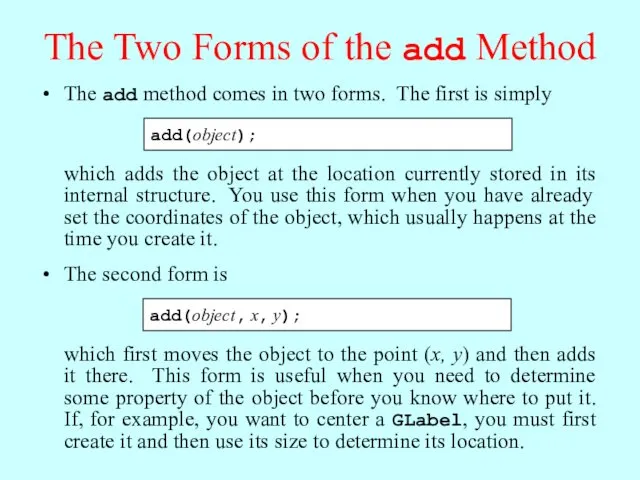
The Two Forms of the add Method
The add method comes in
The Two Forms of the add Method
The add method comes in
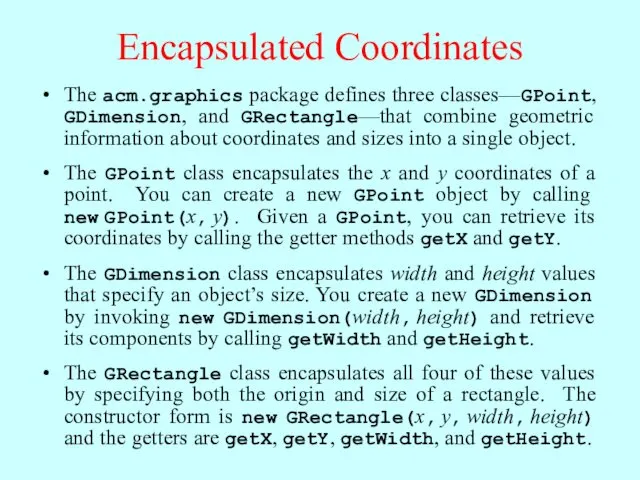
Encapsulated Coordinates
The acm.graphics package defines three classes—GPoint, GDimension, and GRectangle—that combine
Encapsulated Coordinates
The acm.graphics package defines three classes—GPoint, GDimension, and GRectangle—that combine
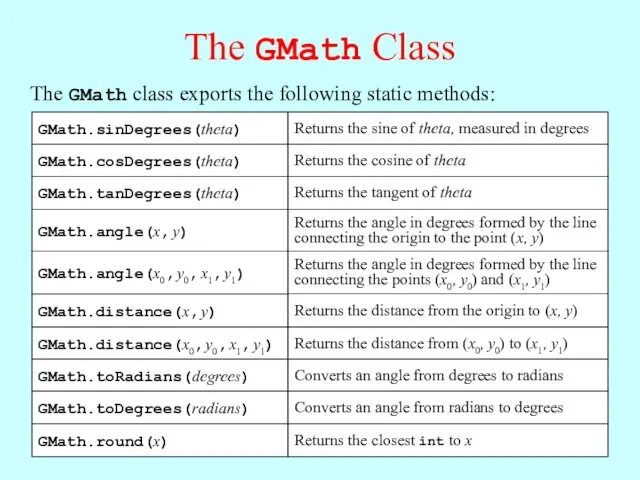
The GMath Class
The GMath class exports the following static methods:
The GMath Class
The GMath class exports the following static methods:
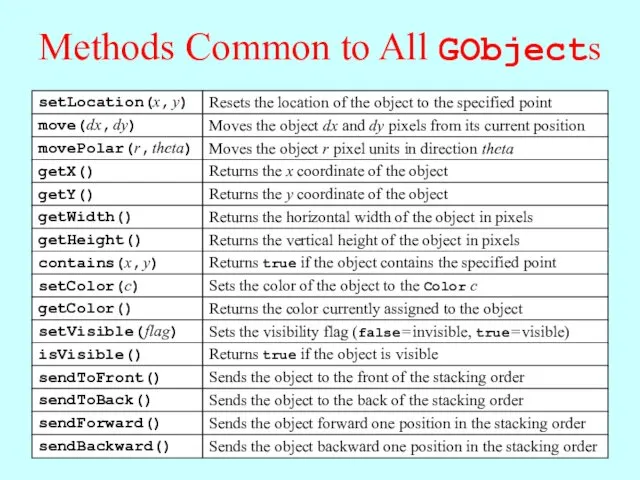
Methods Common to All GObjects
Methods Common to All GObjects
Sharing Behavior through Interfaces
In addition to the methods defined for all
Sharing Behavior through Interfaces
In addition to the methods defined for all
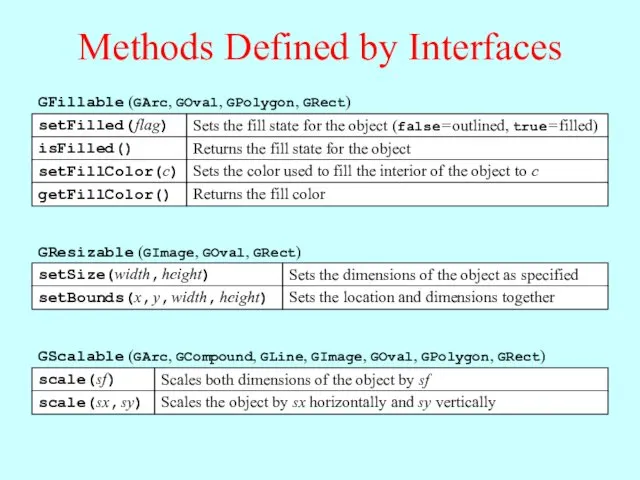
Methods Defined by Interfaces
Methods Defined by Interfaces
Using the Shape Classes
The shape classes are the GObject subclasses that
Using the Shape Classes
The shape classes are the GObject subclasses that
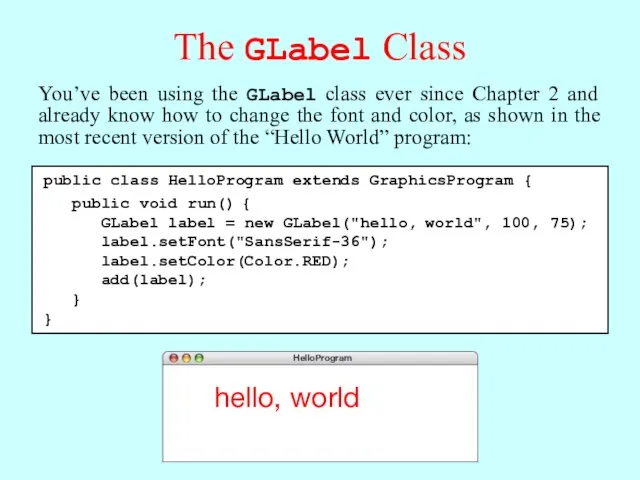
The GLabel Class
You’ve been using the GLabel class ever since Chapter
The GLabel Class
You’ve been using the GLabel class ever since Chapter
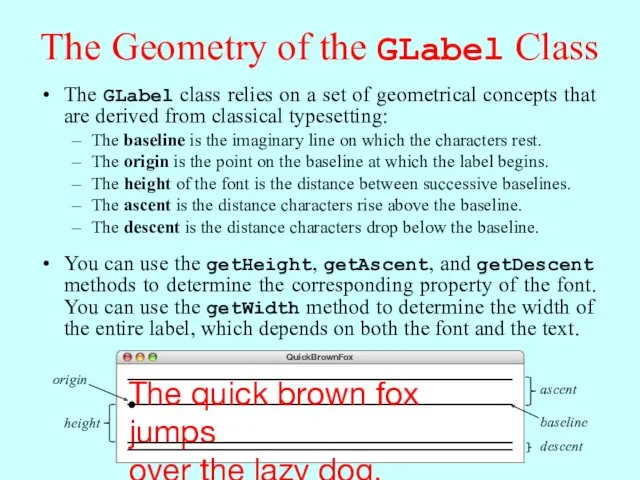
The Geometry of the GLabel Class
The GLabel class relies on a
The Geometry of the GLabel Class
The GLabel class relies on a
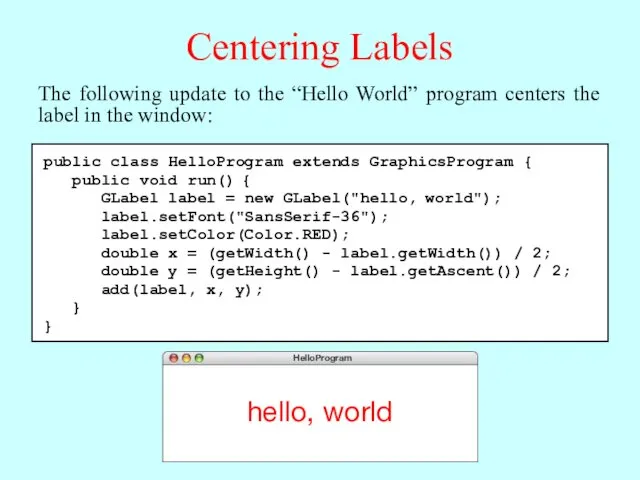
Centering Labels
The following update to the “Hello World” program centers the
Centering Labels
The following update to the “Hello World” program centers the
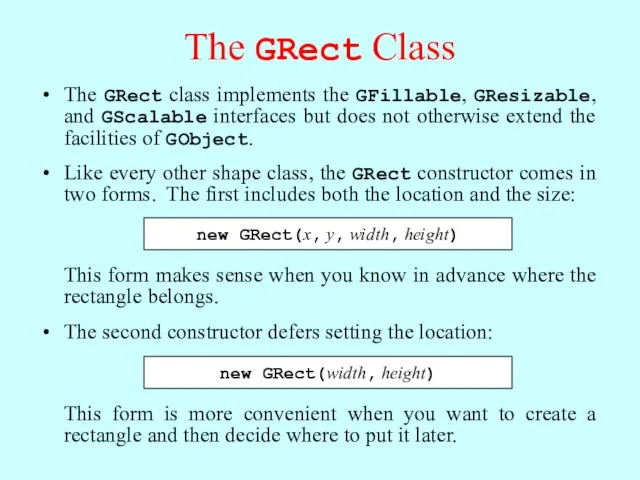
The GRect Class
The GRect class implements the GFillable, GResizable, and GScalable
The GRect Class
The GRect class implements the GFillable, GResizable, and GScalable
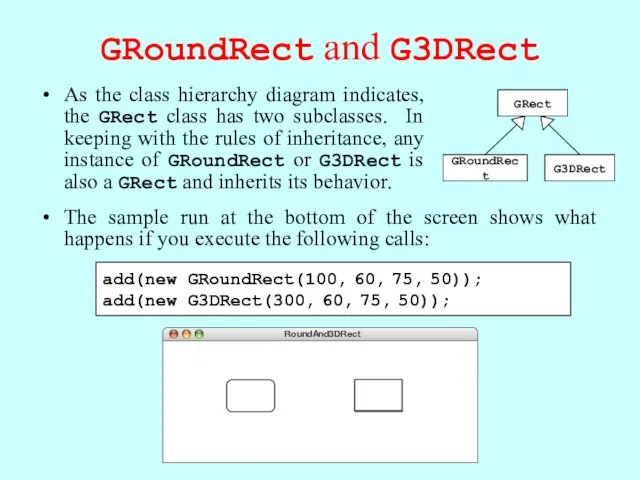
GRoundRect and G3DRect
As the class hierarchy diagram indicates, the GRect class
GRoundRect and G3DRect
As the class hierarchy diagram indicates, the GRect class
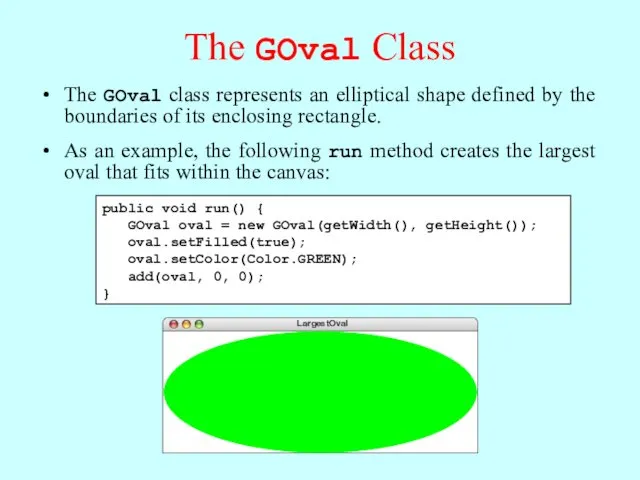
The GOval Class
The GOval class represents an elliptical shape defined by
The GOval Class
The GOval class represents an elliptical shape defined by

The GLine Class
The GLine class represents a line segment that connects
The GLine Class
The GLine class represents a line segment that connects
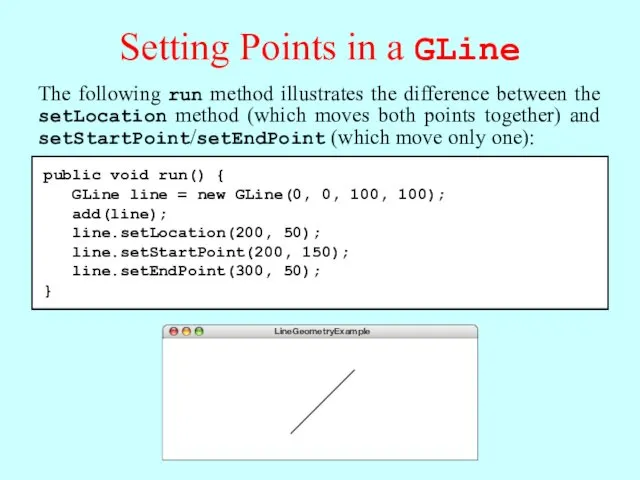
Setting Points in a GLine
public void run() {
GLine line =
Setting Points in a GLine
public void run() {
GLine line =
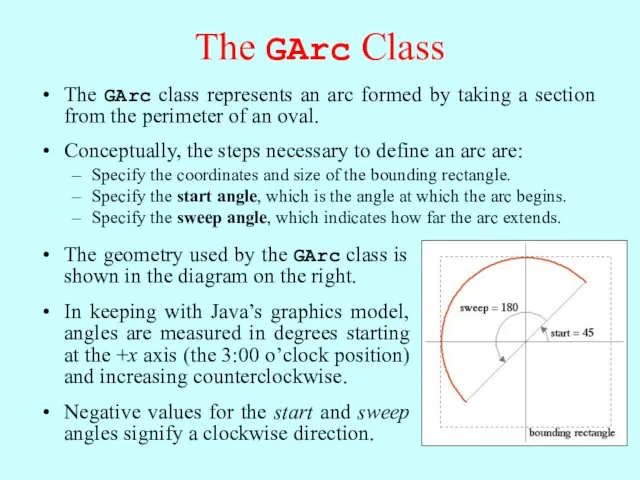
The GArc Class
The GArc class represents an arc formed by taking
The GArc Class
The GArc class represents an arc formed by taking
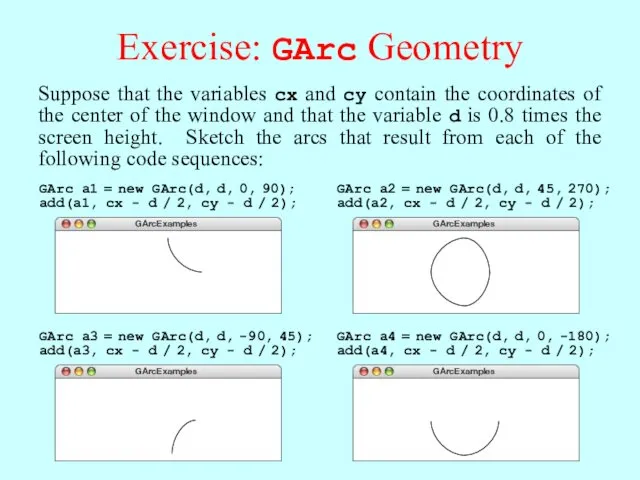
Exercise: GArc Geometry
GArcExamples
Suppose that the variables cx and cy contain the
Exercise: GArc Geometry
GArcExamples
Suppose that the variables cx and cy contain the

Filled Arcs
The GArc class implements the GFillable interface, which means that
Filled Arcs
The GArc class implements the GFillable interface, which means that
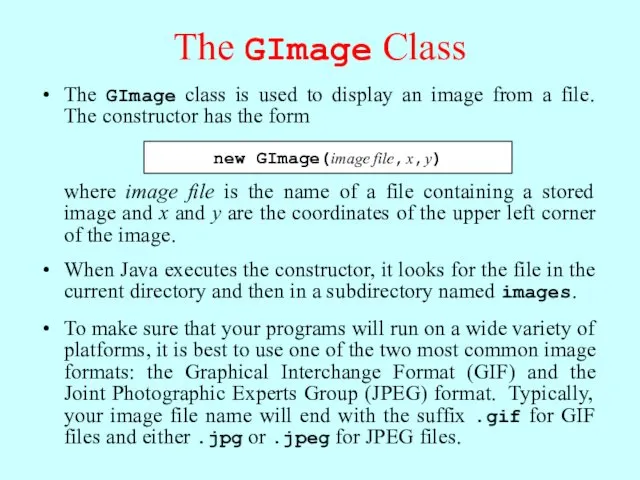
The GImage Class
The GImage class is used to display an image
The GImage Class
The GImage class is used to display an image
Images and Copyrights
Most images that you find on the web are
Images and Copyrights
Most images that you find on the web are
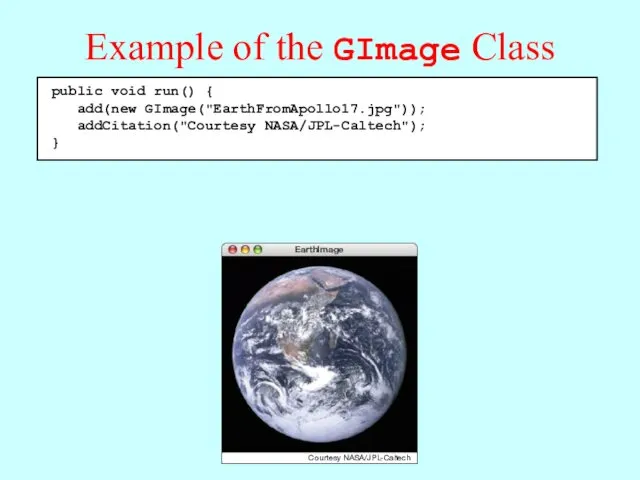
Example of the GImage Class
EarthImage
Courtesy NASA/JPL-Caltech
Example of the GImage Class
EarthImage
Courtesy NASA/JPL-Caltech
The GPolygon Class
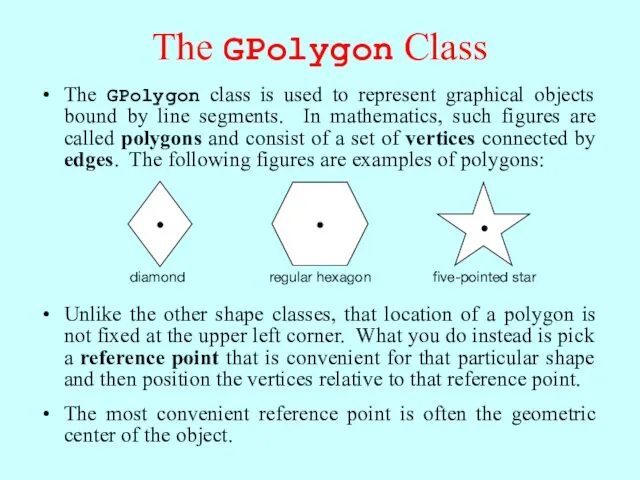
The GPolygon class is used to represent graphical objects
The GPolygon Class
The GPolygon class is used to represent graphical objects
Constructing a GPolygon Object
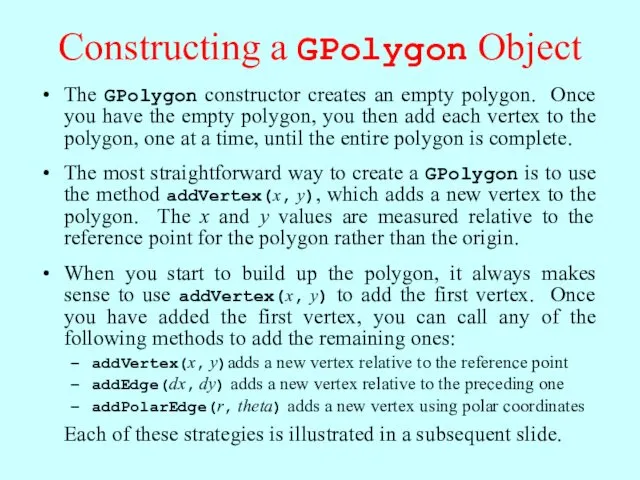
The GPolygon constructor creates an empty polygon. Once
Constructing a GPolygon Object
The GPolygon constructor creates an empty polygon. Once
Using addVertex and addEdge
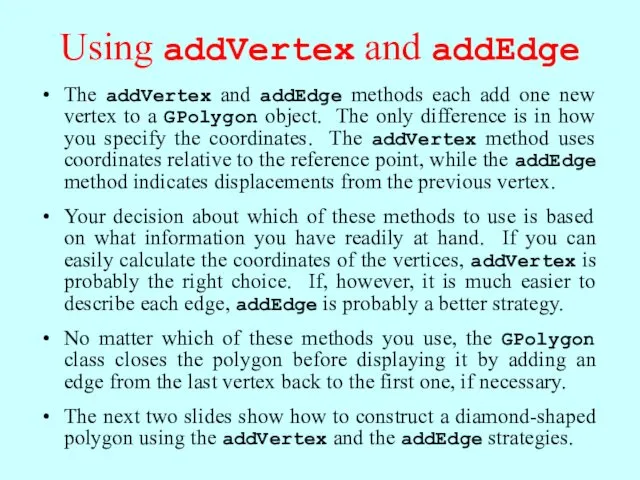
The addVertex and addEdge methods each add one
Using addVertex and addEdge
The addVertex and addEdge methods each add one
Drawing a Diamond (addVertex)
skip simulation
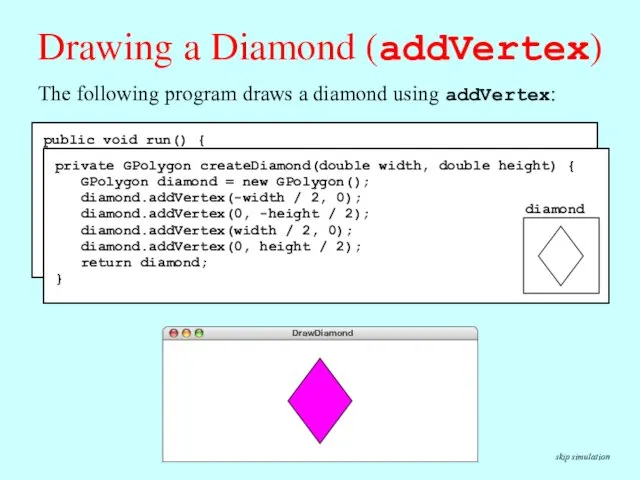
public void run() {
GPolygon diamond
Drawing a Diamond (addVertex)
skip simulation
public void run() {
GPolygon diamond
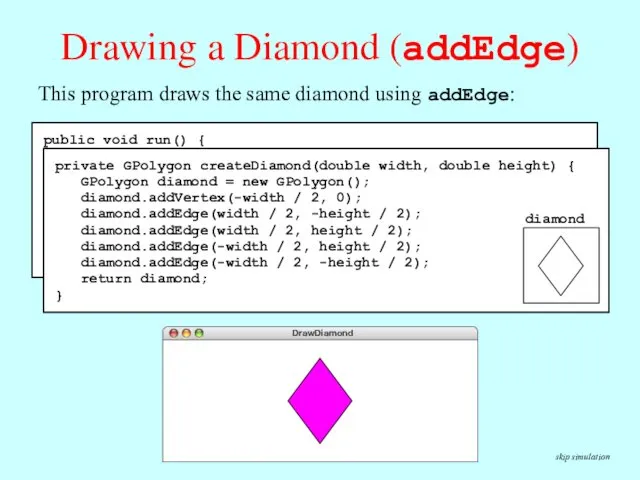
Drawing a Diamond (addEdge)
skip simulation
public void run() {
GPolygon diamond =
Drawing a Diamond (addEdge)
skip simulation
public void run() {
GPolygon diamond =
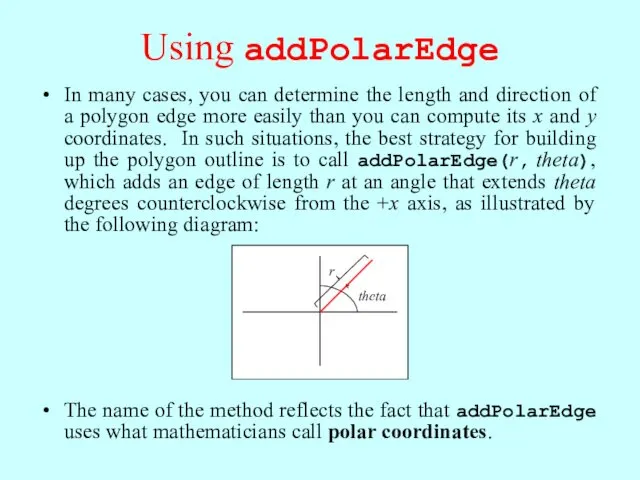
Using addPolarEdge
In many cases, you can determine the length and direction
Using addPolarEdge
In many cases, you can determine the length and direction

Drawing a Hexagon
skip simulation
public void run() {
GPolygon hexagon = createHexagon(50);
Drawing a Hexagon
skip simulation
public void run() {
GPolygon hexagon = createHexagon(50);
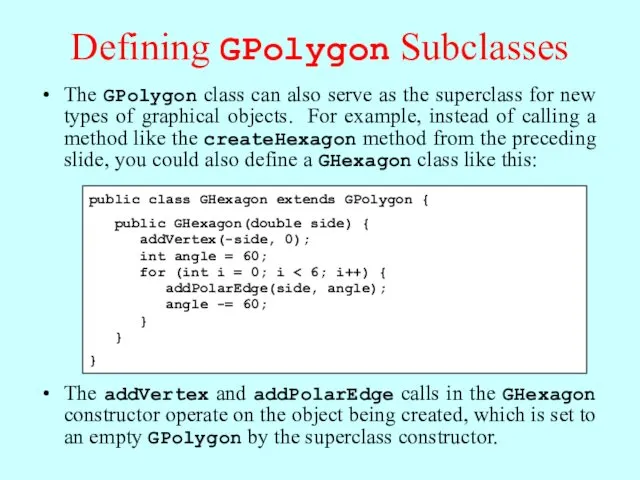
Defining GPolygon Subclasses
The GPolygon class can also serve as the superclass
Defining GPolygon Subclasses
The GPolygon class can also serve as the superclass
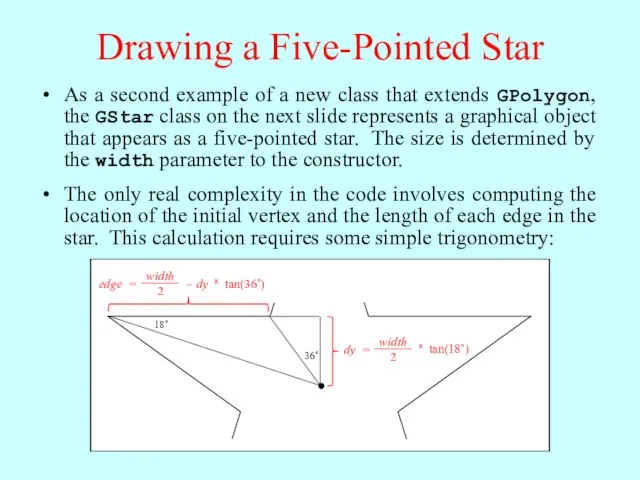
Drawing a Five-Pointed Star
As a second example of a new class
Drawing a Five-Pointed Star
As a second example of a new class
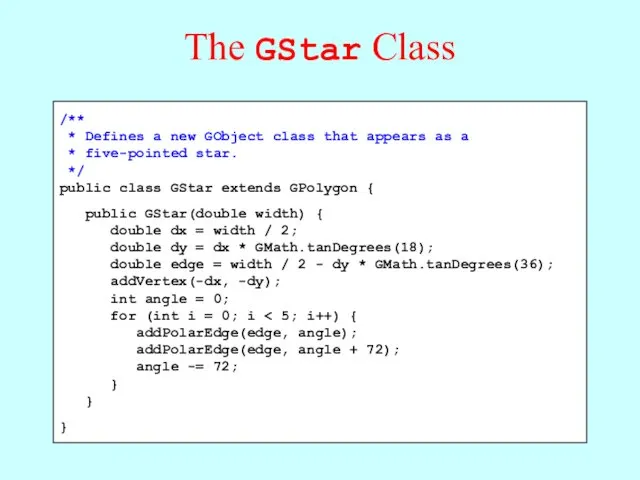
The GStar Class
/**
* Defines a new GObject class that appears
The GStar Class
/**
* Defines a new GObject class that appears
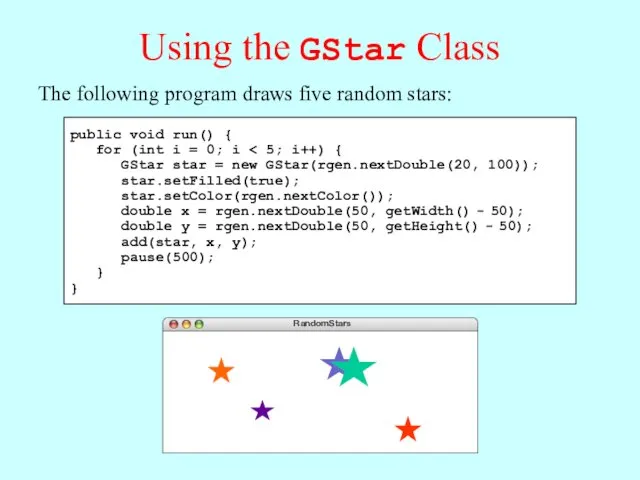
Using the GStar Class
public void run() {
for (int i =
Using the GStar Class
public void run() {
for (int i =
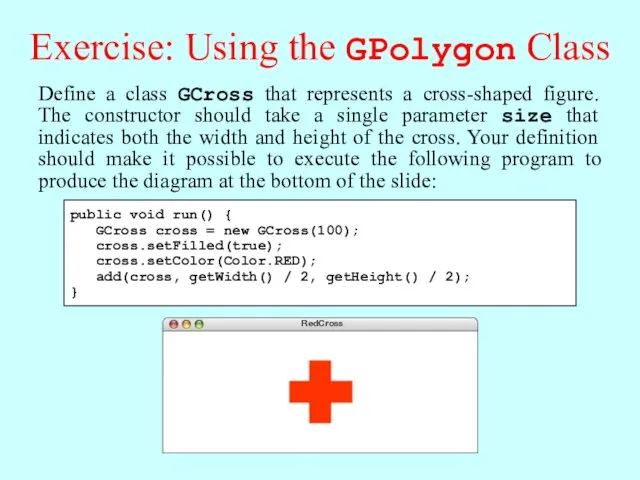
Exercise: Using the GPolygon Class
Define a class GCross that represents a
Exercise: Using the GPolygon Class
Define a class GCross that represents a
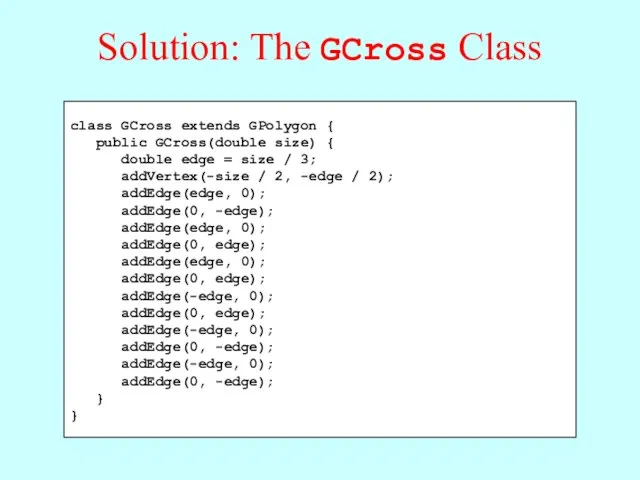
Solution: The GCross Class
class GCross extends GPolygon {
public GCross(double size)
Solution: The GCross Class
class GCross extends GPolygon {
public GCross(double size)
The addArc Method
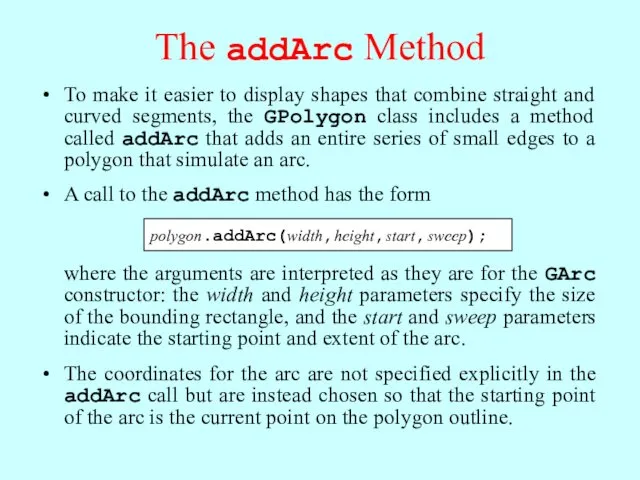
To make it easier to display shapes that combine
The addArc Method
To make it easier to display shapes that combine
Using the addArc Method
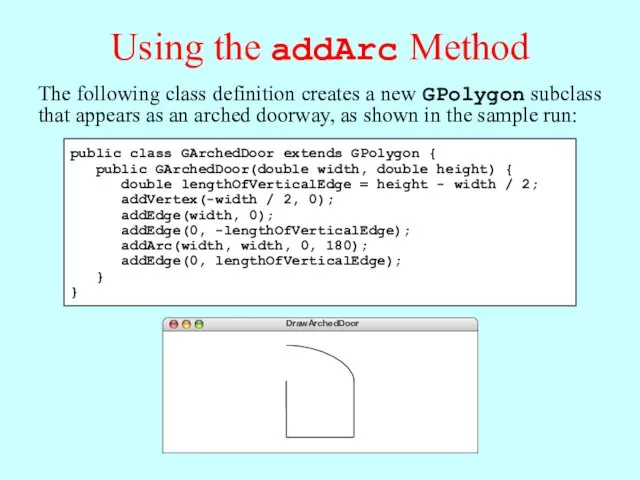
The following class definition creates a new GPolygon
Using the addArc Method
The following class definition creates a new GPolygon
Creating Compound Objects
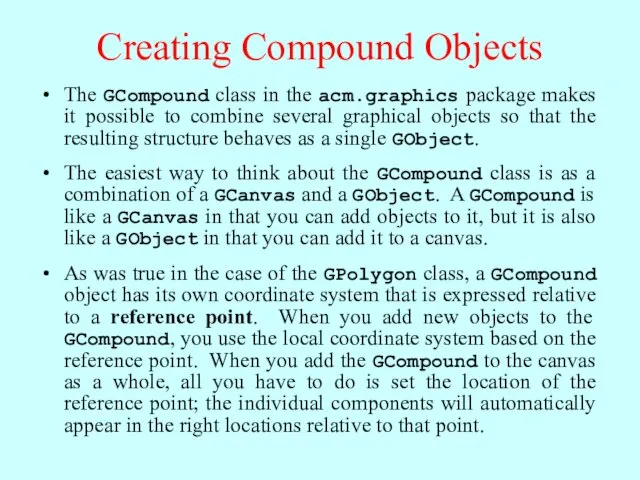
The GCompound class in the acm.graphics package makes it
Creating Compound Objects
The GCompound class in the acm.graphics package makes it
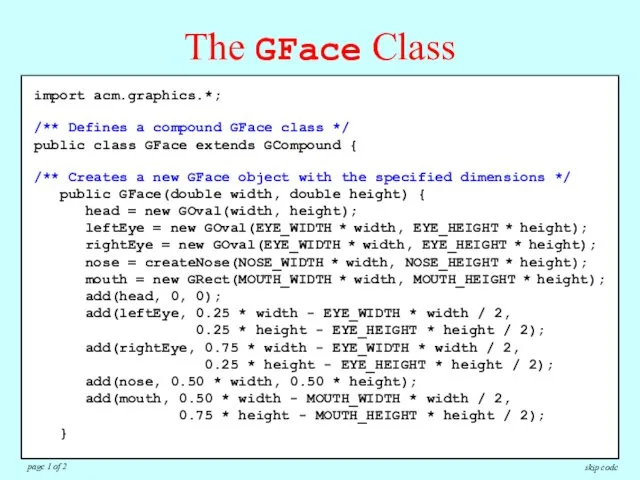
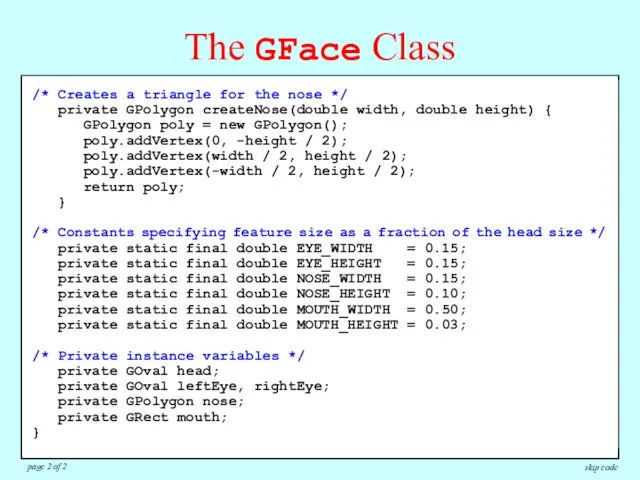
Creating a Face Object
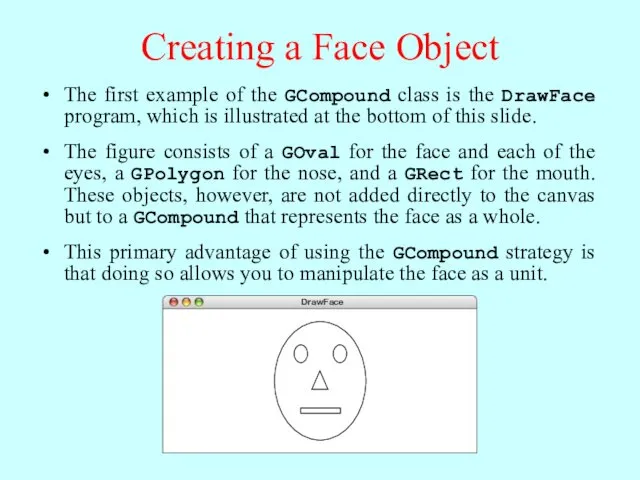
The first example of the GCompound class is
Creating a Face Object
The first example of the GCompound class is
import acm.graphics.*;
/** Defines a compound GFace class */
public class GFace extends
import acm.graphics.*;
/** Defines a compound GFace class */
public class GFace extends
import acm.graphics.*;
/** Defines a compound GFace class */
public class GFace extends
import acm.graphics.*;
/** Defines a compound GFace class */
public class GFace extends
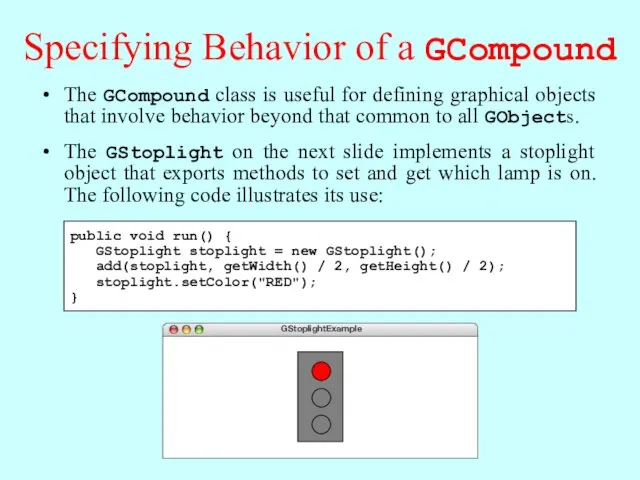
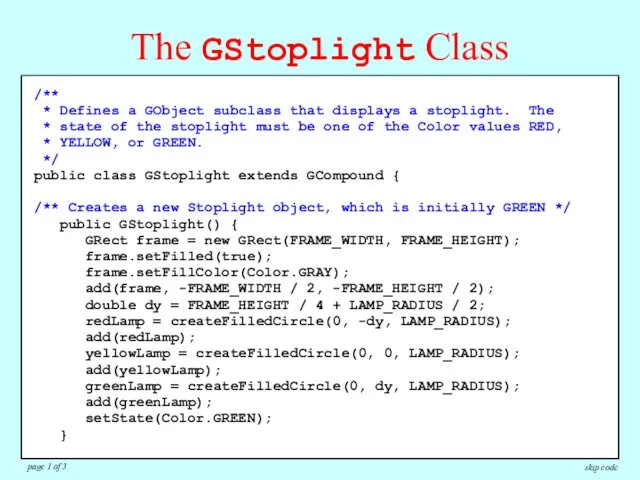
Specifying Behavior of a GCompound
The GCompound class is useful for defining
Specifying Behavior of a GCompound
The GCompound class is useful for defining
/**
* Defines a GObject subclass that displays a stoplight. The
/**
* Defines a GObject subclass that displays a stoplight. The
/**
* Defines a GObject subclass that displays a stoplight. The
/**
* Defines a GObject subclass that displays a stoplight. The
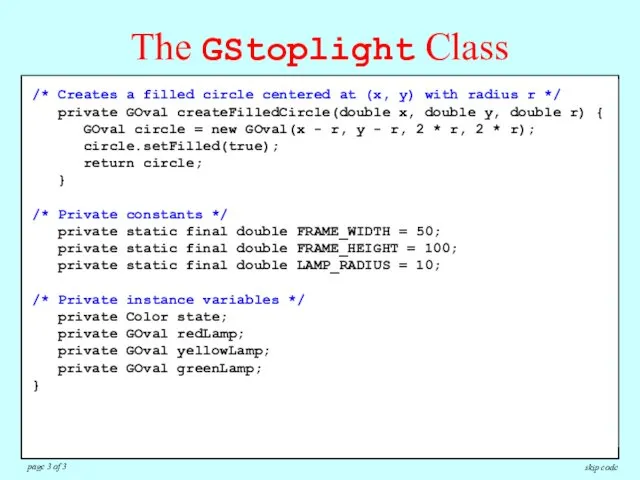
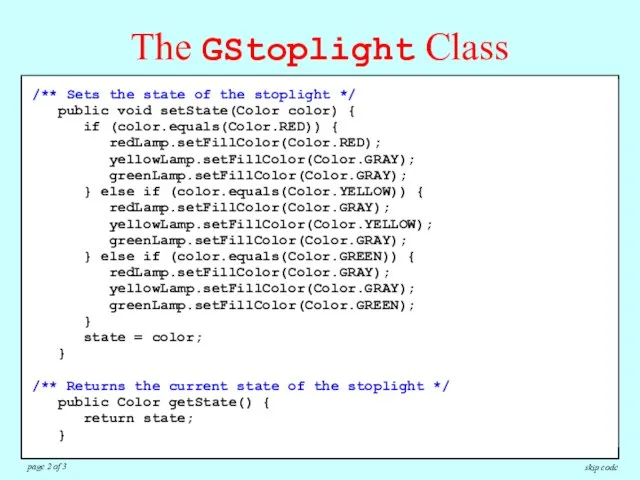
/** Sets the state of the stoplight */
public void setState(Color
/** Sets the state of the stoplight */
public void setState(Color
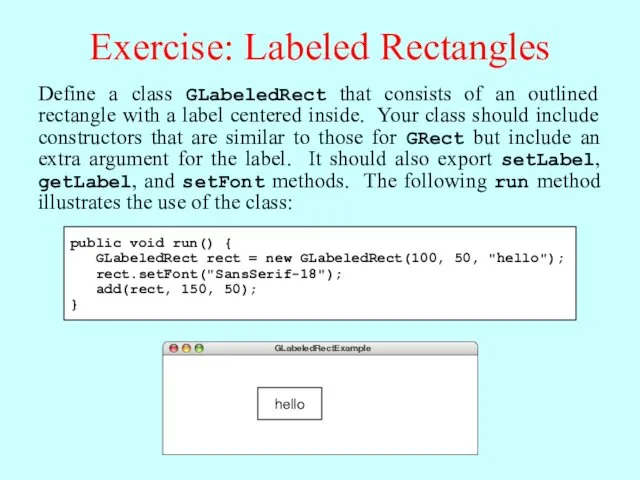
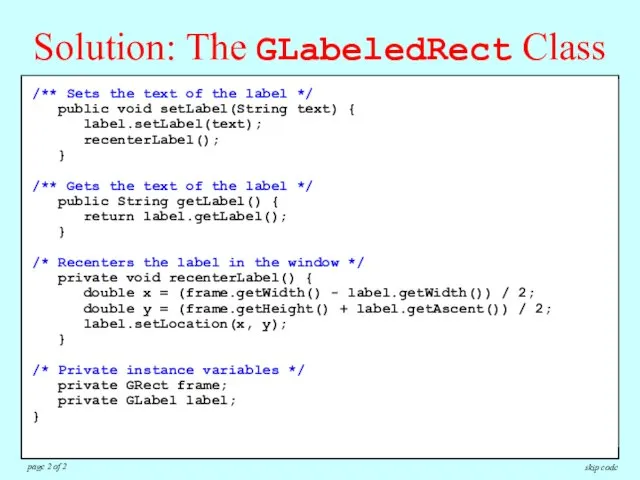
Exercise: Labeled Rectangles
Define a class GLabeledRect that consists of an outlined
Exercise: Labeled Rectangles
Define a class GLabeledRect that consists of an outlined
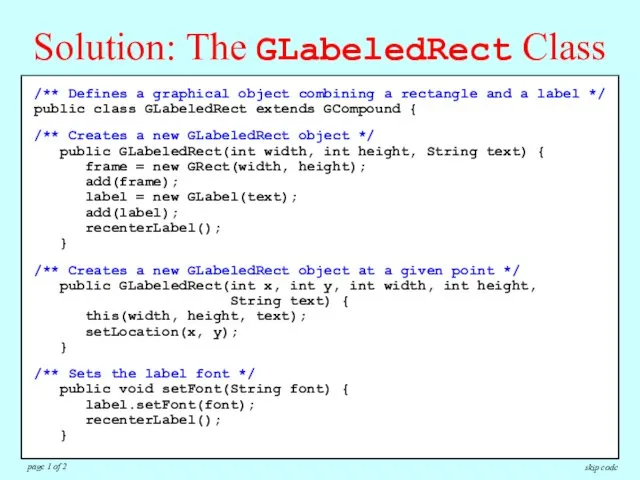
/** Defines a graphical object combining a rectangle and a label
/** Defines a graphical object combining a rectangle and a label
/** Defines a graphical object combining a rectangle and a label
/** Defines a graphical object combining a rectangle and a label
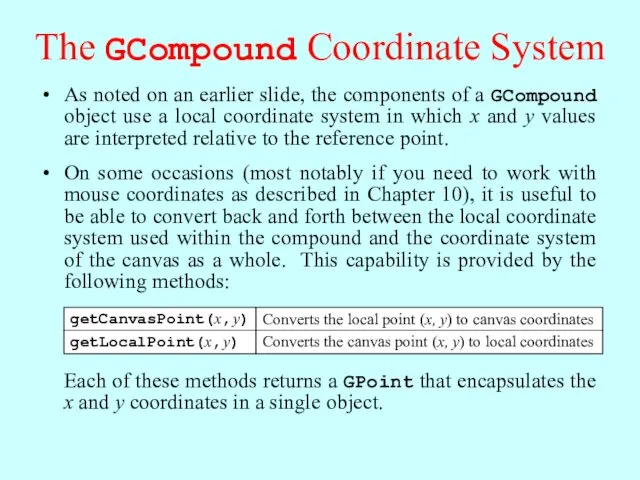
The GCompound Coordinate System
As noted on an earlier slide, the components
The GCompound Coordinate System
As noted on an earlier slide, the components
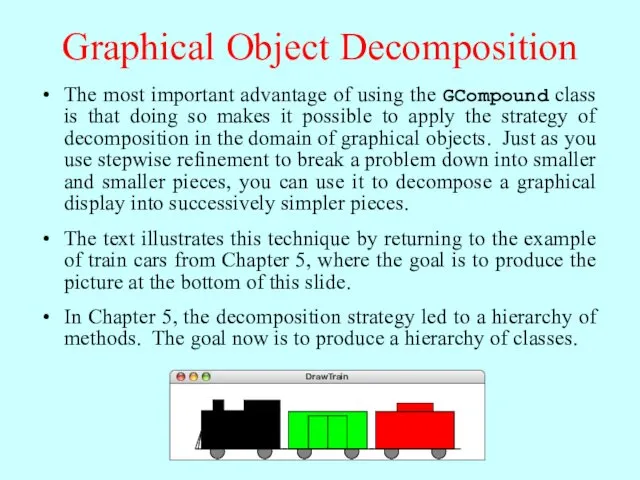
Graphical Object Decomposition
The most important advantage of using the GCompound class
Graphical Object Decomposition
The most important advantage of using the GCompound class
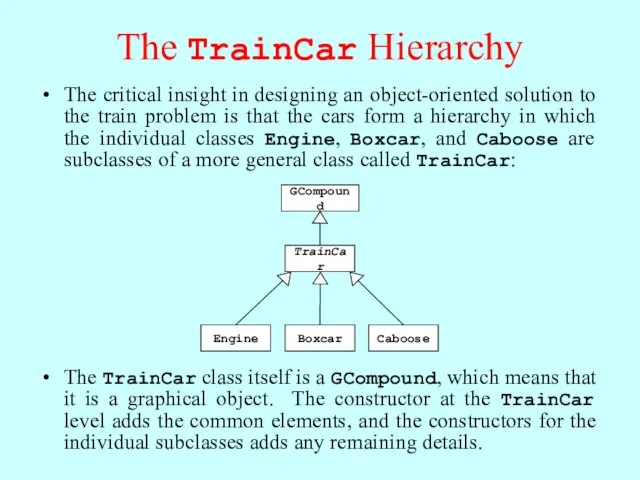
The TrainCar Hierarchy
The critical insight in designing an object-oriented solution to
The TrainCar Hierarchy
The critical insight in designing an object-oriented solution to
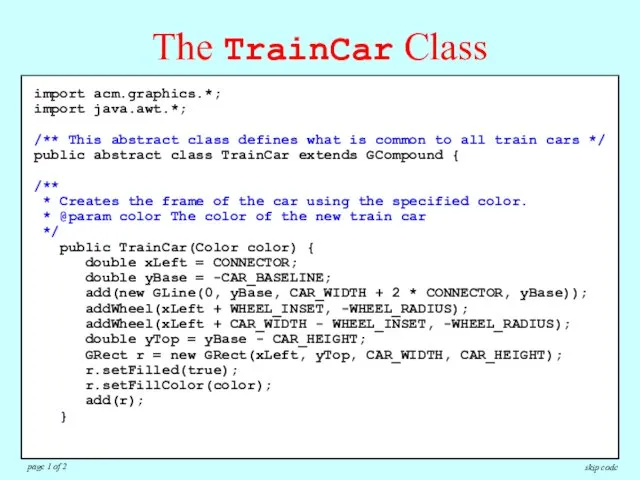
import acm.graphics.*;
import java.awt.*;
/** This abstract class defines what is common to
import acm.graphics.*;
import java.awt.*;
/** This abstract class defines what is common to
import acm.graphics.*;
import java.awt.*;
/** This abstract class defines what is common to
import acm.graphics.*;
import java.awt.*;
/** This abstract class defines what is common to
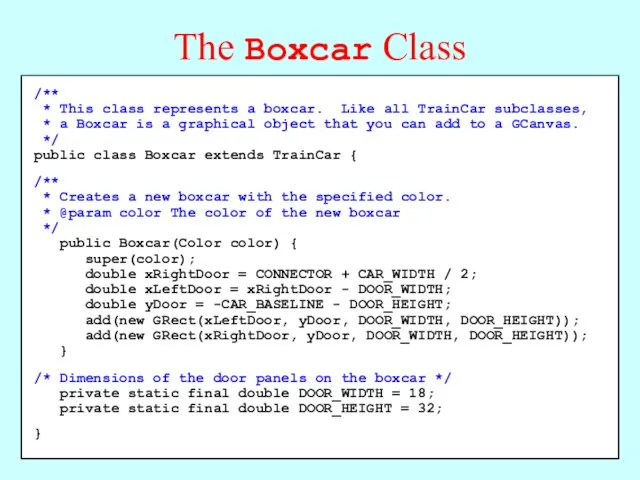
/**
* This class represents a boxcar. Like all TrainCar subclasses,
/**
* This class represents a boxcar. Like all TrainCar subclasses,
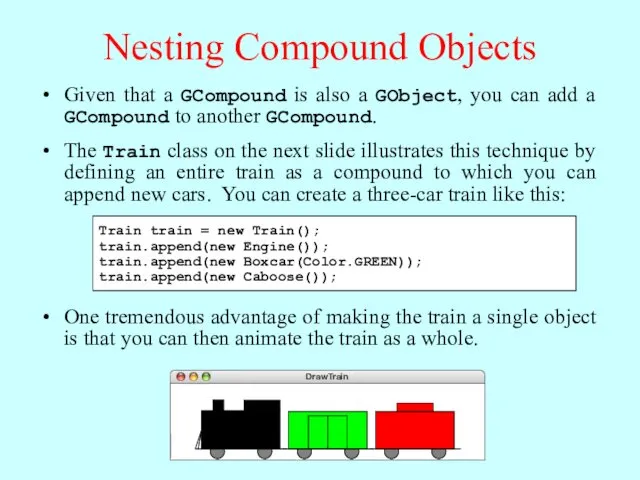
Nesting Compound Objects
Given that a GCompound is also a GObject, you
Nesting Compound Objects
Given that a GCompound is also a GObject, you
import acm.graphics.*;
/** This class defines a GCompound that represents a train.
import acm.graphics.*;
/** This class defines a GCompound that represents a train.
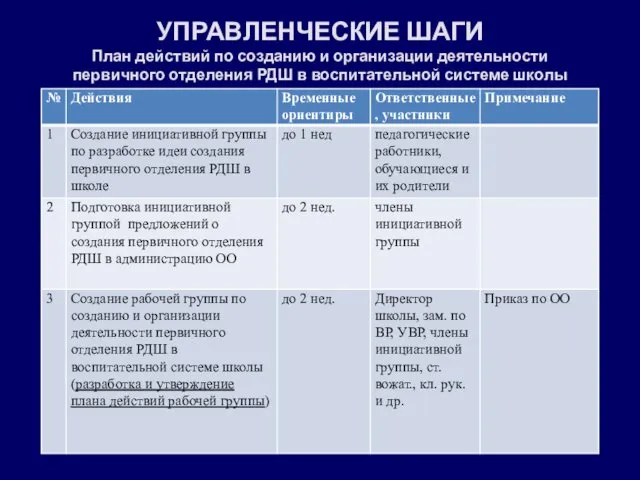 План действий по созданию и организации деятельности первичного отделения РДШ в воспитательной системе школы
 Презентация Строим дом
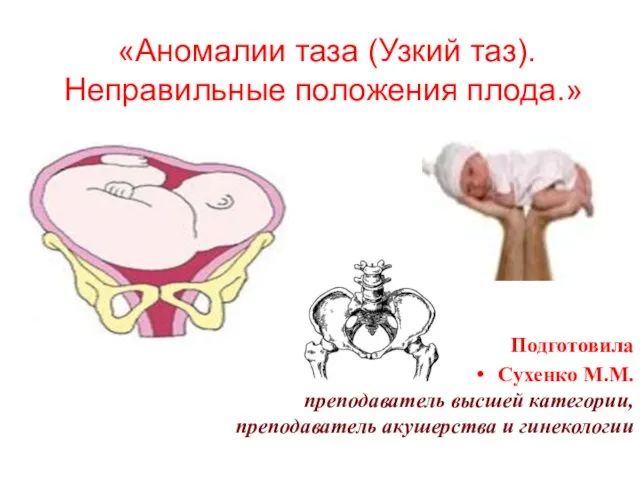 Аномалии таза (Узкий таз). Неправильные положения плода
 prezentatsiya_1
 Светофорик
 Мастер-класс по изготовлению мягкой игрушки Божья коровка.
 материалы к научно-практической конференции по философииБиоэтические проблемы современности
 Счастливый случай
 Презентация по правовому воспитанию.
 Первоцветы. Красная книга
 Всемирные экономические отношения. 10 класс
 Потребители и производители, 8 класс
 О внимании первоклассников
 Собеседование (интервью)
 Презентация к учебному занятию по технологии. Тема Жостовские фигурные…
 Unicorn sight word match. Graphics by prettygrafik design
 D элементтеріне жалпы сипаттама
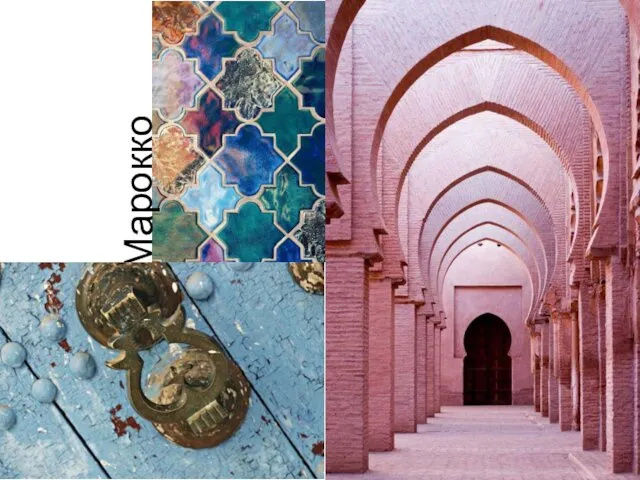 Марокко. Основные сведения о Марокко
 Страна городов
 les 22 FOOD
 Славные люди нашего края. Семья Алексея Анисимовича и Александры Сергеевны Морозовых
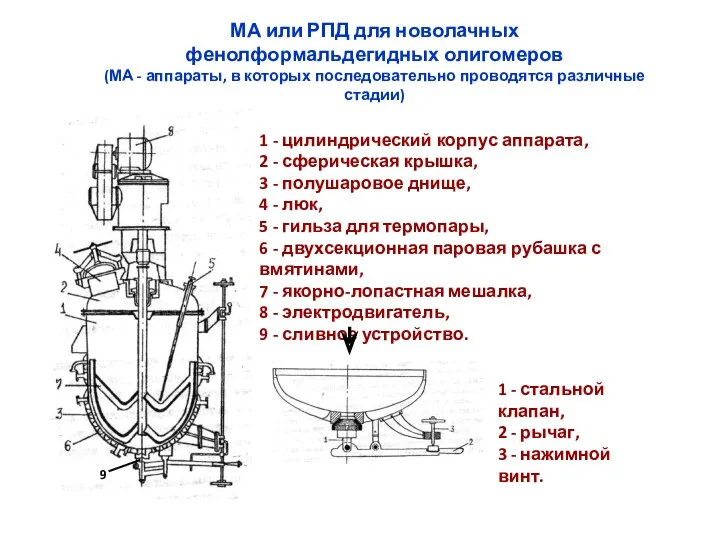 МА или РПД для новолачных фенолформальдегидных олигомеров
 Общие сведения о Корее
 Endemic goiter 3 дәрежелі семіздік
 Презентация Не дай себя в обиду!
 Использование электронных образовательных ресурсов при обучении английскому языку
 Шок. Шұғыл медициналық көмек
 Серебро. Соединения серебра