- Pyro Kings T9 guide

Содержание
- 2. Pyro Kings is a relaxed friendly clan that is usually in Master 3 or C100. We
- 3. Pull Angles. Shot Power and adjusting to higher or lower points Pull angles This isn't always
- 4. Clickable links to each shootout hole. Double click to jump to that slide. Acacia Hole 3
- 5. Acacia Hole 3 (3c) We play this with a Thors Hammer/Apoc 6+ in headwind or a
- 6. Acacia Hole 5 (3) There are many ways to play this hole, but I have found
- 7. Acacia Hole 7 (3b) One of the most hated par 3s in the game. That is
- 8. Sniper Start with 4.5bs 2rs and get into this position - ball guide going to the
- 9. Parc de Paris 8 (3) Max +10 Reduce BS by 0.5 bars per 10mph wind, increase
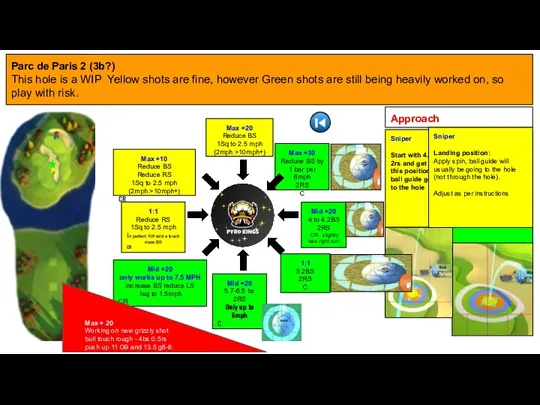
- 10. Parc de Paris 4 (3c) There is a funnel we are trying to hit here Max
- 11. Nordic 2 (3) Thanks to KK for the basis of the set ups on the Nordic
- 12. Nordic 4 (3b) Thanks to KK for the set up on the Nordic holes as they
- 13. Nordic 7 (3c) Thanks to KK for some of the set ups on the Nordic holes
- 14. Tour 9 Shootout Archive Milano Glenmonarch Shiruba Springs
- 15. The Milano Hole 4 (3) In all conditions, we choose to rough bump on this hole.The
- 16. MAX +15% 4.2BS BG 1 square through the hole. 1:1 5.2 BS BG short of hole.
- 17. MIN +40% (P2) 7 BS MIN 50% (P2) 6.8 BS - MIN +40% (P2) 6.8 BS
- 18. Glenmonarch Estate Hole 2 (3) Easy to get close, but tricky to drop consistently this hole.
- 19. Glenmonarch Estate Hole 4 (3b) This is an almost guaranteed HIO hole if you get it
- 20. Approach MAX +20% Up to 1 TS Offset as per notes MAX + 20% 0.3 BS
- 21. HW & XW Sniper MID +20% Set up at min distance. Offset ≈1 square to the
- 22. MAX +20% 1.2 TS + offset MAX +20% Approx 0.6 TS + offset right of the
- 24. Скачать презентацию

Pyro Kings is a relaxed friendly clan that is usually in
Pyro Kings is a relaxed friendly clan that is usually in
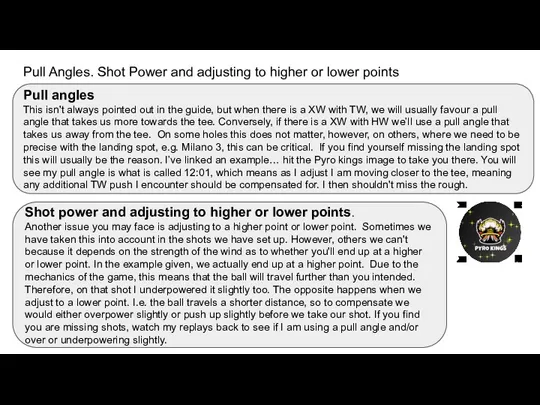
Pull Angles. Shot Power and adjusting to higher or lower points
Pull
Pull Angles. Shot Power and adjusting to higher or lower points
Pull
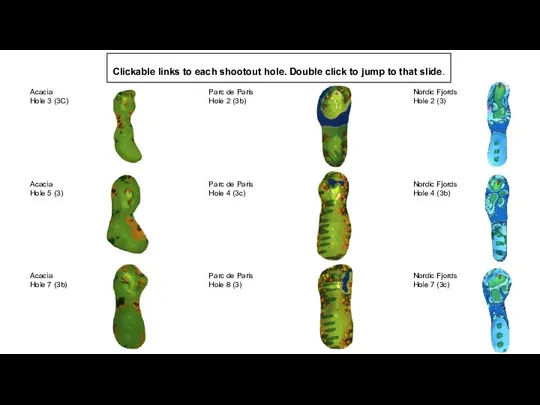
Clickable links to each shootout hole. Double click to jump to
Clickable links to each shootout hole. Double click to jump to
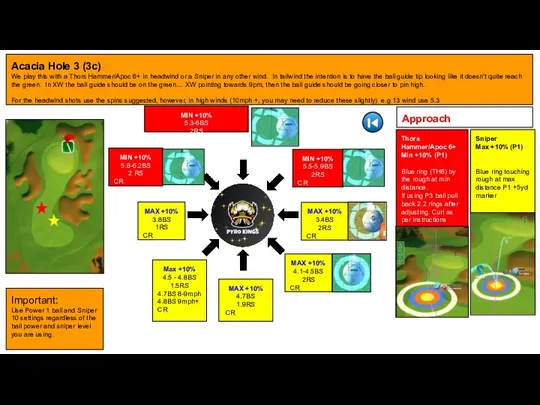
Acacia Hole 3 (3c)
We play this with a Thors Hammer/Apoc 6+
Acacia Hole 3 (3c)
We play this with a Thors Hammer/Apoc 6+
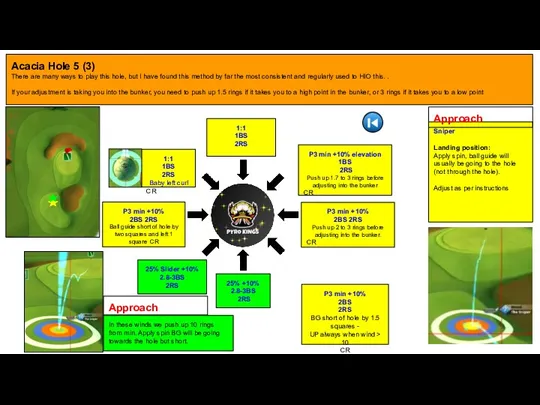
Acacia Hole 5 (3)
There are many ways to play this hole,
Acacia Hole 5 (3)
There are many ways to play this hole,

Acacia Hole 7 (3b)
One of the most hated par 3s in
Acacia Hole 7 (3b)
One of the most hated par 3s in
Sniper
Start with 4.5bs 2rs and get into this position -
Sniper
Start with 4.5bs 2rs and get into this position -
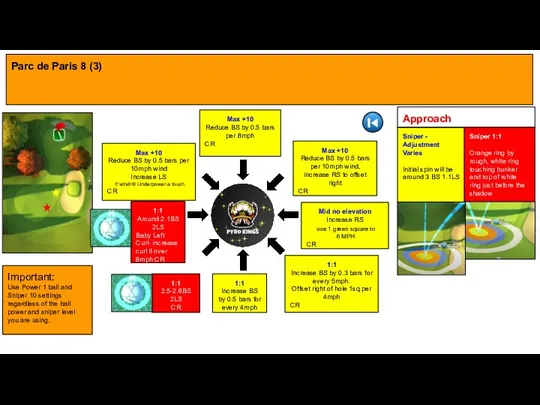
Parc de Paris 8 (3)
Max +10
Reduce BS by 0.5 bars per
Parc de Paris 8 (3)
Max +10
Reduce BS by 0.5 bars per

Parc de Paris 4 (3c)
There is a funnel we are trying
Parc de Paris 4 (3c)
There is a funnel we are trying
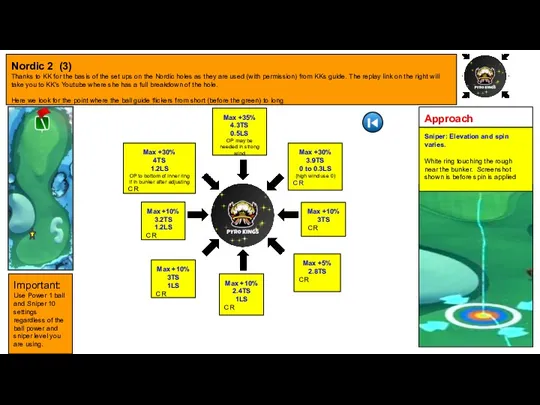
Nordic 2 (3)
Thanks to KK for the basis of the set
Nordic 2 (3)
Thanks to KK for the basis of the set
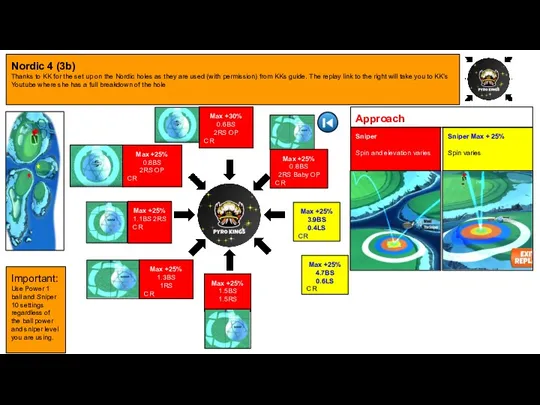
Nordic 4 (3b)
Thanks to KK for the set up on the
Nordic 4 (3b)
Thanks to KK for the set up on the
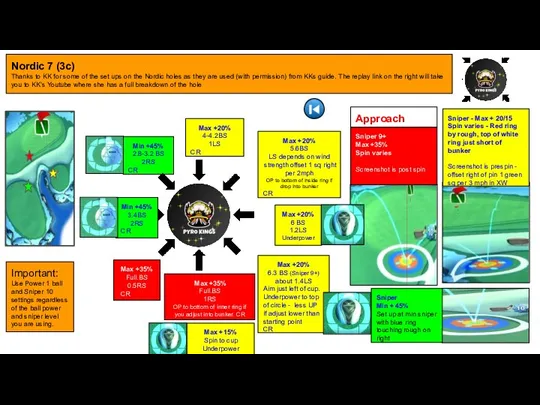
Nordic 7 (3c)
Thanks to KK for some of the set ups
Nordic 7 (3c)
Thanks to KK for some of the set ups
Tour 9 Shootout Archive
Milano
Glenmonarch
Shiruba Springs
Tour 9 Shootout Archive
Milano
Glenmonarch
Shiruba Springs
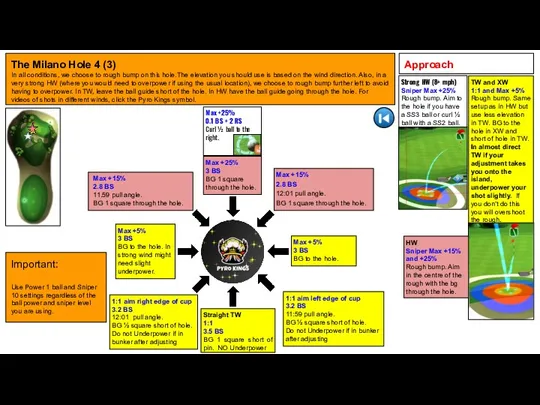
The Milano Hole 4 (3)
In all conditions, we choose to rough
The Milano Hole 4 (3)
In all conditions, we choose to rough

MAX +15%
4.2BS
BG 1 square through the hole.
1:1
5.2 BS
BG short of
MAX +15%
4.2BS
BG 1 square through the hole.
1:1
5.2 BS
BG short of

MIN +40% (P2)
7 BS
MIN 50% (P2)
6.8 BS -
MIN +40% (P2)
6.8 BS
The
MIN +40% (P2)
7 BS
MIN 50% (P2)
6.8 BS -
MIN +40% (P2)
6.8 BS
The
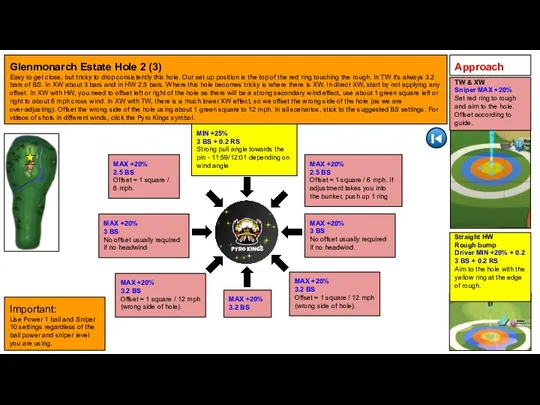
Glenmonarch Estate Hole 2 (3)
Easy to get close, but tricky to
Glenmonarch Estate Hole 2 (3)
Easy to get close, but tricky to
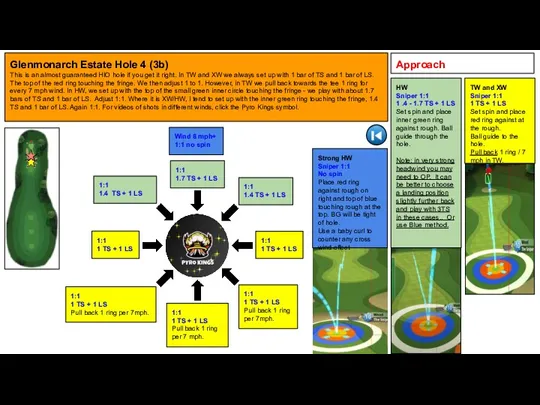
Glenmonarch Estate Hole 4 (3b)
This is an almost guaranteed HIO hole
Glenmonarch Estate Hole 4 (3b)
This is an almost guaranteed HIO hole
Approach
MAX +20%
Up to 1 TS
Offset as per notes
MAX + 20%
0.3
Approach
MAX +20%
Up to 1 TS
Offset as per notes
MAX + 20%
0.3
HW & XW
Sniper MID +20%
Set up at min distance.
Offset ≈1 square
HW & XW
Sniper MID +20%
Set up at min distance.
Offset ≈1 square
MAX +20%
1.2 TS + offset
MAX +20%
Approx 0.6 TS + offset right
MAX +20%
1.2 TS + offset
MAX +20%
Approx 0.6 TS + offset right
 ВКР: Проектирование корпуса Лукояновского молочного завода, подбор и анализ конструкций здания
 Пастель - (фр. pastel, от лат. pasta — тесто) сухая живопись мягкими цветными мелками
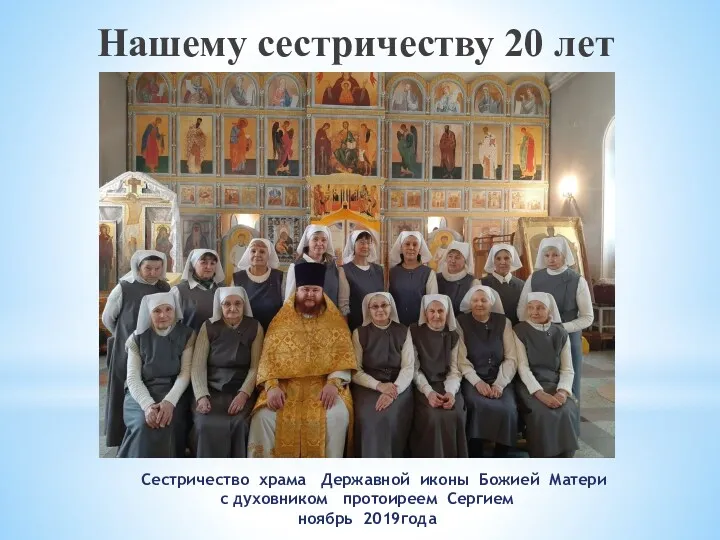 Сестричество храма Державной иконы Божией Матери с духовником протоиреем Сергием
 Токарные резцы
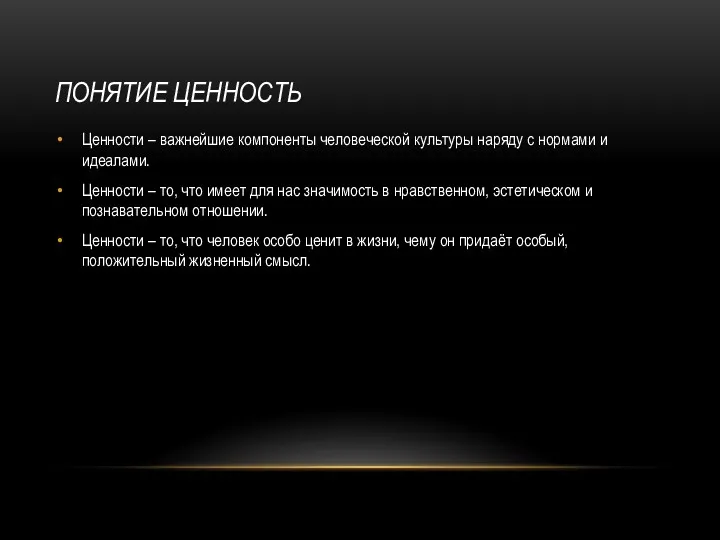 Понятие ценность. Главные ценности в жизни человека
 Презентация к образовательной деятельности по ПДД на тему Знаки сервиса
 classroom-rules-fun-activities-games-icebreakers_140590
 Проект Ой вы, птицы, к нам летите, весну красную несите!
 Обзор декабря и перспективы на 2016
 Политико-правовая мысль Древнего Рима
 Развитие культуры в первой половине XIX века, в России
 Электр энергиясын алу, түрлендіру, жеткізу және пайдалану
 В стране дорожных знаков.
 Кадровый менеджмент. Власть, лидерство и руководство (8)
 Обучающая игра для детей младшего дошкольного возраста
 Электрооборудование и электроснабжение горных организаций
 Боль и обезболивание
 Гидростатика. Уравнение равновесия
 Аэрофотосъемка
 Ум ребенка находится на кончиках его пальцев
 Управление социальным развитием организации
 Пермский край-лесной край.
 Электроосветительные приборы. 7 класс
 Презентация по краеведению Древние культуры на территории Воронежского края
 Презентация к ШМО Мастер-класс по кубановедению
 Городские Легенды
 Печатные платы
 Технология обогащения медно-цинковых руд