- IQVIA Global Product Management

Содержание
- 2. Product Vision Administrator Flow Analyst Flow Data Steward Flow Table of Contents
- 3. Create a flexible product feature that enables our customers to configure and deploy dynamic data views
- 4. Create and Manage Curated Views Administrator Flow Ability to Create New View, Create new View from
- 5. Creation of New View Administrator Flow Administrator must enter the Name of their View, and provide
- 6. Foundation Administrator Flow Administrator chooses the Tables that will be used in the new View, in
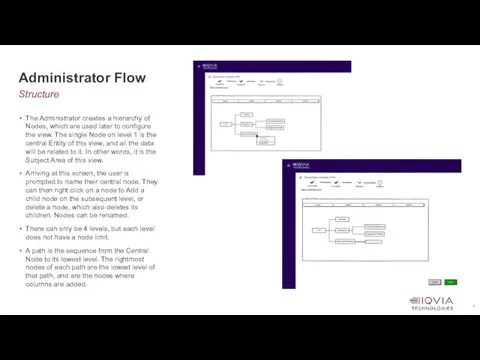
- 7. Structure Administrator Flow The Administrator creates a hierarchy of Nodes, which are used later to configure
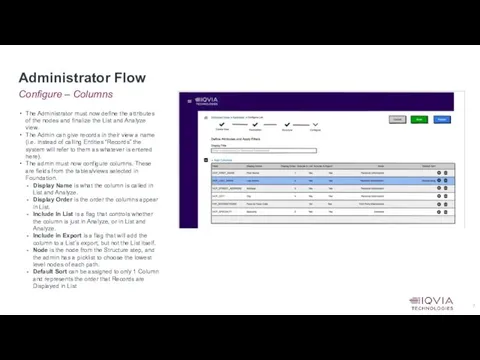
- 8. Configure – Columns Administrator Flow The Administrator must now define the attributes of the nodes and
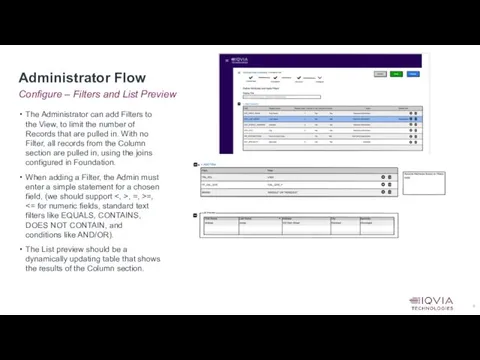
- 9. Configure – Filters and List Preview Administrator Flow The Administrator can add Filters to the View,
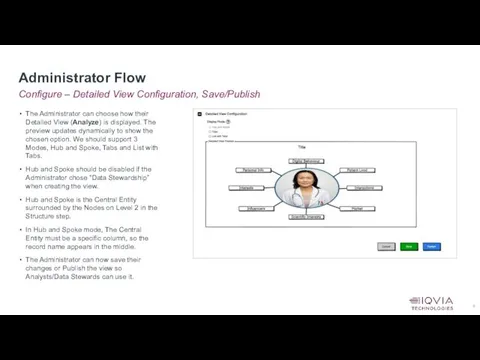
- 10. Configure – Detailed View Configuration, Save/Publish Administrator Flow The Administrator can choose how their Detailed View
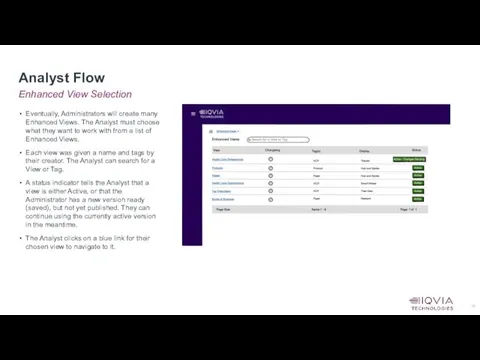
- 11. Enhanced View Selection Analyst Flow Eventually, Administrators will create many Enhanced Views. The Analyst must choose
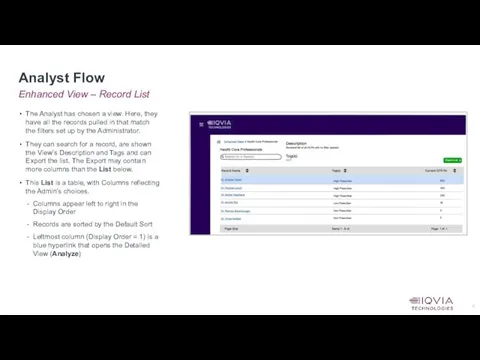
- 12. Enhanced View – Record List Analyst Flow The Analyst has chosen a view. Here, they have
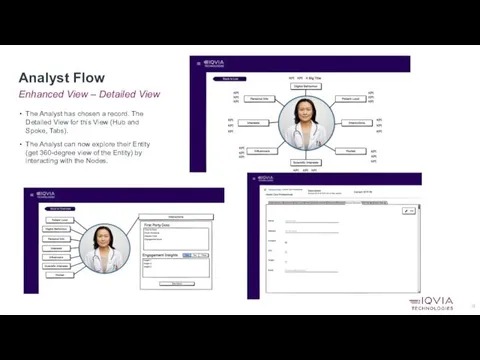
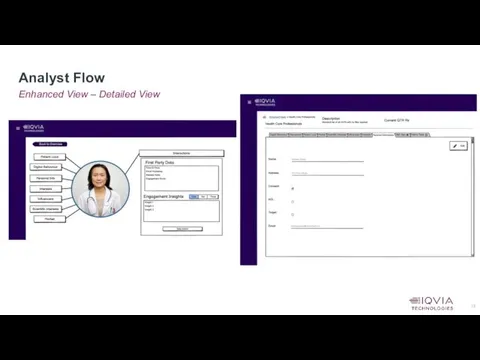
- 13. Enhanced View – Detailed View Analyst Flow The Analyst has chosen a record. The Detailed View
- 14. Enhanced View – Detailed View Analyst Flow
- 15. Enhanced View – Detailed View Analyst Flow
- 17. Скачать презентацию
Product Vision
Administrator Flow
Analyst Flow
Data Steward Flow
Table of Contents
Product Vision
Administrator Flow
Analyst Flow
Data Steward Flow
Table of Contents

Create a flexible product feature that enables our customers to configure
Create a flexible product feature that enables our customers to configure
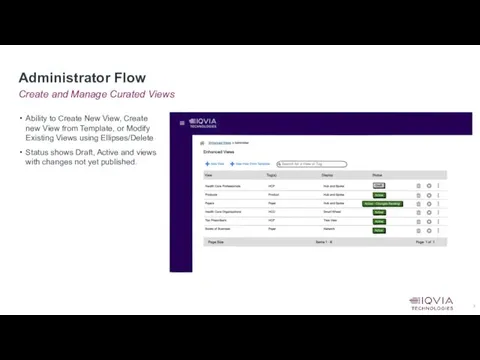
Create and Manage Curated Views
Administrator Flow
Ability to Create New View, Create
Create and Manage Curated Views
Administrator Flow
Ability to Create New View, Create
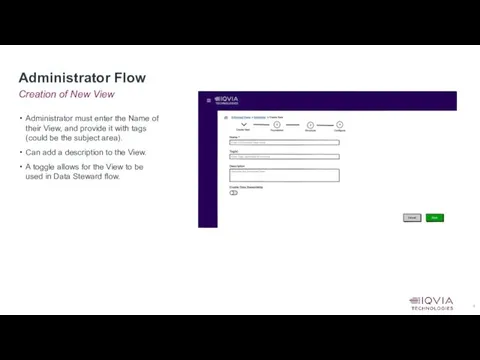
Creation of New View
Administrator Flow
Administrator must enter the Name of their
Creation of New View
Administrator Flow
Administrator must enter the Name of their
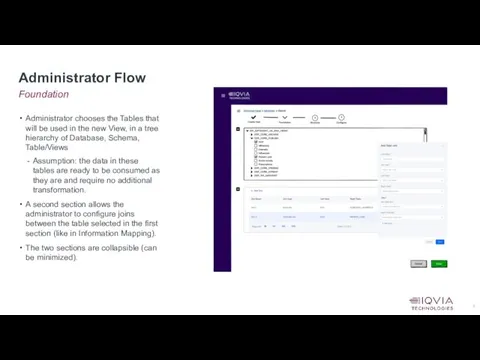
Foundation
Administrator Flow
Administrator chooses the Tables that will be used in the
Foundation
Administrator Flow
Administrator chooses the Tables that will be used in the
Structure
Administrator Flow
The Administrator creates a hierarchy of Nodes, which are used
Structure
Administrator Flow
The Administrator creates a hierarchy of Nodes, which are used
Configure – Columns
Administrator Flow
The Administrator must now define the attributes of
Configure – Columns
Administrator Flow
The Administrator must now define the attributes of
Configure – Filters and List Preview
Administrator Flow
The Administrator can add Filters
Configure – Filters and List Preview
Administrator Flow
The Administrator can add Filters
Configure – Detailed View Configuration, Save/Publish
Administrator Flow
The Administrator can choose how
Configure – Detailed View Configuration, Save/Publish
Administrator Flow
The Administrator can choose how
Enhanced View Selection
Analyst Flow
Eventually, Administrators will create many Enhanced Views. The
Enhanced View Selection
Analyst Flow
Eventually, Administrators will create many Enhanced Views. The
Enhanced View – Record List
Analyst Flow
The Analyst has chosen a view.
Enhanced View – Record List
Analyst Flow
The Analyst has chosen a view.
Enhanced View – Detailed View
Analyst Flow
The Analyst has chosen a record.
Enhanced View – Detailed View
Analyst Flow
The Analyst has chosen a record.
Enhanced View – Detailed View
Analyst Flow
Enhanced View – Detailed View
Analyst Flow

Enhanced View – Detailed View
Analyst Flow
Enhanced View – Detailed View
Analyst Flow
 Research in collaboration
 Презентация Проблемы молодежи
 Вид. Структура и критерии вида
 Праздник Пусть всегда будет солнце!
 Развитие навыков самостоятельной работы на уроках математики.Презентация.
 Банкет с частичным обслуживанием официантами
 Зоряні системи - галактики
 Поздравляем с юбилеем! Фотоальбом
 Путь к радуге
 Экзаменационная работа по изобразительному искусству. Натюрморт
 ДНК база. Биологические полимеры - нуклеиновые кислоты
 Новые числа
 Кардиомиопатии. Виды кардиомиопатий
 Презентация к занятию: Чтение художественной литературы А.Барто Игрушки
 Устное собеседование по русскому языку
 как могут стать опасными обычные вещи
 Анализ доходности портфеля акций
 Понятие и сущность права
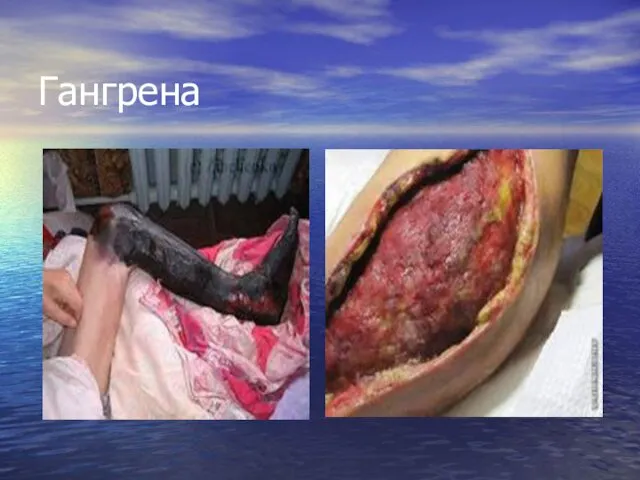 Гангрена. Этиология
 Порядок заключения, исполнения, изменения и расторжения договоров
 Дыхательная недостаточность
 Цветы в технике квиллинга
 ЗОЖ. Вред курения
 Презентация Сотрудничество семьи и школы в развитии личностных УУД младших школьников
 презентация ко дню матери
 Репродуктивное здоровье населения и национальная безопасность России
 Mobile Phone. Made by : Ryabckova, Dudar’, Belova,
 20190216_moya_komnata