- Мікропроцесорна техніка (лекція 3)

Содержание
- 2. PSoC@3/5 CapSense PSoC Creator 4.2 Designing with PSoC 3/5
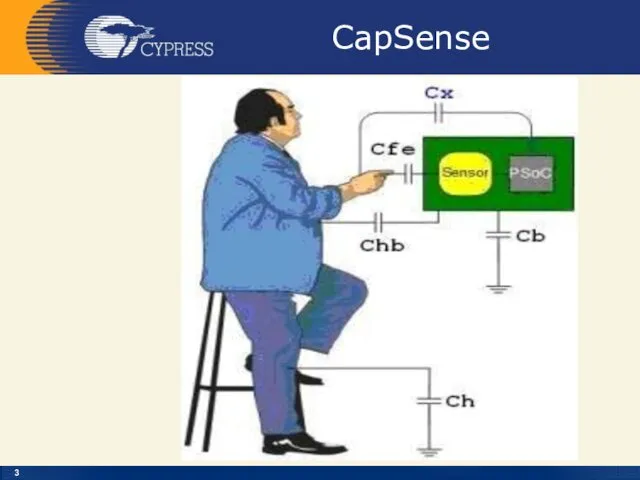
- 3. CapSense
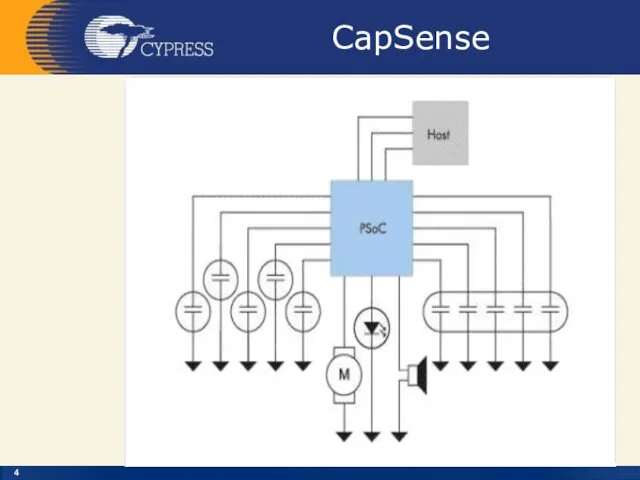
- 4. CapSense
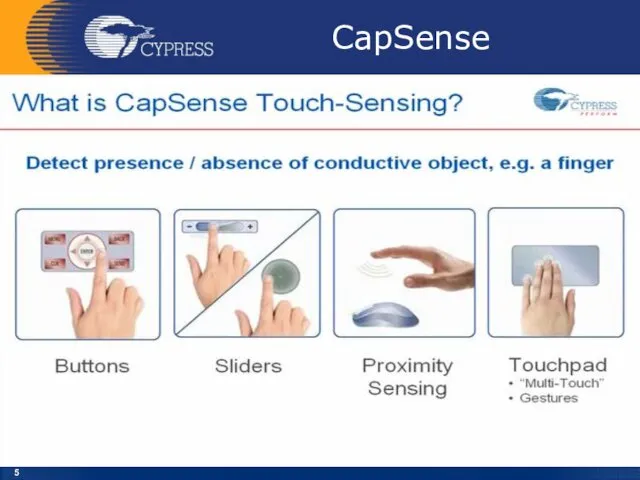
- 5. CapSense
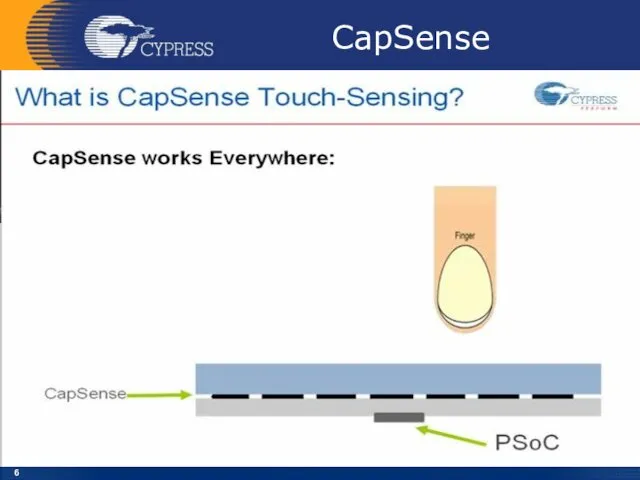
- 6. CapSense
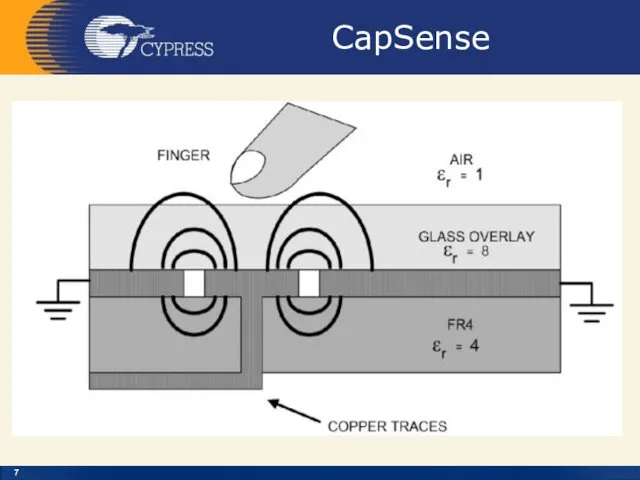
- 7. CapSense
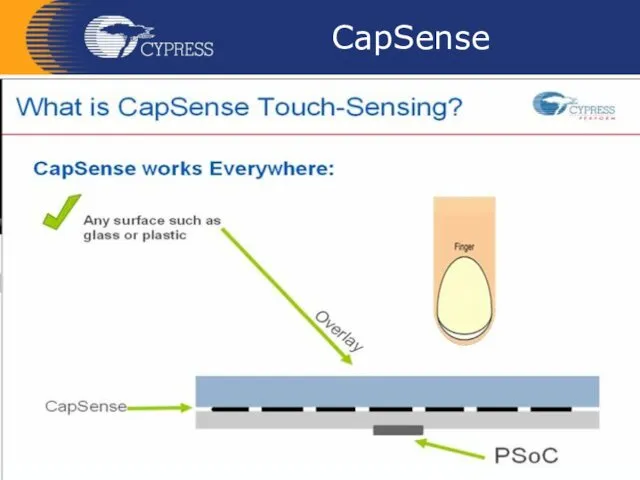
- 8. CapSense
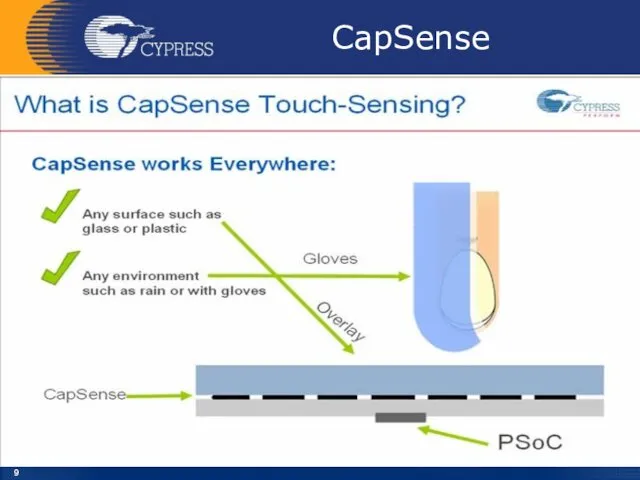
- 9. CapSense
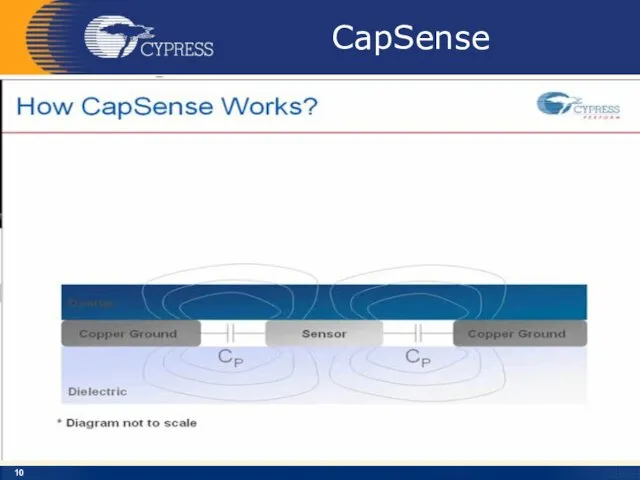
- 10. CapSense
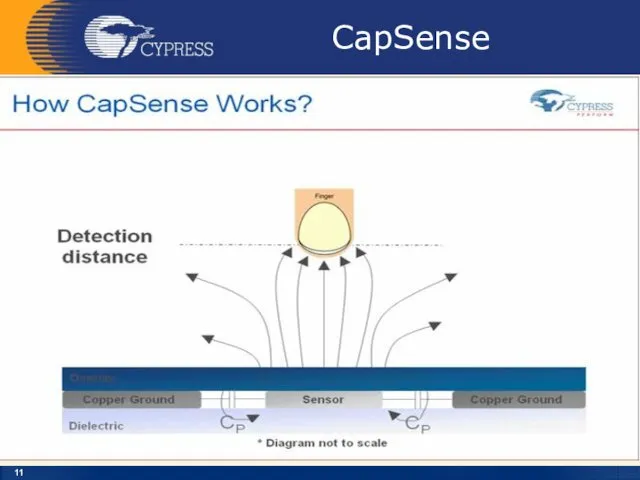
- 11. CapSense
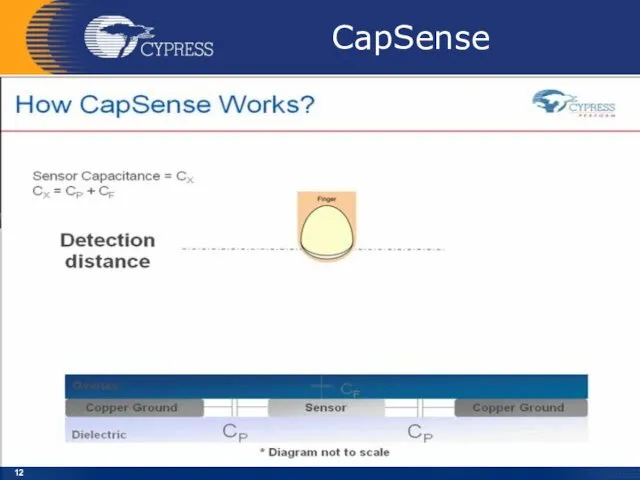
- 12. CapSense
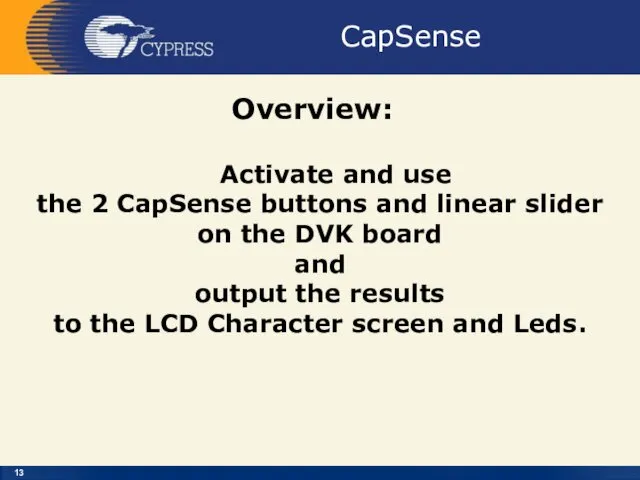
- 13. CapSense Overview: Activate and use the 2 CapSense buttons and linear slider on the DVK board
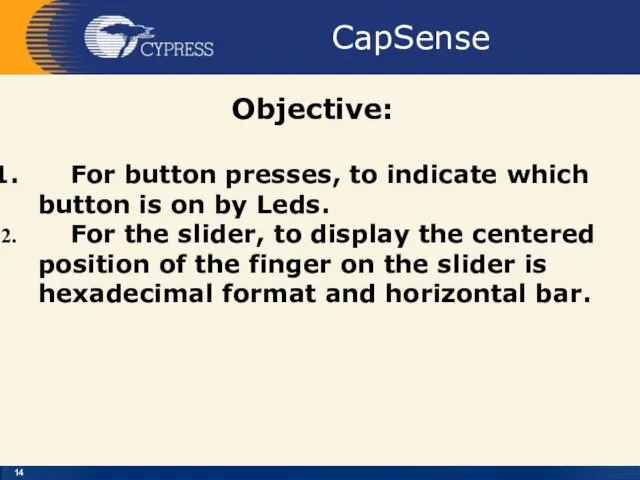
- 14. CapSense Objective: For button presses, to indicate which button is on by Leds. For the slider,
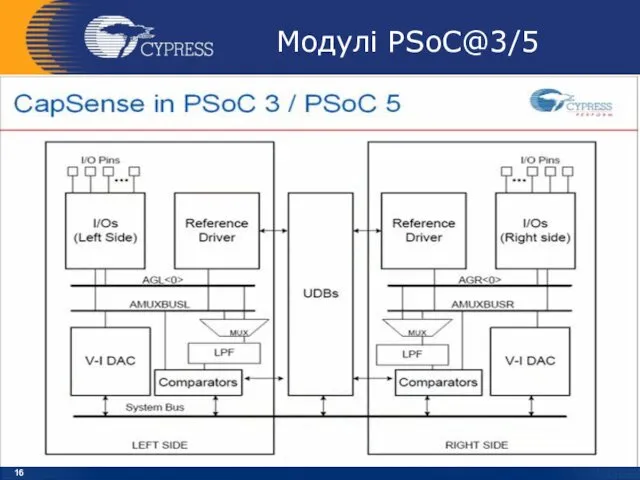
- 15. Модулі PSoC@3/5
- 16. Модулі PSoC@3/5
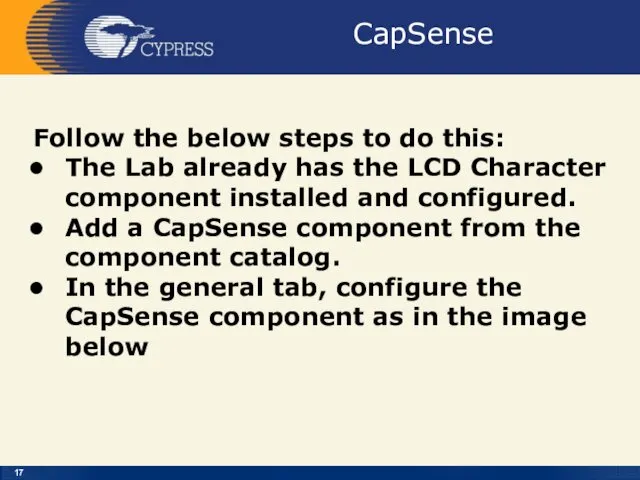
- 17. CapSense Follow the below steps to do this: The Lab already has the LCD Character component
- 18. Lab_3 CapSense
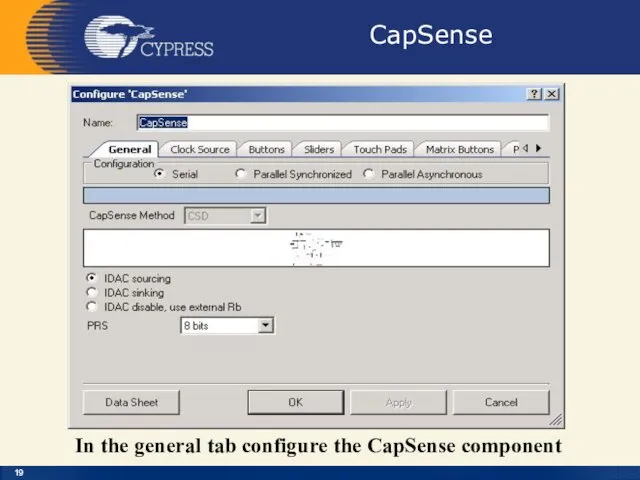
- 19. CapSense In the general tab configure the CapSense component
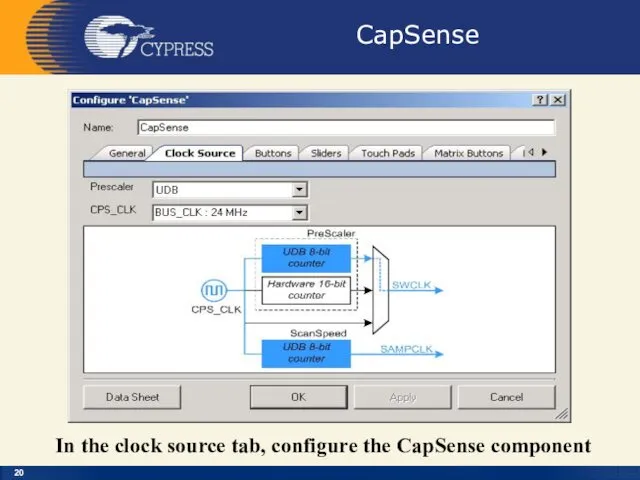
- 20. CapSense In the clock source tab, configure the CapSense component
- 21. CapSense
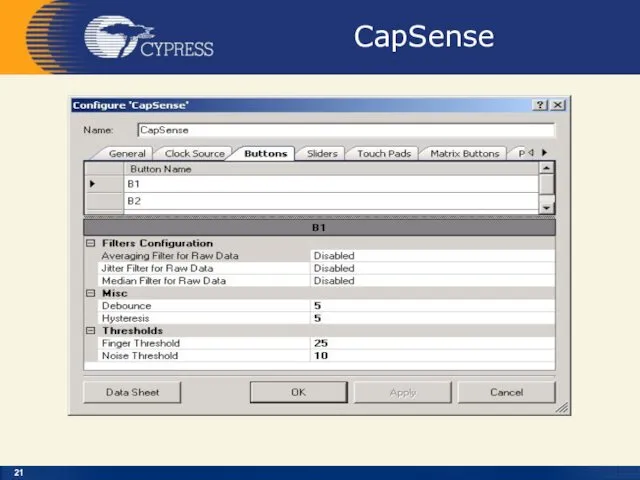
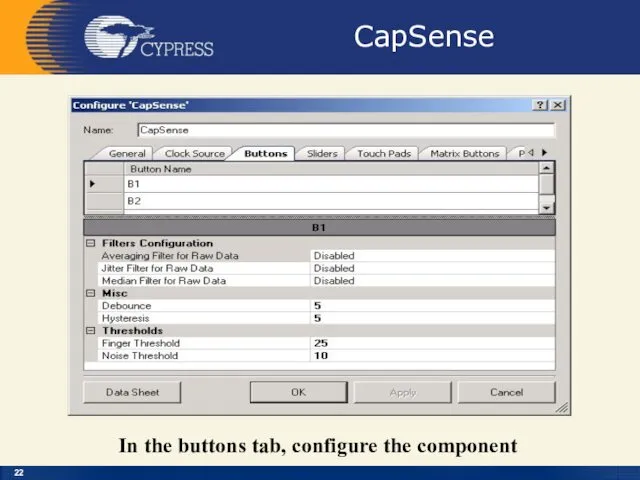
- 22. CapSense In the buttons tab, configure the component
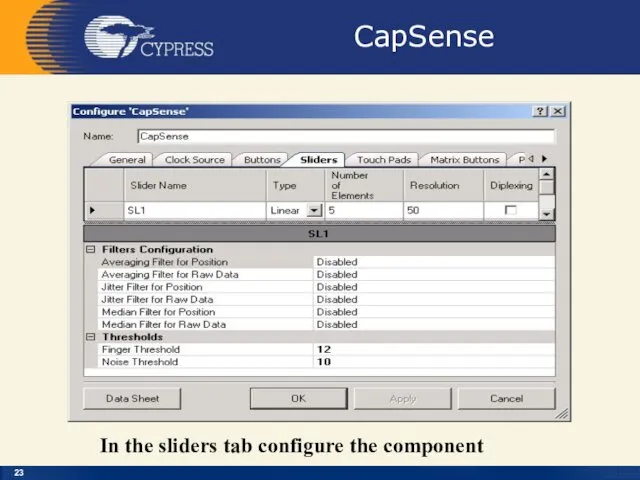
- 23. CapSense In the sliders tab configure the component
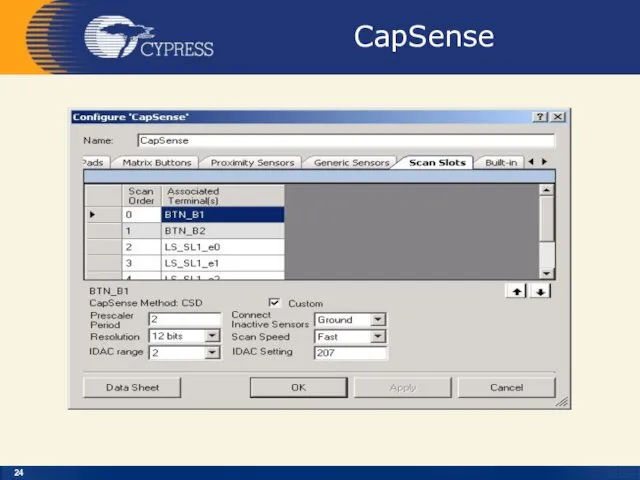
- 24. CapSense
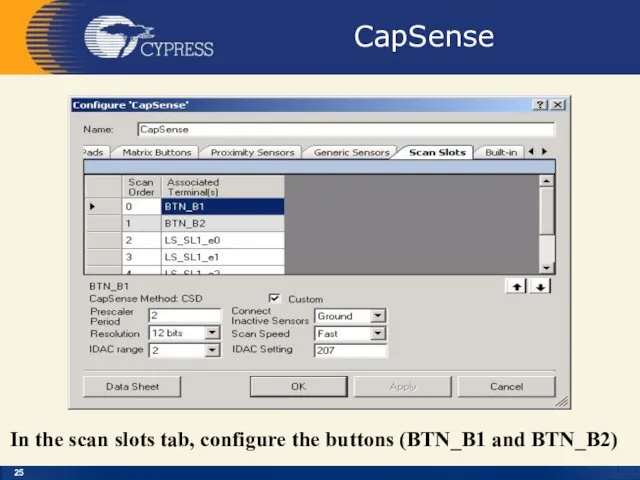
- 25. CapSense In the scan slots tab, configure the buttons (BTN_B1 and BTN_B2)
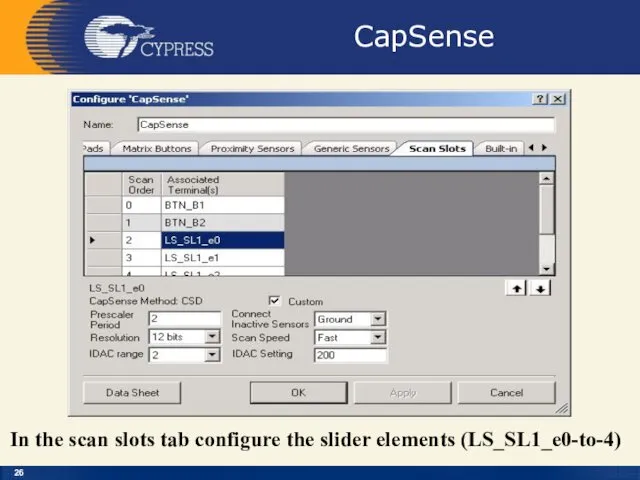
- 26. CapSense In the scan slots tab configure the slider elements (LS_SL1_e0-to-4)
- 27. CapSense Configure the pins tab in the .cydwr file
- 28. Creator
- 29. File – New - Projekt
- 30. Empty PSoC 3 Design
- 31. Configure LCD
- 32. Configure CSD
- 33. Configure CSD
- 34. Configure CSD
- 35. Configure CSD
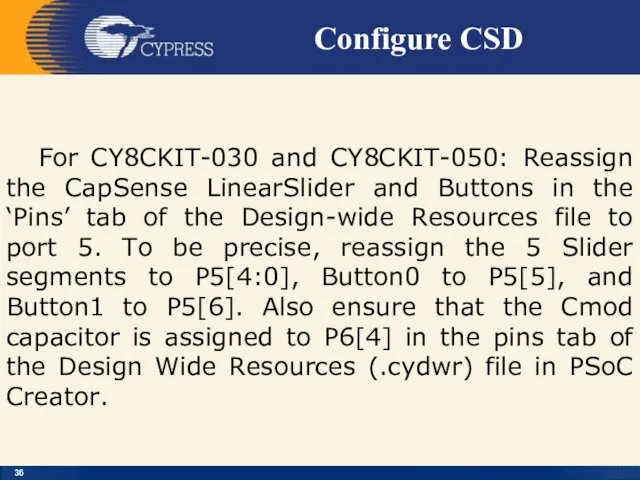
- 36. Configure CSD For CY8CKIT-030 and CY8CKIT-050: Reassign the CapSense LinearSlider and Buttons in the ‘Pins’ tab
- 37. Lab_3.cywr
- 38. Lab_3 Main.c
- 39. Lab_3 Main.c_2
- 40. Lab_3 Main.c_3
- 41. Lab_3 Main.c_4
- 42. Lab_3 Main.c_5
- 43. Lab_3 Main.c_6
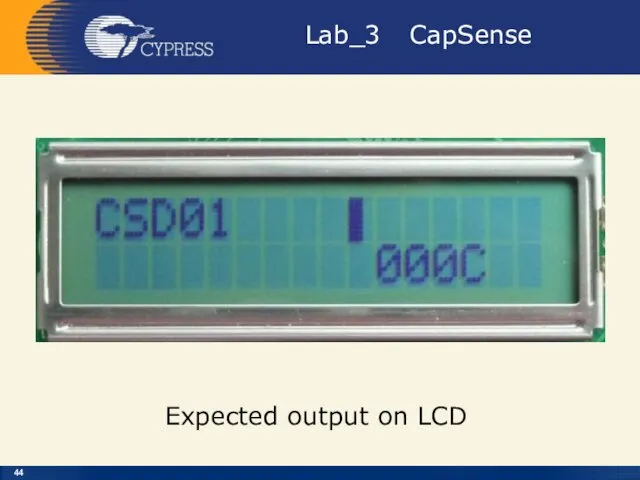
- 44. Lab_3 CapSense Expected output on LCD
- 45. Lab_3 CapSense References [1] Application Note AN2233a, “Capacitive Switch Scan,” Cypress Semiconductor [2] Application Note AN2403,
- 46. Lab_3 CapSense References (continue) [6] Application Note AN2318, “EMC Design Considerations for PSoC CapSense Applications,” Cypress
- 47. Приклади застосування МК PSOC На сайті фірми Cypress знаходиться більше 200 Application Notes і Reference Designs,
- 49. Скачать презентацию
PSoC@3/5
CapSense
PSoC Creator 4.2
Designing with PSoC 3/5
PSoC@3/5
CapSense
PSoC Creator 4.2
Designing with PSoC 3/5
CapSense
CapSense
CapSense
CapSense
CapSense
CapSense
CapSense
CapSense
CapSense
CapSense
CapSense
CapSense
CapSense
CapSense
CapSense
CapSense
CapSense
CapSense
CapSense
CapSense
CapSense
Overview:
Activate and use
the 2 CapSense buttons and linear slider
CapSense
Overview:
Activate and use
the 2 CapSense buttons and linear slider
CapSense
Objective:
For button presses, to indicate which button is on by
CapSense
Objective:
For button presses, to indicate which button is on by

Модулі PSoC@3/5
Модулі PSoC@3/5
Модулі PSoC@3/5
Модулі PSoC@3/5
CapSense
Follow the below steps to do this:
The Lab already has
CapSense
Follow the below steps to do this:
The Lab already has
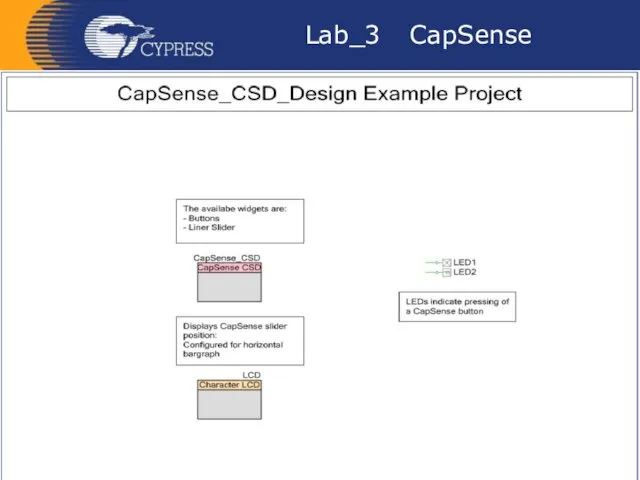
Lab_3 CapSense
Lab_3 CapSense
CapSense
In the general tab configure the CapSense component
CapSense
In the general tab configure the CapSense component
CapSense
In the clock source tab, configure the CapSense component
CapSense
In the clock source tab, configure the CapSense component
CapSense
CapSense
CapSense
In the buttons tab, configure the component
CapSense
In the buttons tab, configure the component
CapSense
In the sliders tab configure the component
CapSense
In the sliders tab configure the component
CapSense
CapSense
CapSense
In the scan slots tab, configure the buttons (BTN_B1 and BTN_B2)
CapSense
In the scan slots tab, configure the buttons (BTN_B1 and BTN_B2)
CapSense
In the scan slots tab configure the slider elements (LS_SL1_e0-to-4)
CapSense
In the scan slots tab configure the slider elements (LS_SL1_e0-to-4)

CapSense
Configure the pins tab in the .cydwr file
CapSense
Configure the pins tab in the .cydwr file
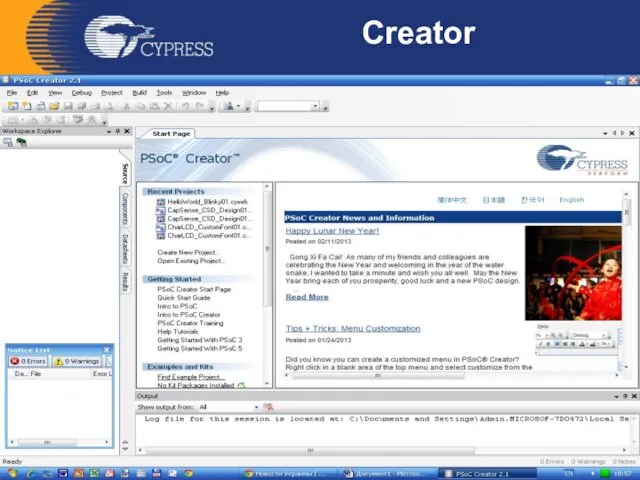
Creator
Creator
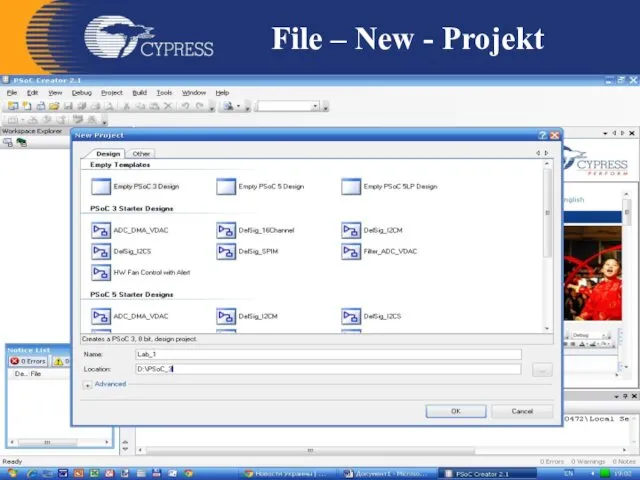
File – New - Projekt
File – New - Projekt
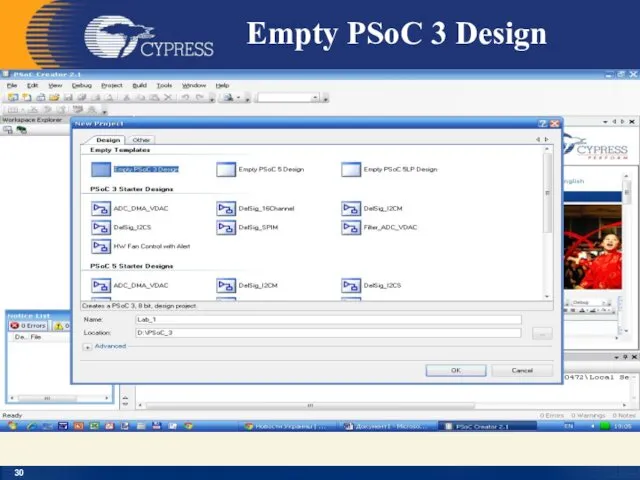
Empty PSoC 3 Design
Empty PSoC 3 Design
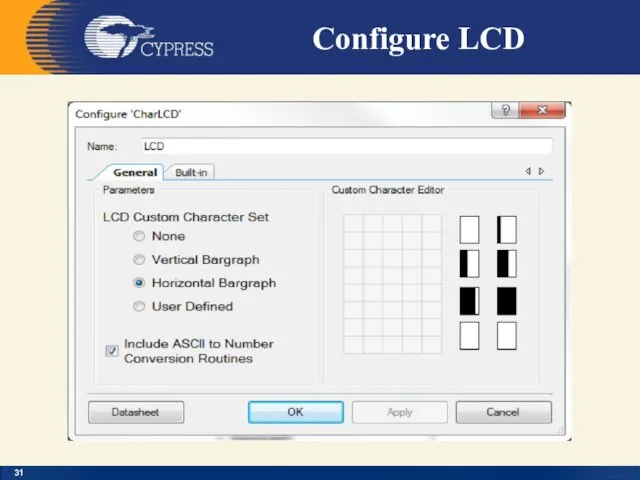
Configure LCD
Configure LCD
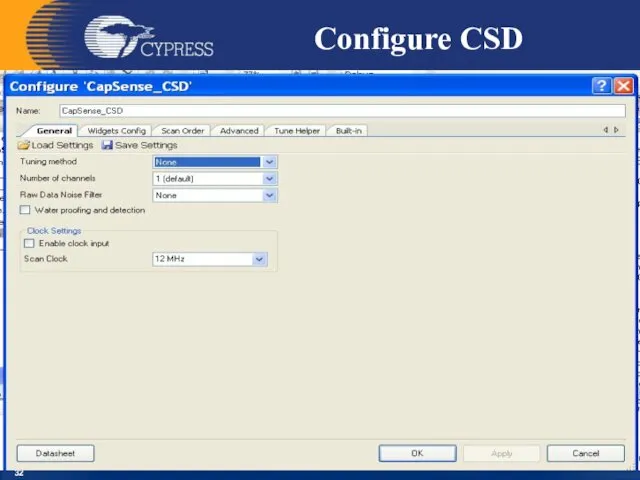
Configure CSD
Configure CSD
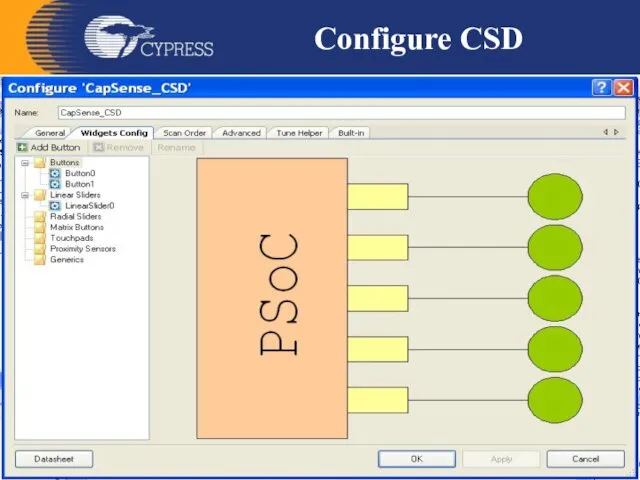
Configure CSD
Configure CSD
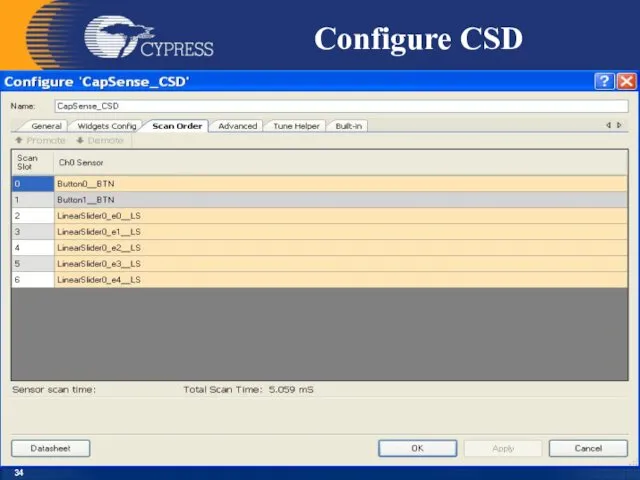
Configure CSD
Configure CSD
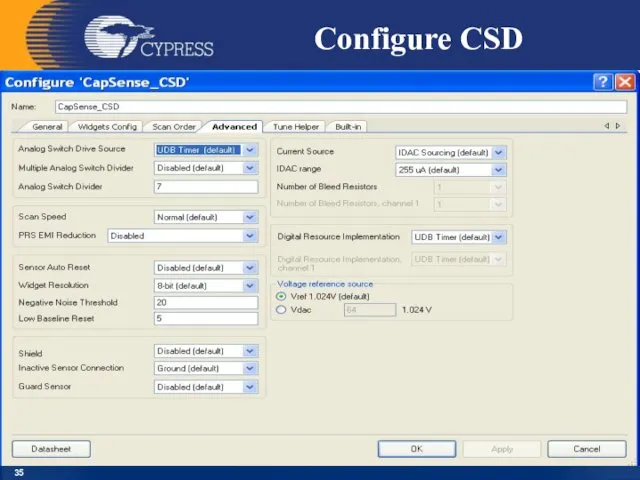
Configure CSD
Configure CSD
Configure CSD
For CY8CKIT-030 and CY8CKIT-050: Reassign the CapSense LinearSlider and Buttons
Configure CSD
For CY8CKIT-030 and CY8CKIT-050: Reassign the CapSense LinearSlider and Buttons
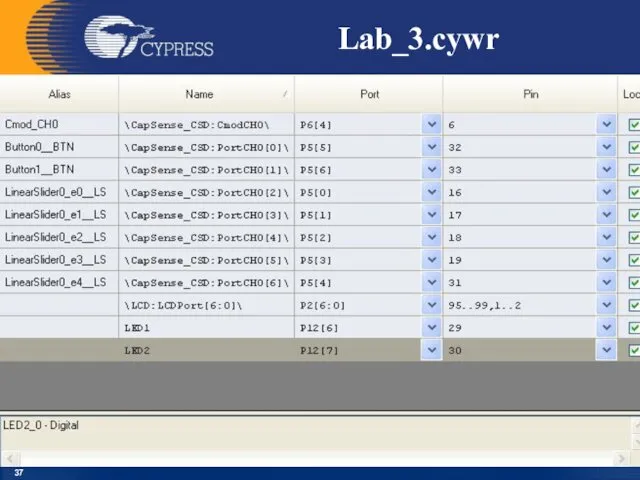
Lab_3.cywr
Lab_3.cywr
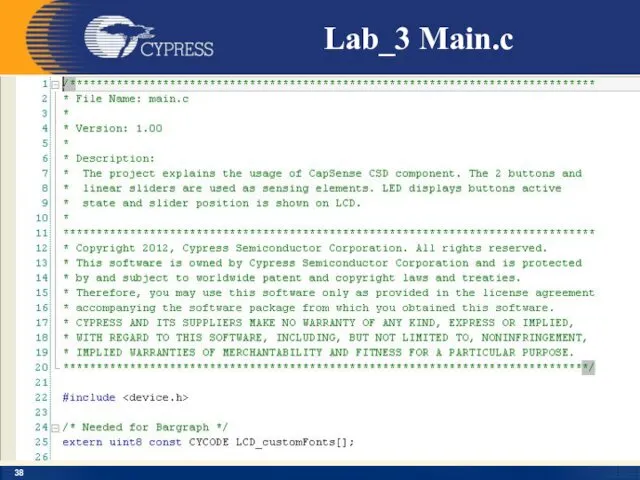
Lab_3 Main.c
Lab_3 Main.c
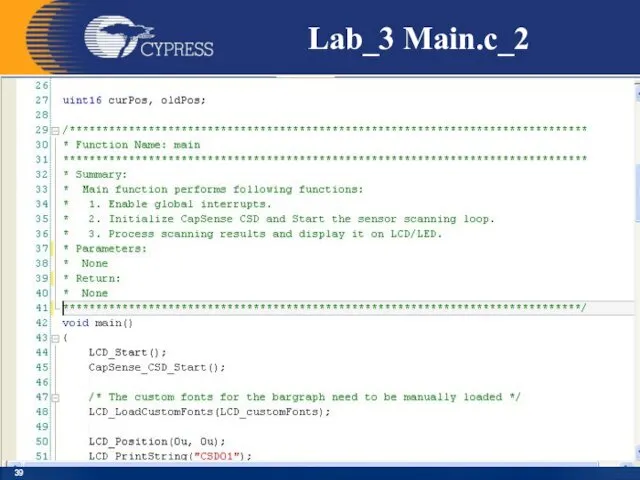
Lab_3 Main.c_2
Lab_3 Main.c_2
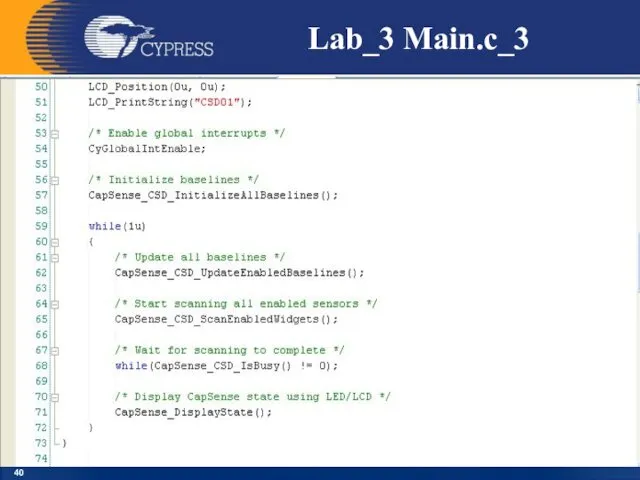
Lab_3 Main.c_3
Lab_3 Main.c_3
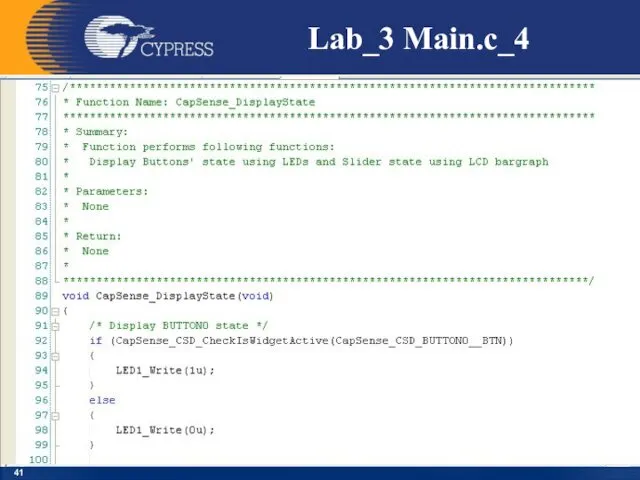
Lab_3 Main.c_4
Lab_3 Main.c_4

Lab_3 Main.c_5
Lab_3 Main.c_5
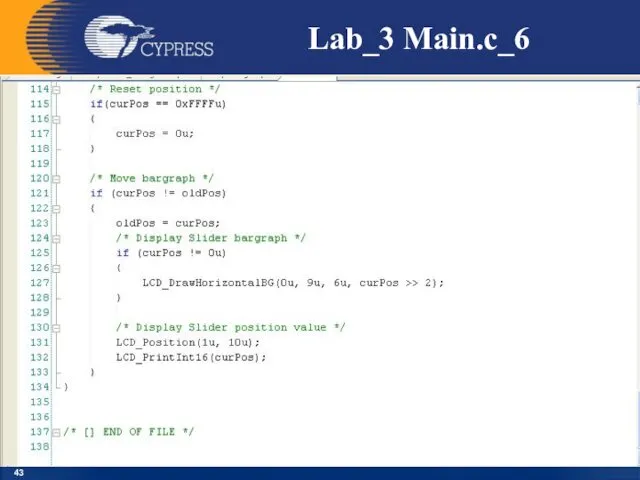
Lab_3 Main.c_6
Lab_3 Main.c_6
Lab_3 CapSense
Expected output on LCD
Lab_3 CapSense
Expected output on LCD
![Lab_3 CapSense References [1] Application Note AN2233a, “Capacitive Switch Scan,”](/_ipx/f_webp&q_80&fit_contain&s_1440x1080/imagesDir/jpg/22244/slide-44.jpg)
Lab_3 CapSense
References
[1] Application Note AN2233a, “Capacitive Switch Scan,” Cypress Semiconductor
Lab_3 CapSense
References
[1] Application Note AN2233a, “Capacitive Switch Scan,” Cypress Semiconductor
![Lab_3 CapSense References (continue) [6] Application Note AN2318, “EMC Design](/_ipx/f_webp&q_80&fit_contain&s_1440x1080/imagesDir/jpg/22244/slide-45.jpg)
Lab_3 CapSense
References (continue)
[6] Application Note AN2318, “EMC Design Considerations for PSoC
Lab_3 CapSense
References (continue)
[6] Application Note AN2318, “EMC Design Considerations for PSoC
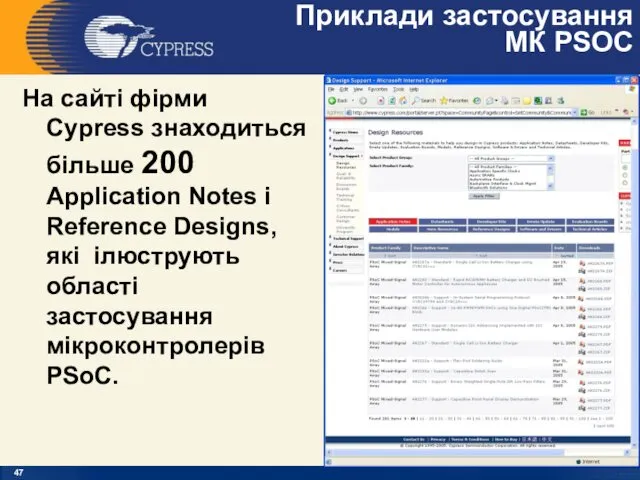
Приклади застосування
МК PSOC
На сайті фірми Cypress знаходиться більше 200 Application
Приклади застосування
МК PSOC
На сайті фірми Cypress знаходиться більше 200 Application
 Психолого-педагогическое сопровождение образовательного процесса
 Понятийный аппарат логистики, этапы развития логистики
 Понятие планировочной структуры города
 Основные правила ввода текста в WORD
 Технические средства телекоммуникационных технологий
 Общее знакомство с растениями
 Порядок выполнения действий
 Правовое регулирование в сфере образования
 Электроэнергетика
 Сыйфат. Сыйфатның гади һәм чагыштыру дәрәҗәсе презентация
 Материалы для детско-родительского проекта Волшебный цветок
 Н.В. Гоголь. Образы помещиков в поэме Мертвые души
 Монтаж кабельных линий
 Гепатит. Классификация гепатита
 Попечительский совет МАДОУ
 интерактивная игра Яркие краски детства
 Круги Луллия
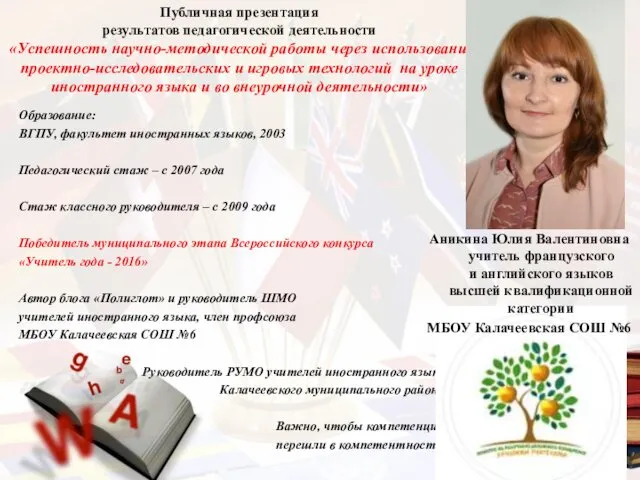 Успешность работы через использование проектно-исследовательских технологий на уроке иностранного языка и во внеурочной работе
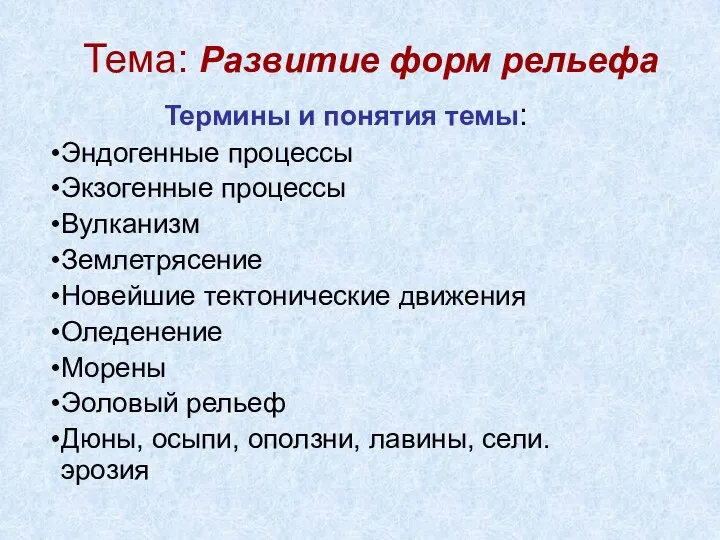 презентация на тему: Развитие форм рельефа
 Структура и содержание контрольных измерительных материалов (КИМ) единого государственного экзамена (ЕГЭ)
 Материал к конкурсу Учитель года Москвы - 2012
 Реформы 1860–1870 годов в России, их последствия и значение
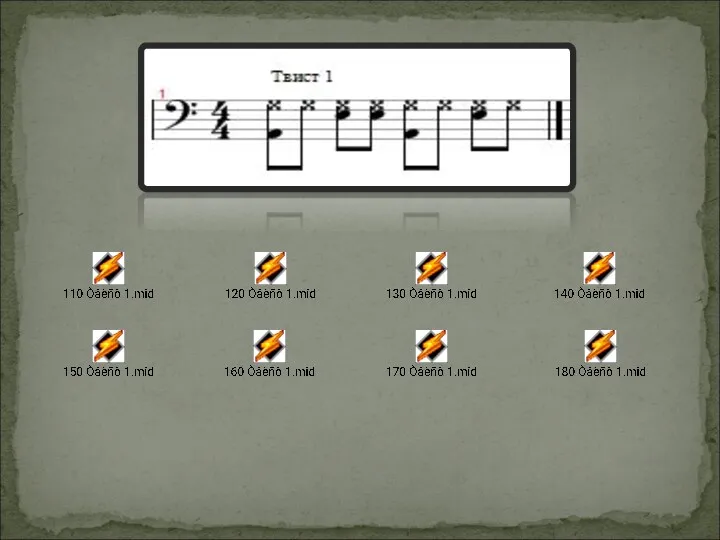 57 стилей для ударной установки с аккомпаниментом бас-гитары
 Тест по теме Глагол. 2 класс
 Грамположительные условно патогенные и патогенные кокки
 Читаем по слогам
 Как писать сочинения
 Презентации по географии