- What is online lims?

Содержание
- 2. What is Online LIMS ? A specialized LIMS for mining labs Very fast data access and
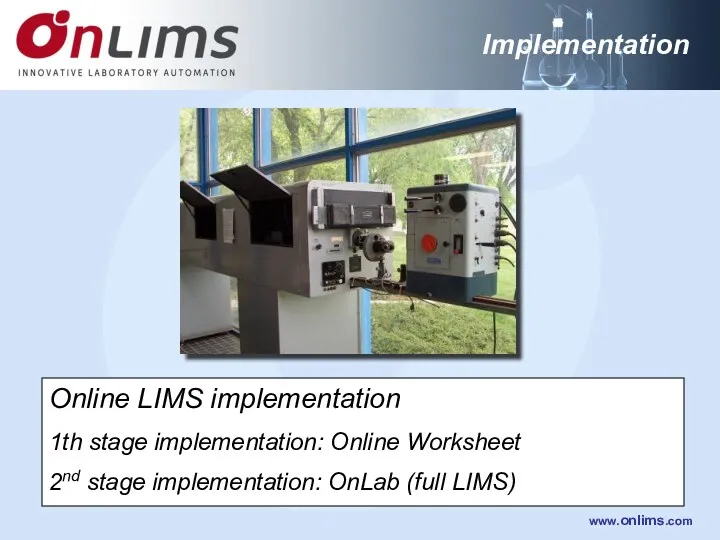
- 3. ** START ** Online LIMS Cominco Online LIMS implementation 1th stage implementation: Online Worksheet 2nd stage
- 4. Online Worksheet Concept OnWSH is an advanced interface between one or more instruments and the LIMS
- 5. Lab Workflow Sample Selection and grouping by technique Sample preparation (weighting, digestion, etc) Logbook preparation Do
- 6. Do all calculations and data reviewing in the Worksheet (calculation using formulas and less data manipulation
- 7. OnLINK.EXE Handles serial communication between the instrument and OnWSH. This small application should be active on
- 8. The worksheet Browser OnWSH browser provides color coded worksheet status information: RED for pending worksheets GREEN
- 9. Browser Toolbar menu Create New WSH Service (Work) Group Pick List Open selected WSH (DBL CLK)
- 10. Filtering Select filter selects a group of worksheets Selected work group (Service group) folder The select
- 11. Browser file name format Jump to a WSH Browser file name format. Three formats are available:
- 12. Open the worksheet by double clicking on the selected file. A window with six tabs represent
- 13. Worksheet header Supervisor Worksheet statistics Click here to activate the worksheet header The header tab stores
- 14. True electronic equivalent of a technician’s log book Automatic Dups popup Excel-like formulas Type your comments
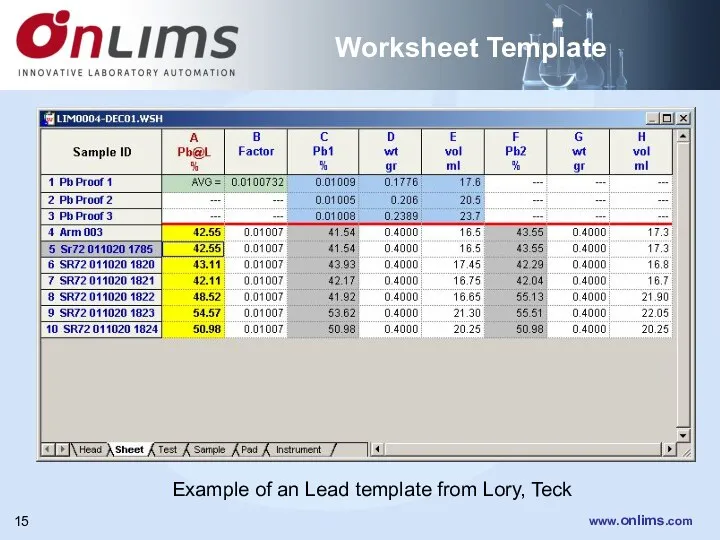
- 15. Worksheet Template Example of an Lead template from Lory, Teck
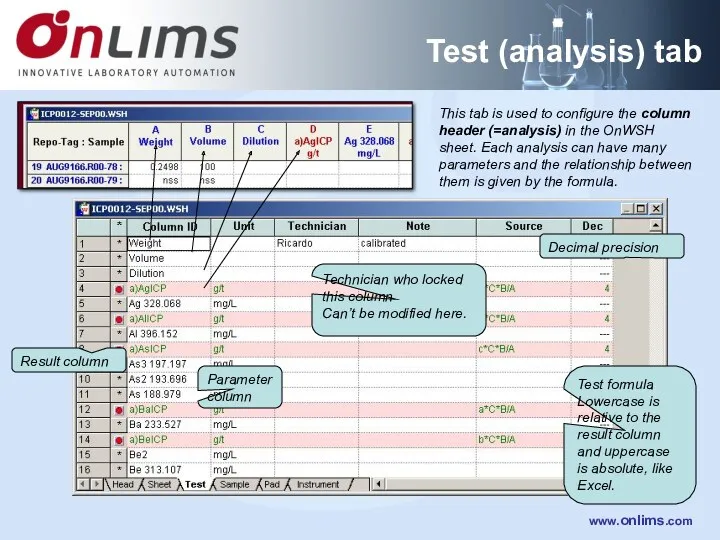
- 16. Test (analysis) tab This tab is used to configure the column header (=analysis) in the OnWSH
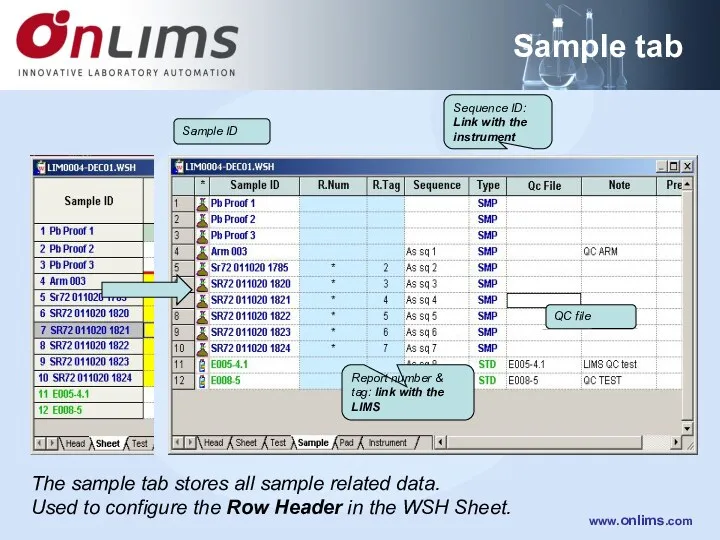
- 17. Sample tab The sample tab stores all sample related data. Used to configure the Row Header
- 18. For auditing purposes, all instrument information, including calibration data is recorded in the WSH log file.
- 19. Worksheet configuration Sample login (ROWS) Analysis setup (COLUMNS) Formulas (SHEET) Formatting (SHEET) For the login of
- 20. 1) Sample login (ROWS) The first step is to login all sample Id information and configure
- 21. 2) Test login (COLUMNS) The second step is to login all required analysis (Test) and parameters.
- 22. The LIMS formula (1) is converted (2) into an “excel like” formula. Lowercase characters are RELATIVE
- 23. 4) Formatting (SHEET) Open cell format dialog Cell highlighter Increases or decreases the amount of decimals
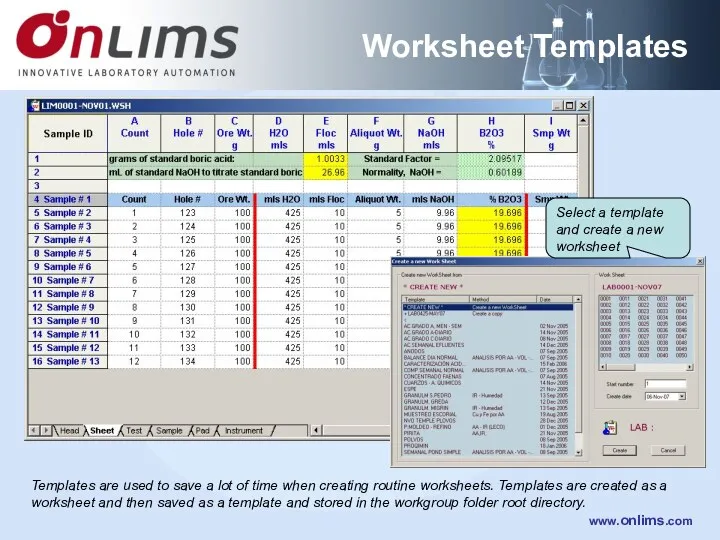
- 24. Worksheet Templates Templates are used to save a lot of time when creating routine worksheets. Templates
- 25. Templates Template list Shows all files with WSH extension located in the Service Group root folder
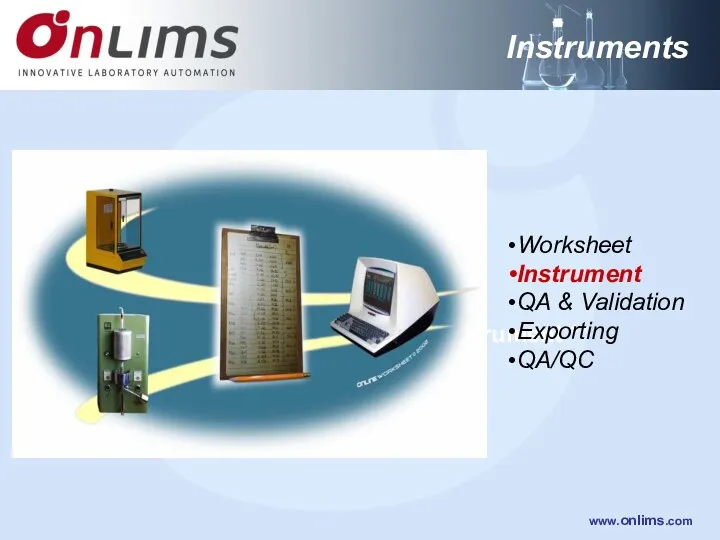
- 26. ** Instrument ** Worksheet Instrument QA & Validation Exporting QA/QC Instruments
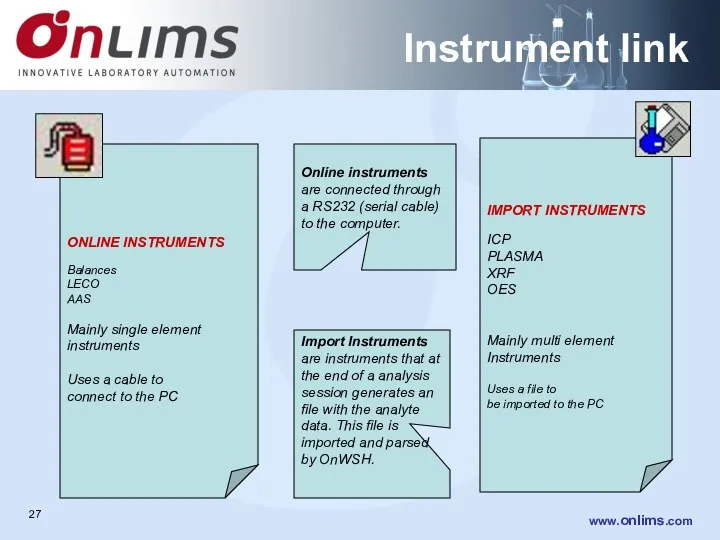
- 27. Instrument link IMPORT INSTRUMENTS ICP PLASMA XRF OES Mainly multi element Instruments Uses a file to
- 28. Online Instrument setup On-line Instruments allows you to read data directly from the instrument into the
- 29. Online LINK OnLINK should be active on the taskbar OnLINK is a application that handles the
- 30. Instrument import Quick preview of the the contents of the instrument file Selected instrument driver used
- 31. Import diagram 1 a The lines try to explain how data is parsed from the instrument
- 32. Import diagram 2 The instrument “Sample ID” must match the “Sequence” column in the worksheet and
- 33. Instrument Database The main purpose of the instrument database is to track the calibration and service
- 34. ** QC & Validation ** Worksheet Instrument QC & Validation Exporting Instrument Database
- 35. QC file browser The OnLQC browser helps to navigate trough all QC files and to edit
- 36. QC Chart Reference material panel Overall statistic panel Current point panel Data Chart Horizontal cursor Vertical
- 37. Validating data After validating a column (locking the column), the column header becomes GREEN and the
- 38. QC Check Mean Certified value, Min & Max allowed Plots only last 40 values as a
- 39. QC Check 2 Only the last 40 values are displayed in the QC validation window. To
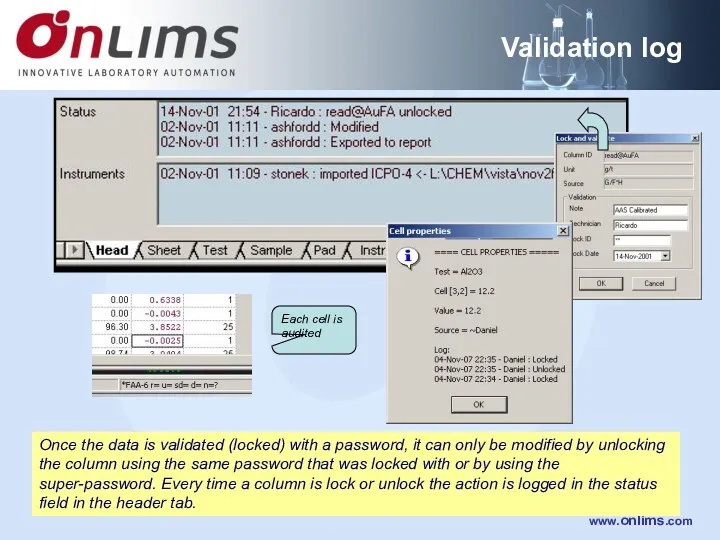
- 40. Validation log Once the data is validated (locked) with a password, it can only be modified
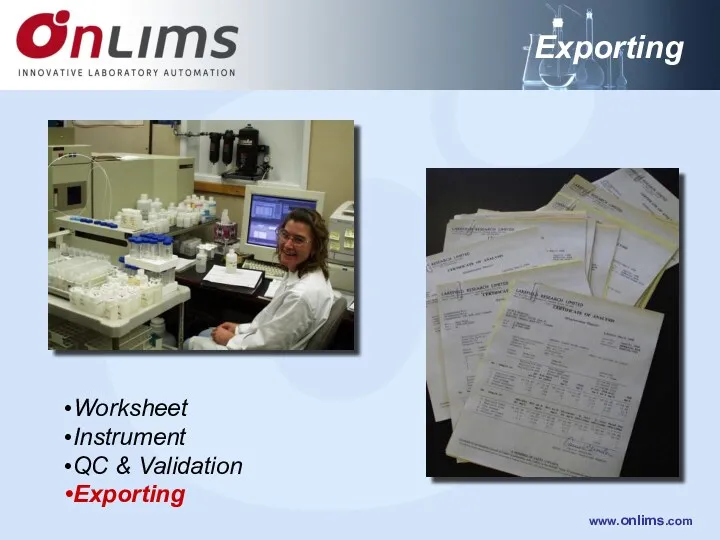
- 41. ** Exporting ** Worksheet Instrument QC & Validation Exporting Exporting
- 42. The worksheet export (transfer) released data to the LIMS database. Some feedbacks are provided for the
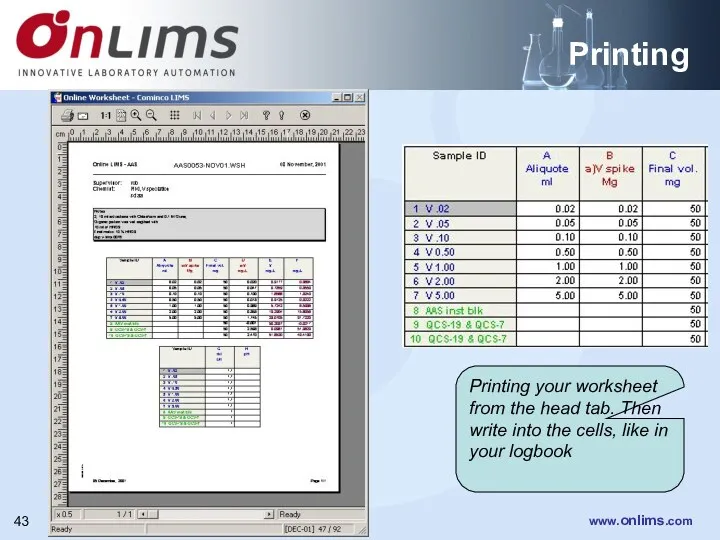
- 43. Printing Printing your worksheet from the head tab. Then write into the cells, like in your
- 45. Скачать презентацию
What is Online LIMS ?
A specialized LIMS for mining labs
What is Online LIMS ?
A specialized LIMS for mining labs
** START **
Online LIMS Cominco
Online LIMS implementation
1th stage implementation: Online Worksheet
** START **
Online LIMS Cominco
Online LIMS implementation
1th stage implementation: Online Worksheet
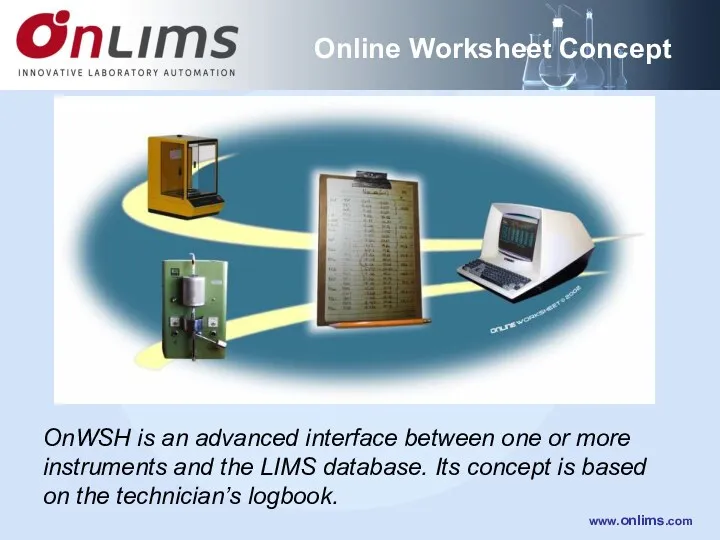
Online Worksheet Concept
OnWSH is an advanced interface between one or more
Online Worksheet Concept
OnWSH is an advanced interface between one or more
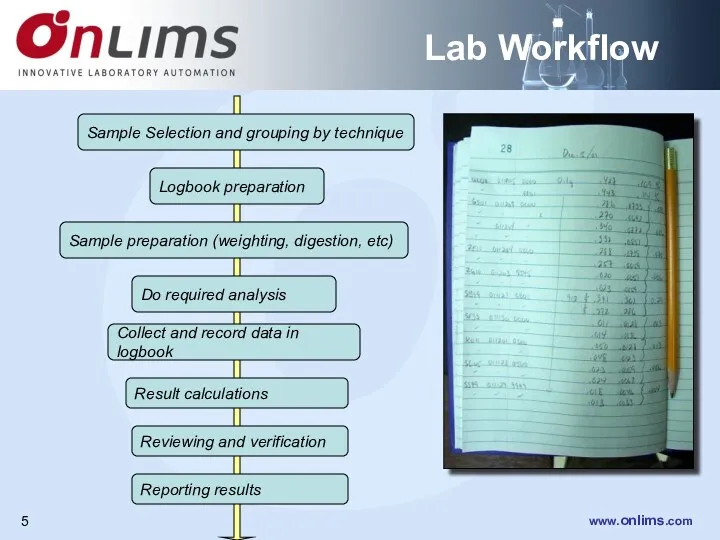
Lab Workflow
Sample Selection and grouping by technique
Sample preparation (weighting, digestion, etc)
Logbook
Lab Workflow
Sample Selection and grouping by technique
Sample preparation (weighting, digestion, etc)
Logbook
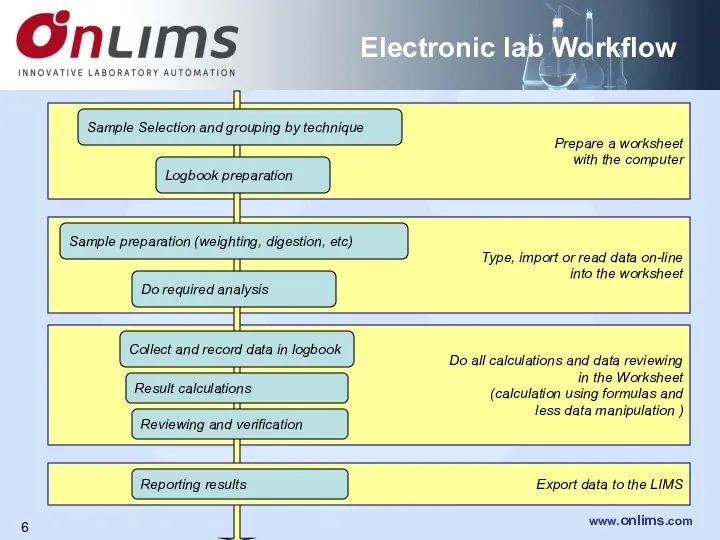
Do all calculations and data reviewing
in the Worksheet
(calculation using formulas and
Do all calculations and data reviewing
in the Worksheet
(calculation using formulas and
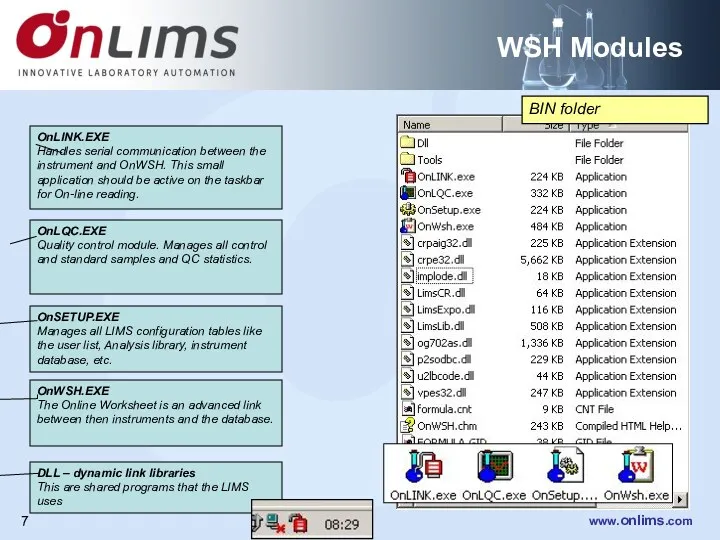
OnLINK.EXE
Handles serial communication between the instrument and OnWSH. This small application
OnLINK.EXE
Handles serial communication between the instrument and OnWSH. This small application
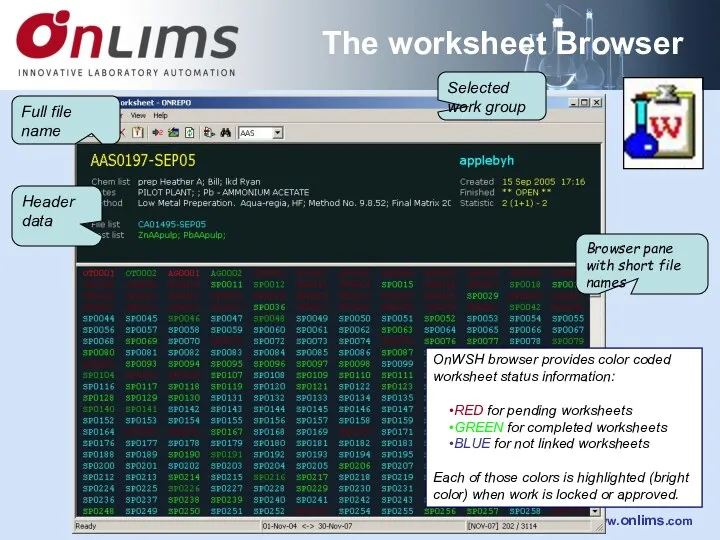
The worksheet Browser
OnWSH browser provides color coded worksheet status information:
RED for
The worksheet Browser
OnWSH browser provides color coded worksheet status information:
RED for
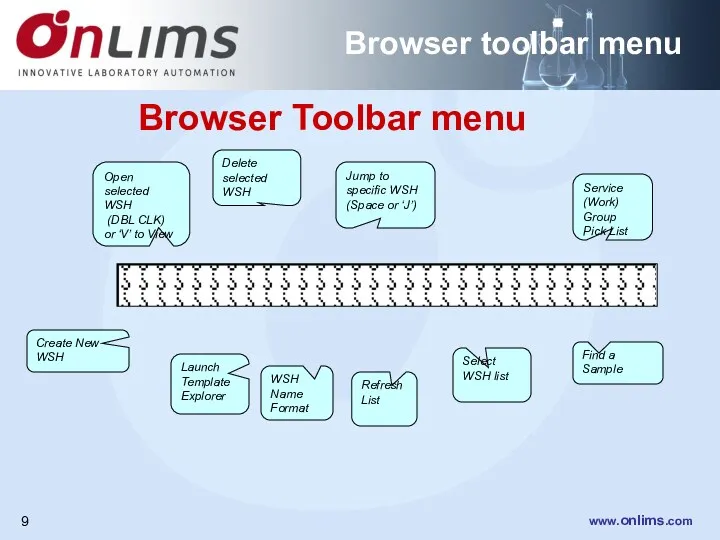
Browser Toolbar menu
Create New WSH
Service (Work) Group
Pick List
Open selected WSH
Browser Toolbar menu
Create New WSH
Service (Work) Group
Pick List
Open selected WSH
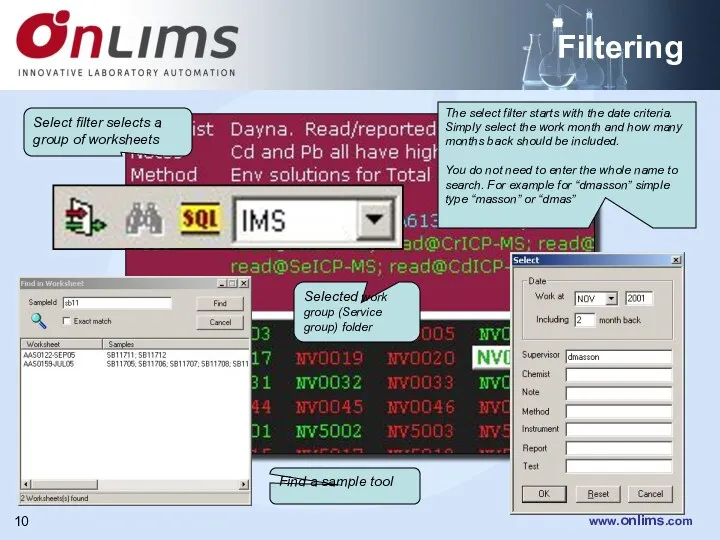
Filtering
Select filter selects a group of worksheets
Selected work group (Service group)
Filtering
Select filter selects a group of worksheets
Selected work group (Service group)
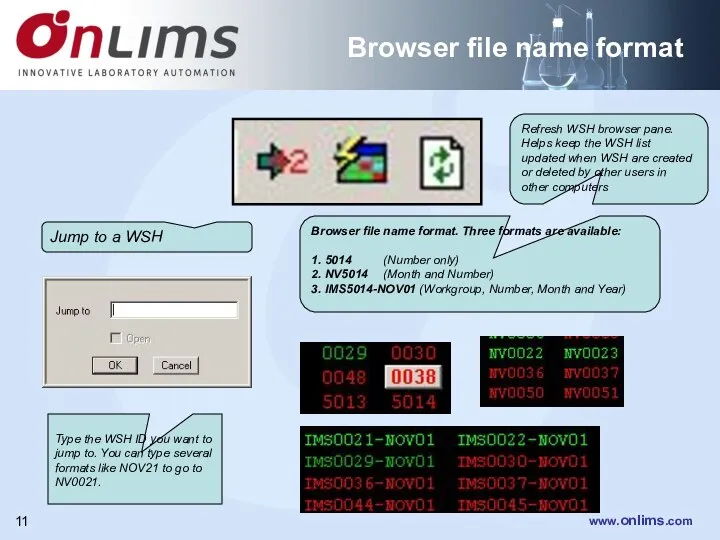
Browser file name format
Jump to a WSH
Browser file name format. Three
Browser file name format
Jump to a WSH
Browser file name format. Three
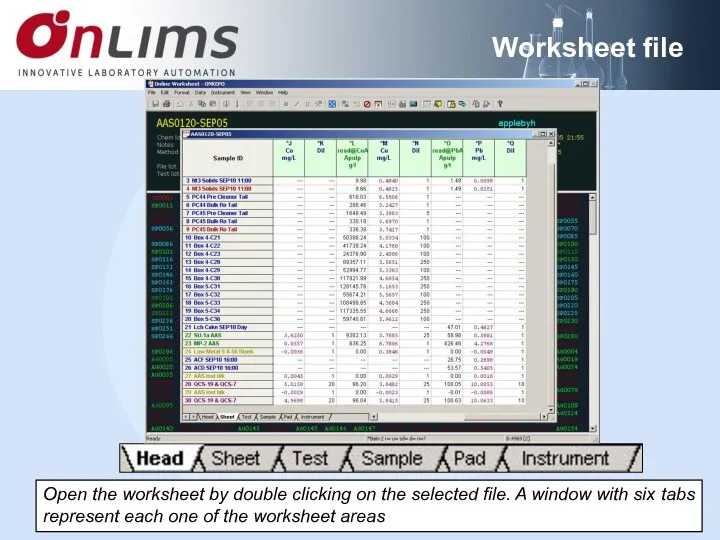
Open the worksheet by double clicking on the selected file. A
Open the worksheet by double clicking on the selected file. A
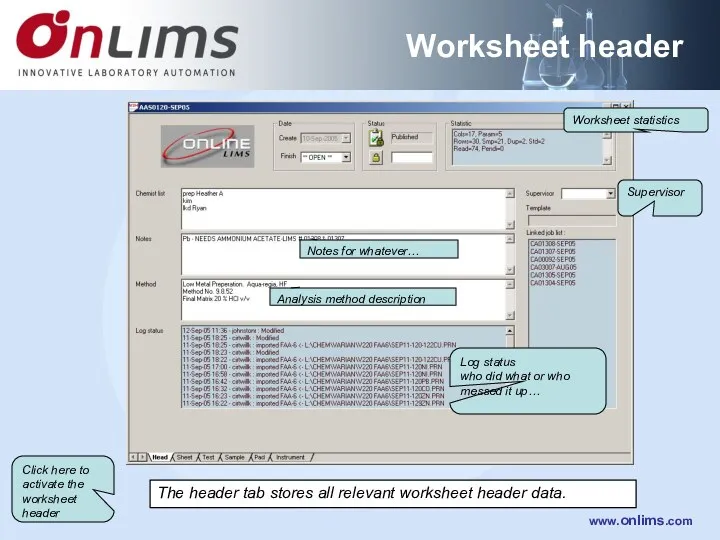
Worksheet header
Supervisor
Worksheet statistics
Click here to activate the worksheet header
The header tab
Worksheet header
Supervisor
Worksheet statistics
Click here to activate the worksheet header
The header tab
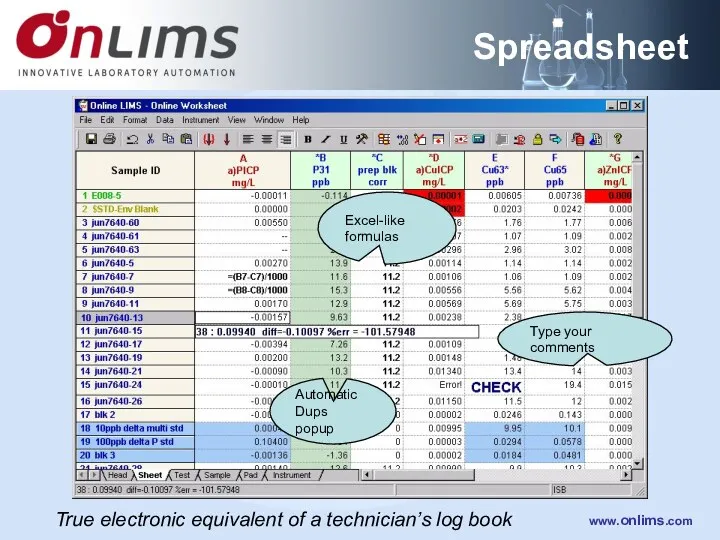
True electronic equivalent of a technician’s log book
Automatic Dups
popup
Excel-like
formulas
Type
True electronic equivalent of a technician’s log book
Automatic Dups
popup
Excel-like
formulas
Type
Worksheet Template
Example of an Lead template from Lory, Teck
Worksheet Template
Example of an Lead template from Lory, Teck
Test (analysis) tab
This tab is used to configure the column header
Test (analysis) tab
This tab is used to configure the column header
Sample tab
The sample tab stores all sample related data.
Used to
Sample tab
The sample tab stores all sample related data.
Used to
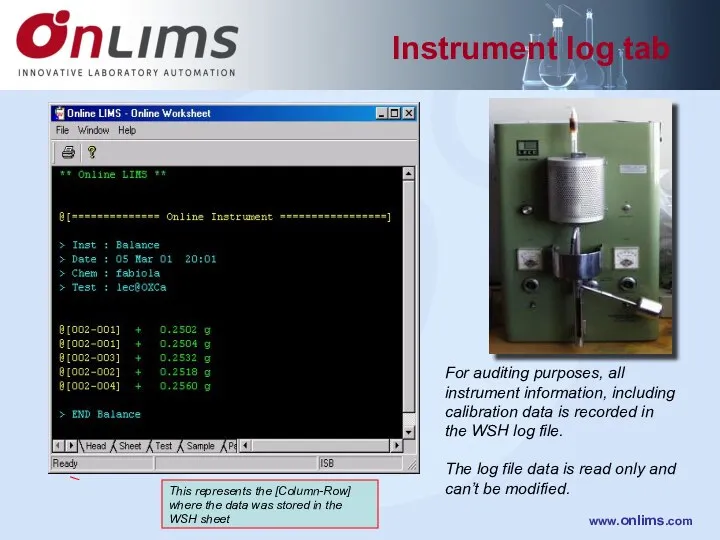
For auditing purposes, all instrument information, including calibration data is recorded
For auditing purposes, all instrument information, including calibration data is recorded
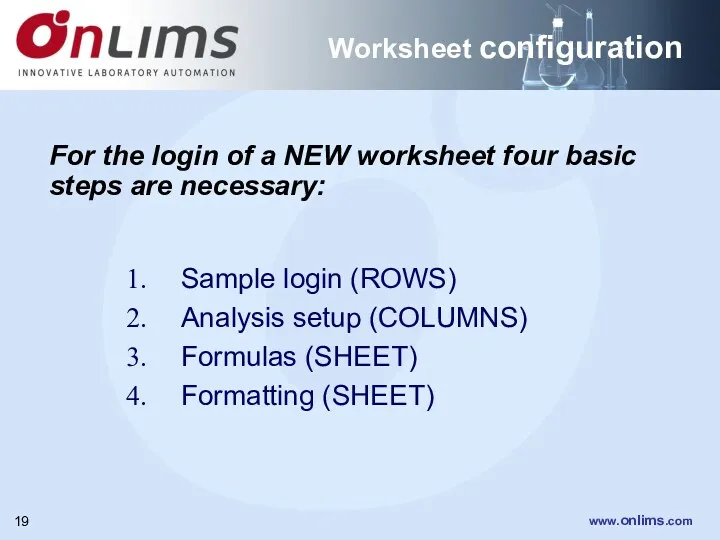
Worksheet configuration
Sample login (ROWS)
Analysis setup (COLUMNS)
Formulas (SHEET)
Formatting (SHEET)
For the login of
Worksheet configuration
Sample login (ROWS)
Analysis setup (COLUMNS)
Formulas (SHEET)
Formatting (SHEET)
For the login of
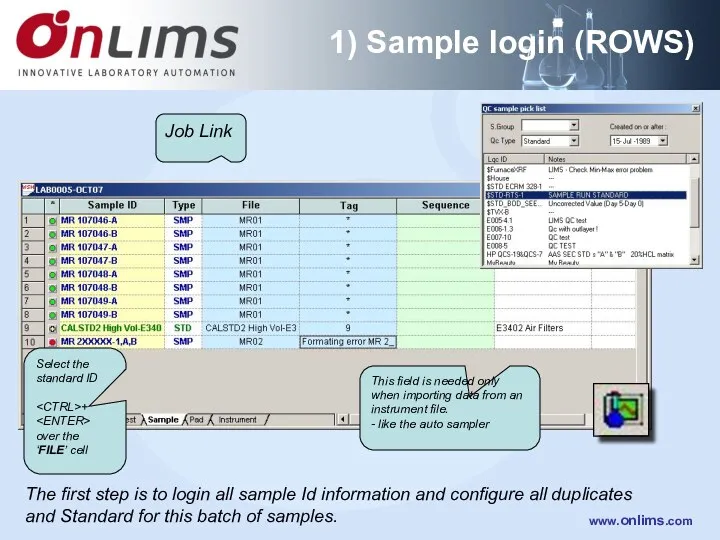
1) Sample login (ROWS)
The first step is to login all sample
1) Sample login (ROWS)
The first step is to login all sample
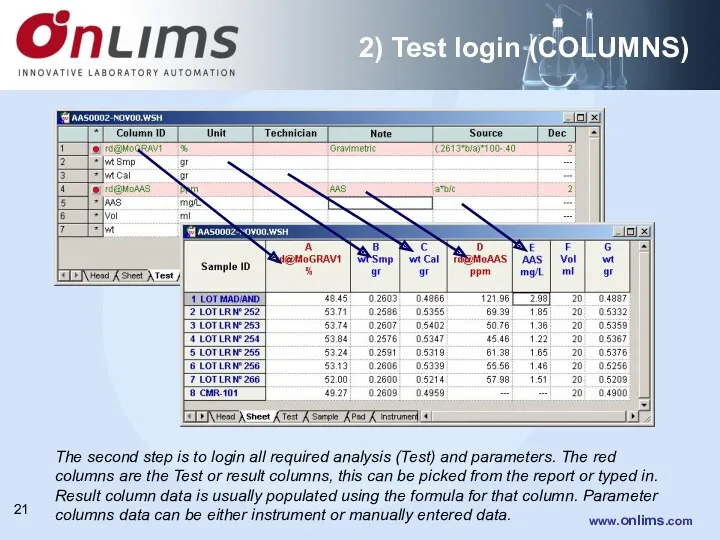
2) Test login (COLUMNS)
The second step is to login all required
2) Test login (COLUMNS)
The second step is to login all required

The LIMS formula (1) is converted (2) into an “excel like”
The LIMS formula (1) is converted (2) into an “excel like”
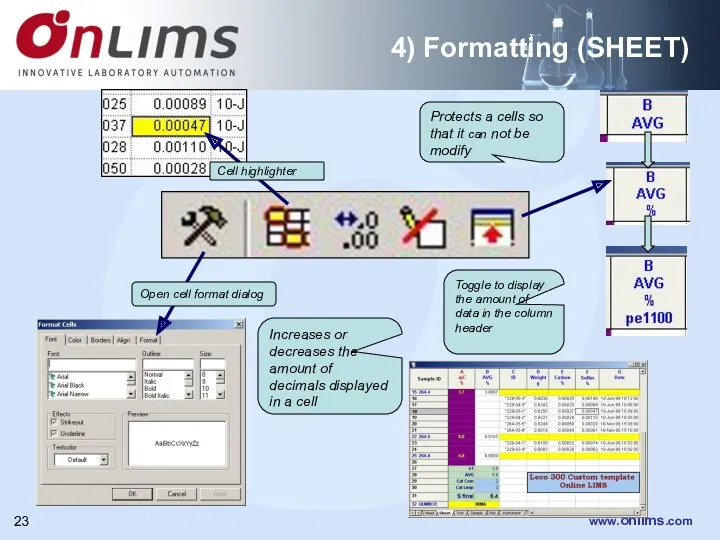
4) Formatting (SHEET)
Open cell format dialog
Cell highlighter
Increases or decreases the amount
4) Formatting (SHEET)
Open cell format dialog
Cell highlighter
Increases or decreases the amount
Worksheet Templates
Templates are used to save a lot of time when
Worksheet Templates
Templates are used to save a lot of time when

Templates
Template list
Shows all files with WSH extension located in the
Templates
Template list
Shows all files with WSH extension located in the
** Instrument **
Worksheet
Instrument
QA & Validation
Exporting
QA/QC
Instruments
** Instrument **
Worksheet
Instrument
QA & Validation
Exporting
QA/QC
Instruments
Instrument link
IMPORT INSTRUMENTS
ICP
PLASMA
XRF
OES
Mainly multi element
Instruments
Uses a file to
be imported
Instrument link
IMPORT INSTRUMENTS
ICP
PLASMA
XRF
OES
Mainly multi element
Instruments
Uses a file to
be imported
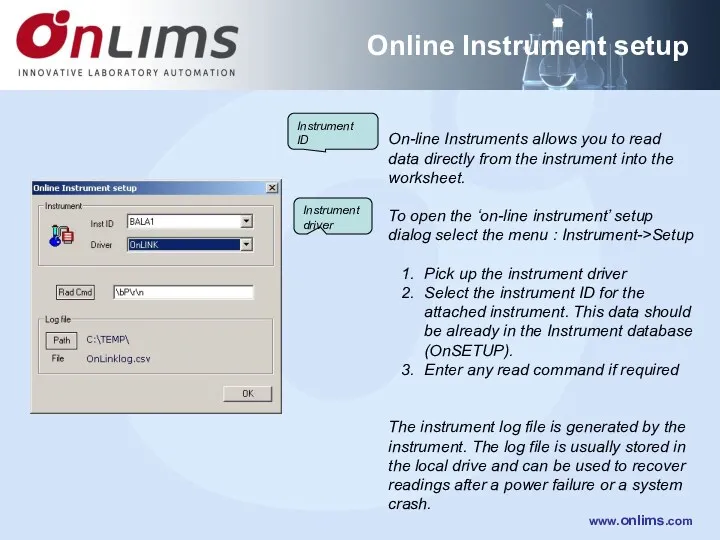
Online Instrument setup
On-line Instruments allows you to read data directly from
Online Instrument setup
On-line Instruments allows you to read data directly from
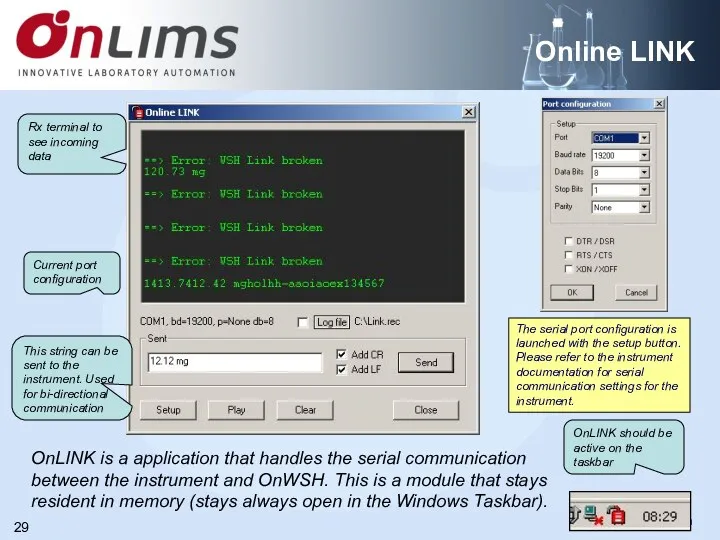
Online LINK
OnLINK should be active on the taskbar
OnLINK is
Online LINK
OnLINK should be active on the taskbar
OnLINK is
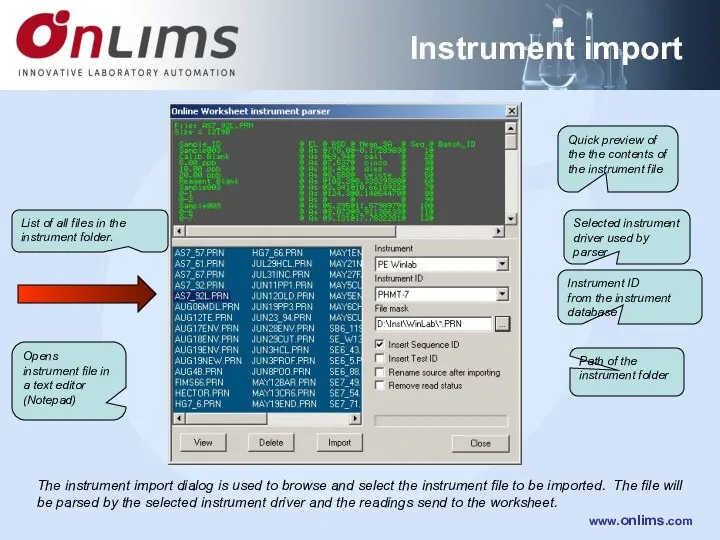
Instrument import
Quick preview of the the contents of the instrument file
Selected
Instrument import
Quick preview of the the contents of the instrument file
Selected
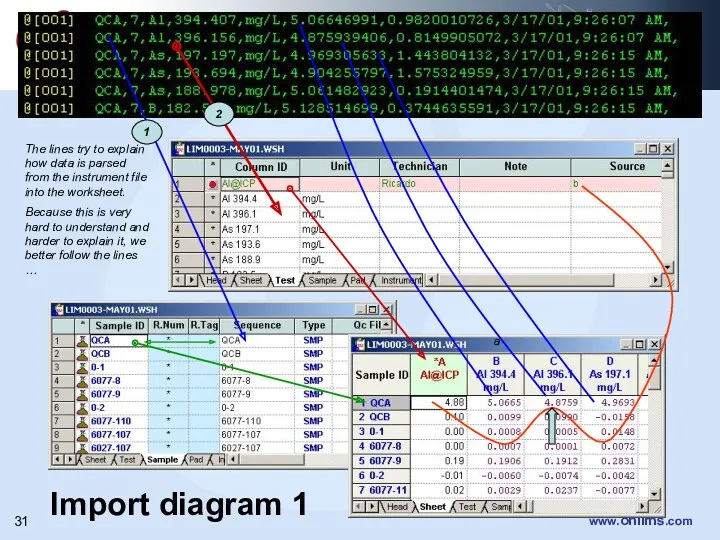
Import diagram 1
a
The lines try to explain how data is parsed
Import diagram 1
a
The lines try to explain how data is parsed
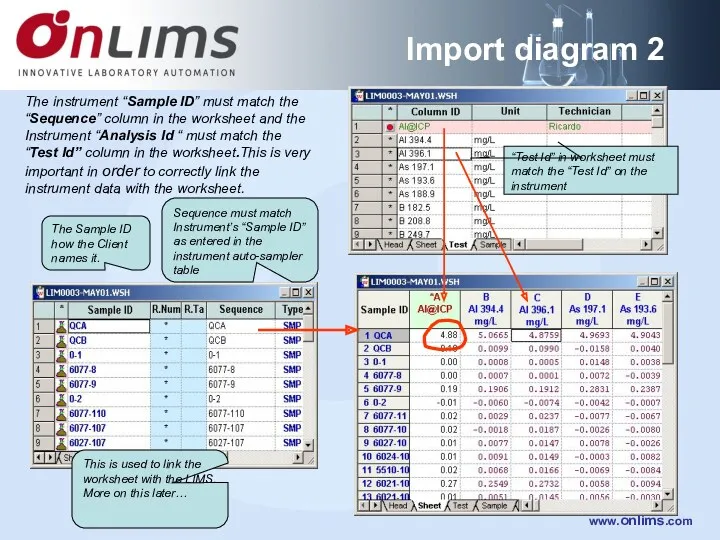
Import diagram 2
The instrument “Sample ID” must match the “Sequence” column
Import diagram 2
The instrument “Sample ID” must match the “Sequence” column
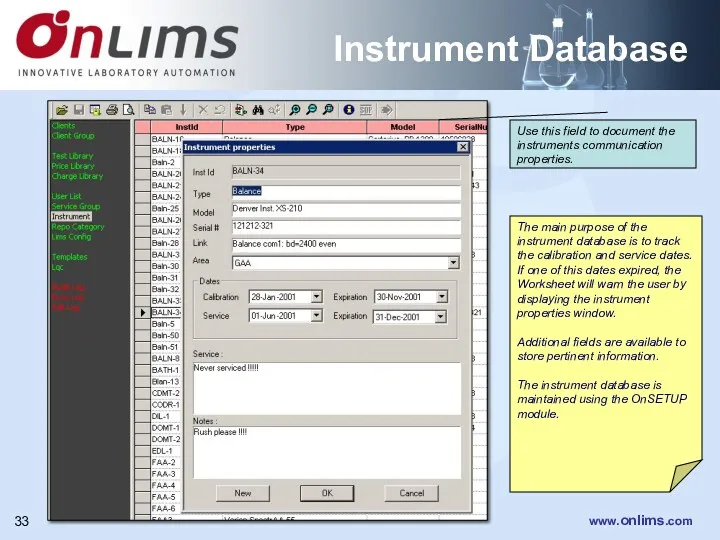
Instrument Database
The main purpose of the instrument database is to track
Instrument Database
The main purpose of the instrument database is to track
** QC & Validation **
Worksheet
Instrument
QC & Validation
Exporting
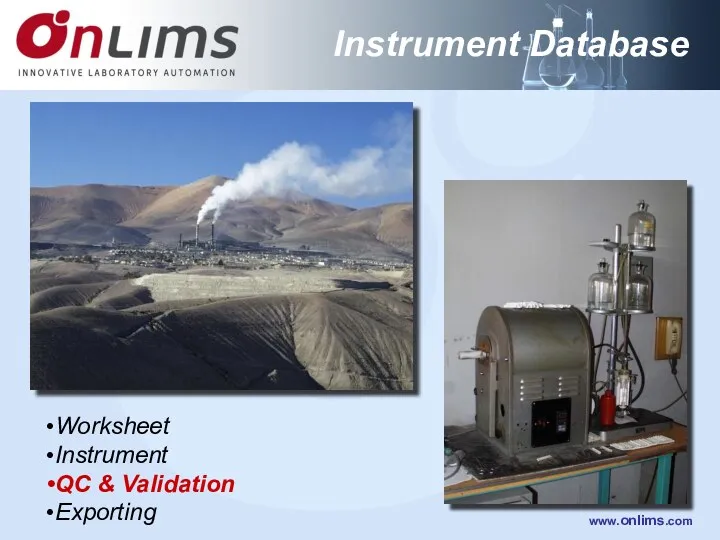
Instrument Database
** QC & Validation **
Worksheet
Instrument
QC & Validation
Exporting
Instrument Database
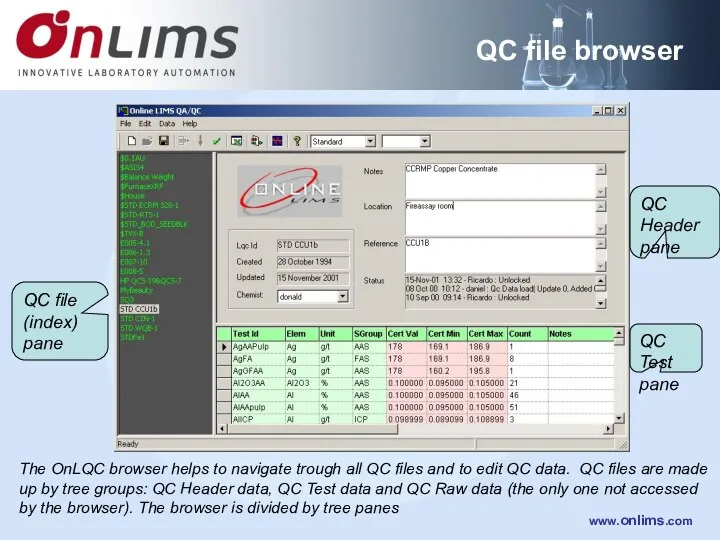
QC file browser
The OnLQC browser helps to navigate trough all QC
QC file browser
The OnLQC browser helps to navigate trough all QC
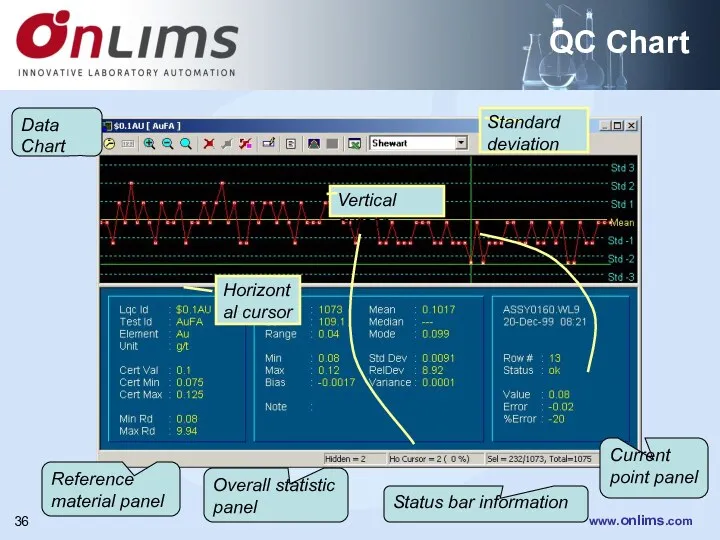
QC Chart
Reference material panel
Overall statistic panel
Current point panel
Data
Chart
Horizontal cursor
Vertical cursor
Standard
QC Chart
Reference material panel
Overall statistic panel
Current point panel
Data
Chart
Horizontal cursor
Vertical cursor
Standard
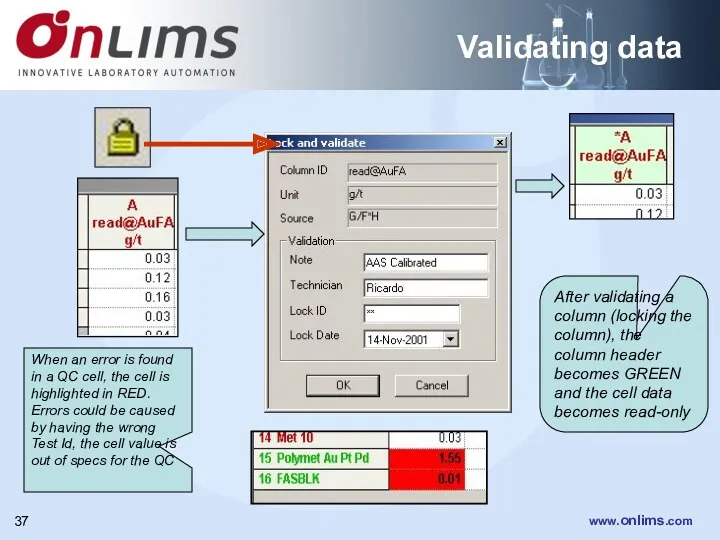
Validating data
After validating a column (locking the column), the column header
Validating data
After validating a column (locking the column), the column header
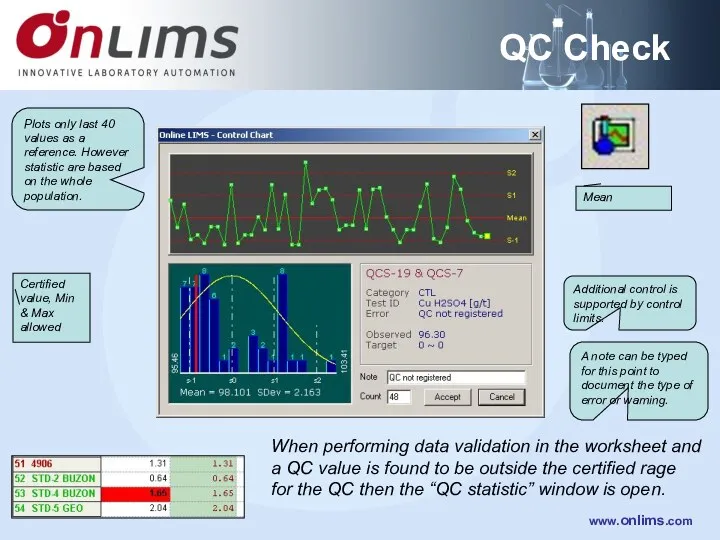
QC Check
Mean
Certified value, Min & Max allowed
Plots only last 40 values
QC Check
Mean
Certified value, Min & Max allowed
Plots only last 40 values
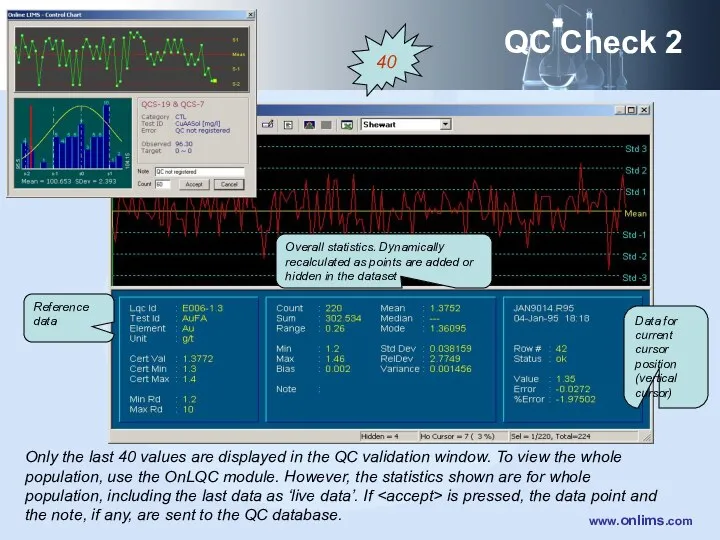
QC Check 2
Only the last 40 values are displayed in the
QC Check 2
Only the last 40 values are displayed in the
Validation log
Once the data is validated (locked) with a password, it
Validation log
Once the data is validated (locked) with a password, it
** Exporting **
Worksheet
Instrument
QC & Validation
Exporting
Exporting
** Exporting **
Worksheet
Instrument
QC & Validation
Exporting
Exporting
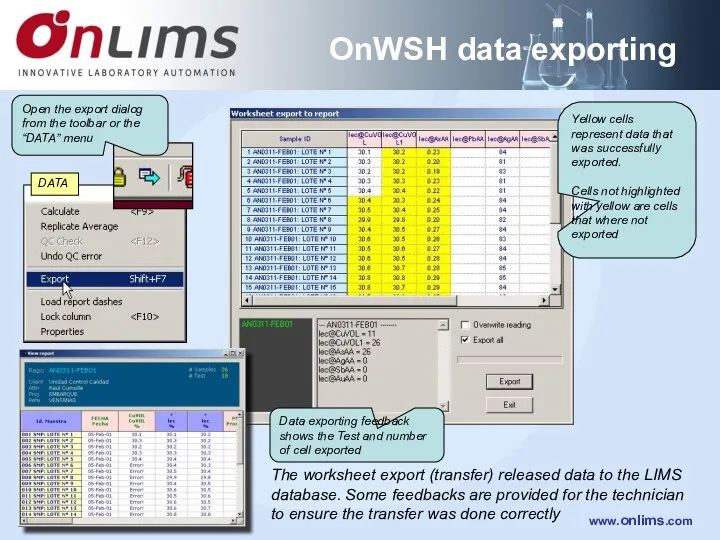
The worksheet export (transfer) released data to the LIMS database. Some
The worksheet export (transfer) released data to the LIMS database. Some
Printing
Printing your worksheet from the head tab. Then write into the
Printing
Printing your worksheet from the head tab. Then write into the
Похожие презентации
 Кухня Англии
 Слова – паразиты в английском языке
 Word Formation
 Creamy mushroom soup
 Match the pictures to the parts of the song “Happy Happy new year” by Fantastikids
 Spotlight C14-16
 ЕГЭ. Английский язык. Раздел 4
 Tour in Georgia
 Ergonomic workplace
 Hobbies and free time activities
 Countable/uncountable nouns
 Сопоставительный анализ концепта отдых на материале фразеологии английского и русского языков
 The United States of America (USA)
 Preparing a report
 History of information storage systems
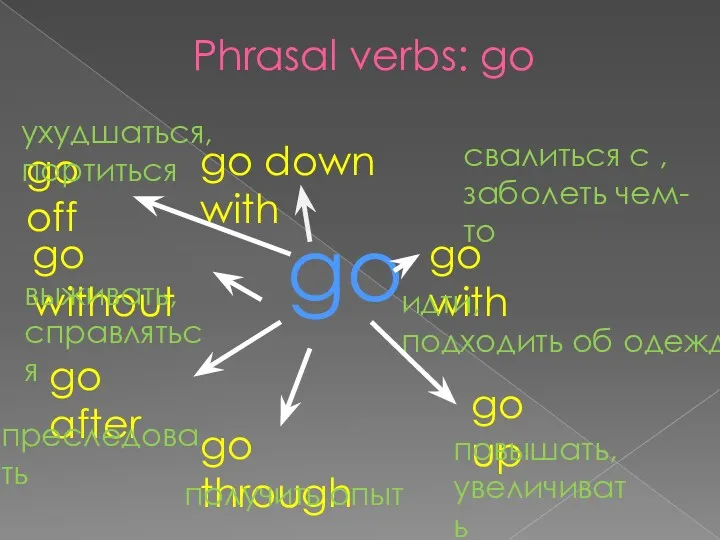 Phrasal verbs: go
 Оборот to be going to. (5 класс)
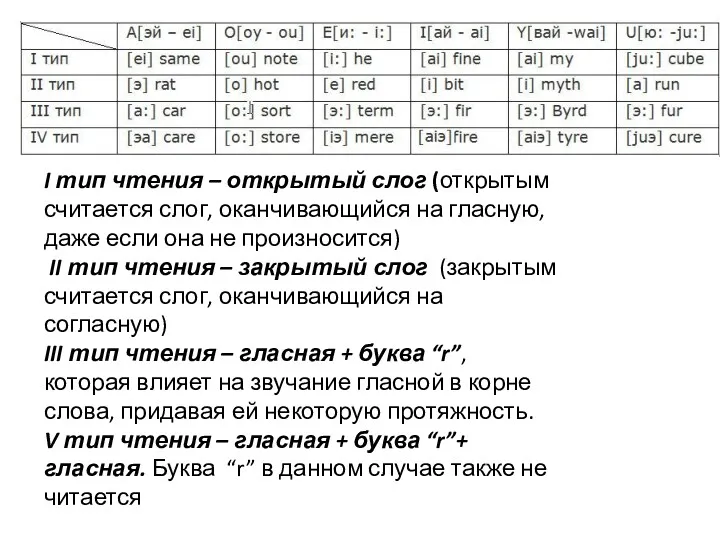 Типы чтения
 Грамматические темы, выносимые на экзамен летней сессии:
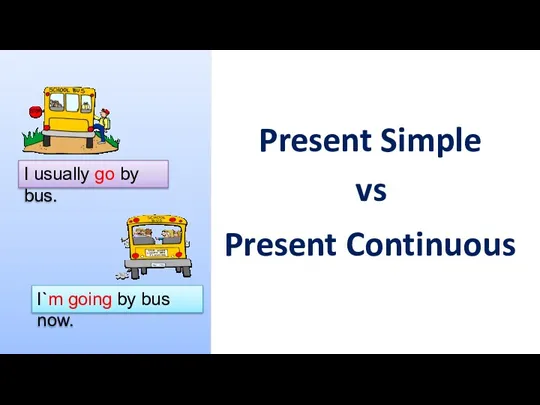 Present Simple vs Present Continuous
 L'activité théâtrale dans l'établissement d'enseignement supérieur sportif
 My idol Tetyukhin Sergey
 The past continuous tense
 Языковой Центр Speak Up представляет…
 New York City Attractions Достопримечательности Нью-Йорка
 Irregular verbs
 Life line