- 3linker manual

Содержание
- 3. A Installation
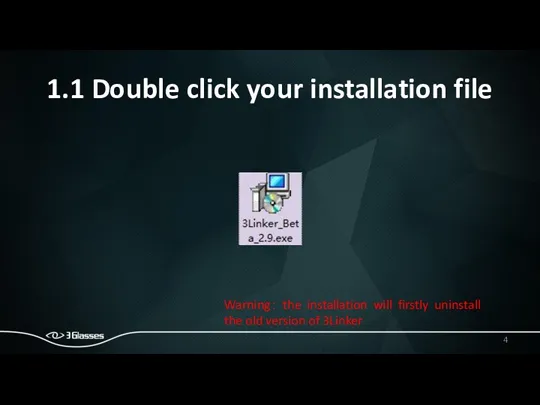
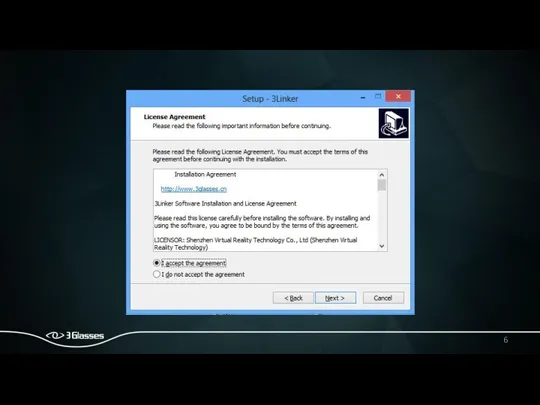
- 4. 1.1 Double click your installation file Warning: the installation will firstly uninstall the old version of
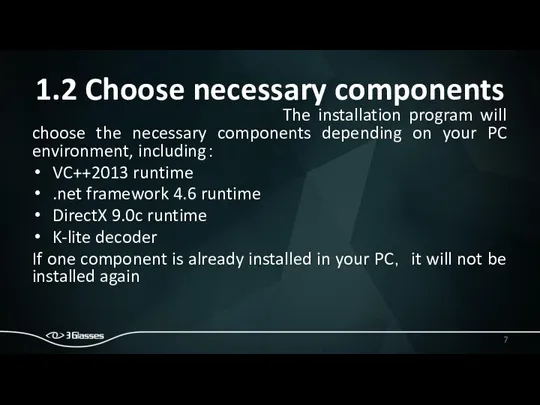
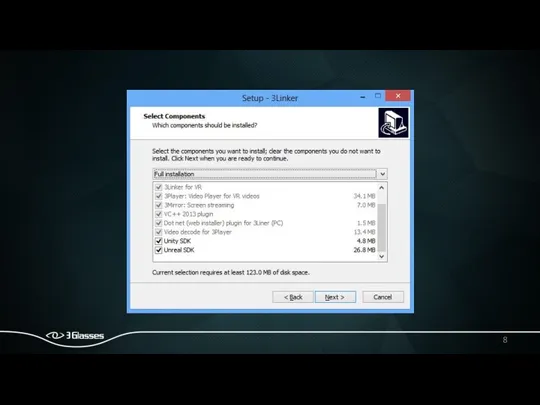
- 7. 1.2 Choose necessary components The installation program will choose the necessary components depending on your PC
- 11. Installing video decoder
- 14. Installing .net framework runtime
- 18. 1.3 Finish your installation
- 19. B Device Management
- 20. 2. Launch 3Linker 2.1 Double click the quick link on your desktop
- 21. 2.2 Check your device If no 3glasses device installed, 3Linker will be like the image on
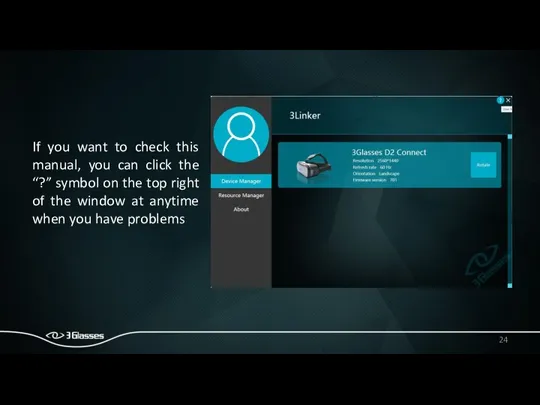
- 22. Else, you will see the device info as the right image(Some detailed information will be shown
- 23. If the orientation of screen in your glasses is not in a right direction , you
- 24. If you want to check this manual, you can click the “?” symbol on the top
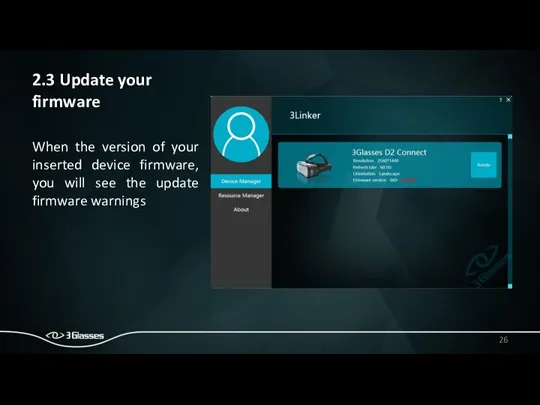
- 26. 2.3 Update your firmware When the version of your inserted device firmware, you will see the
- 27. Click yes to update your firmware
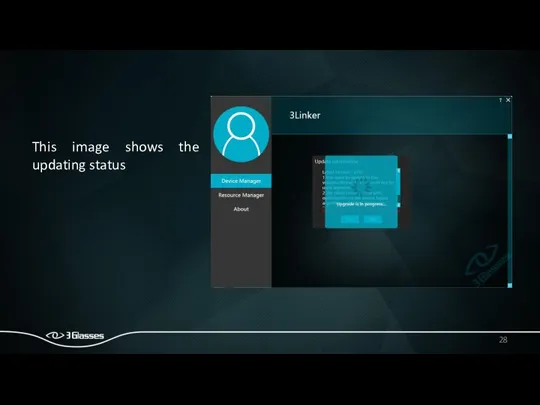
- 28. This image shows the updating status
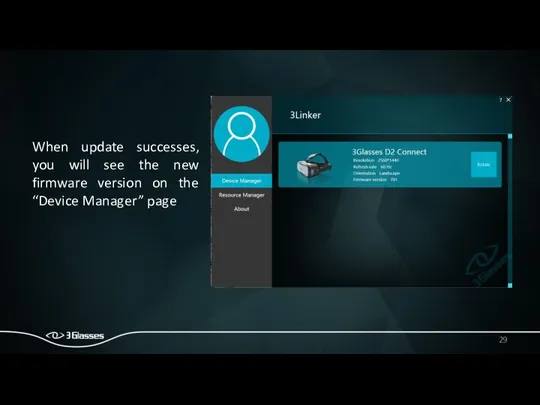
- 29. When update successes, you will see the new firmware version on the “Device Manager” page
- 30. 2.4 Ukey Management 2.4.1 UI when uKey inserted
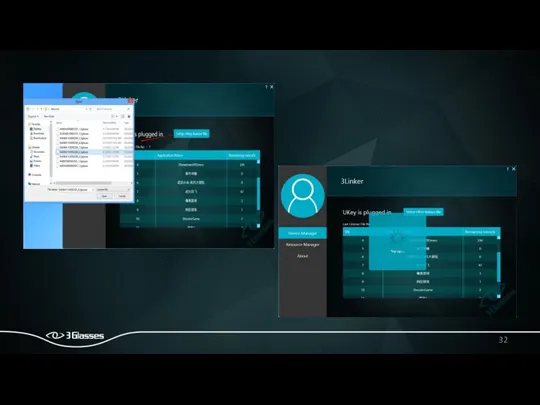
- 31. 2.4.2 Recharge your ukey with license file Click “Details” button on your ukey, then choose the
- 33. The license file contains the information of the apps and their available times of play
- 35. If you recharge your ukey successful, then you will see the apps and their remaining execution
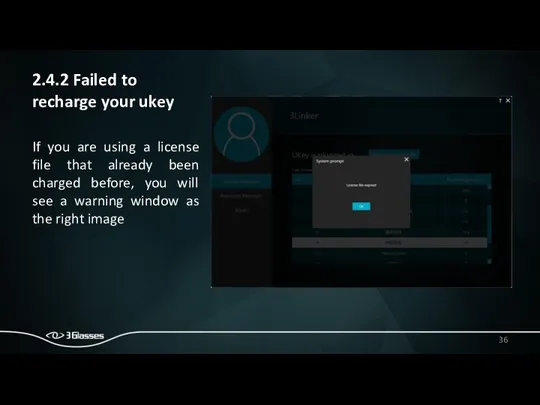
- 36. 2.4.2 Failed to recharge your ukey If you are using a license file that already been
- 37. If the license id not match your ukey, then you will see a warning window as
- 38. C Resource management
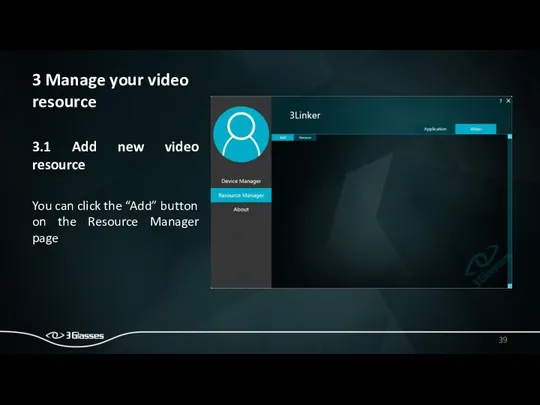
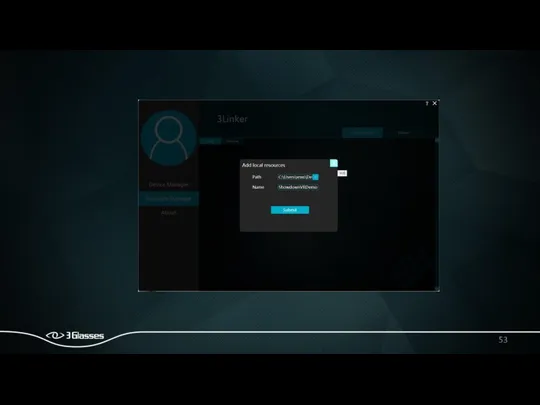
- 39. 3 Manage your video resource 3.1 Add new video resource You can click the “Add” button
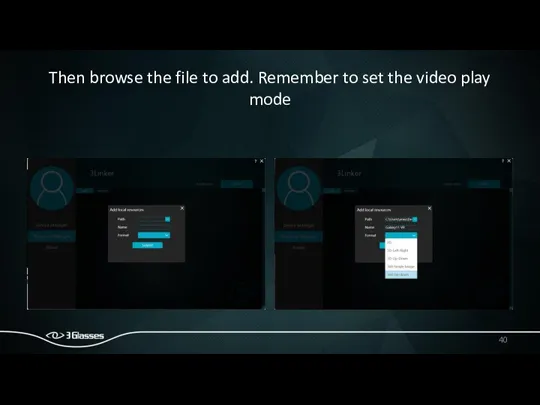
- 40. Then browse the file to add. Remember to set the video play mode
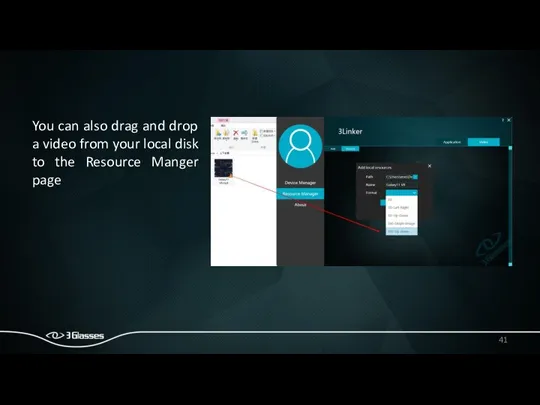
- 41. You can also drag and drop a video from your local disk to the Resource Manger
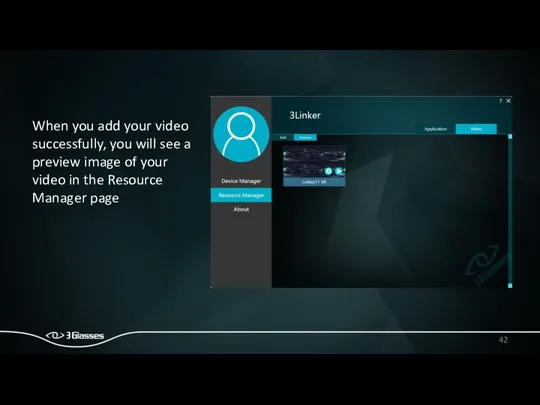
- 42. When you add your video successfully, you will see a preview image of your video in
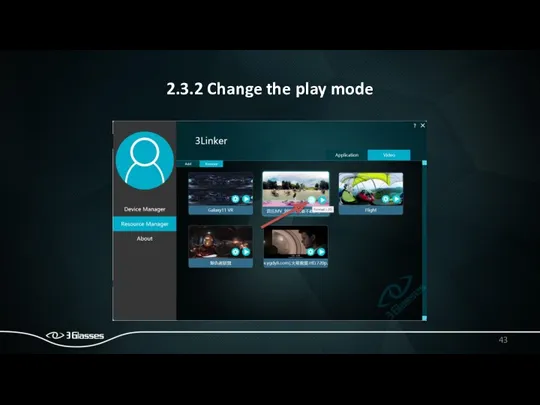
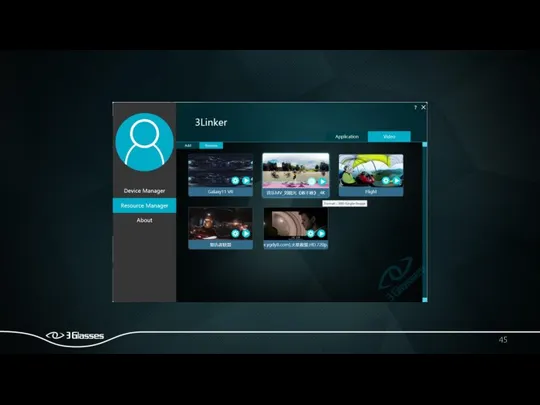
- 43. 2.3.2 Change the play mode
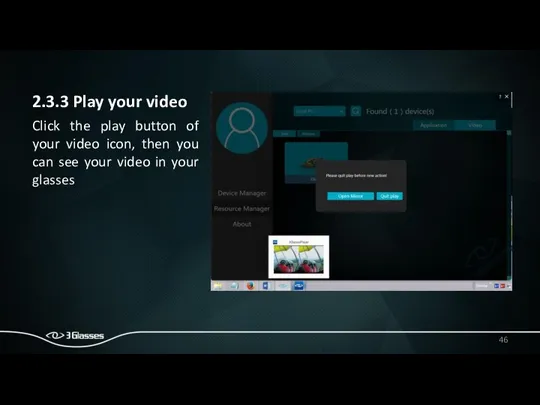
- 46. 2.3.3 Play your video Click the play button of your video icon, then you can see
- 47. During the playing, you can click the Open Mirror button to run 3Mirror which copies the
- 49. Click the Quit Play button to exit the player, and click the Close Mirror button to
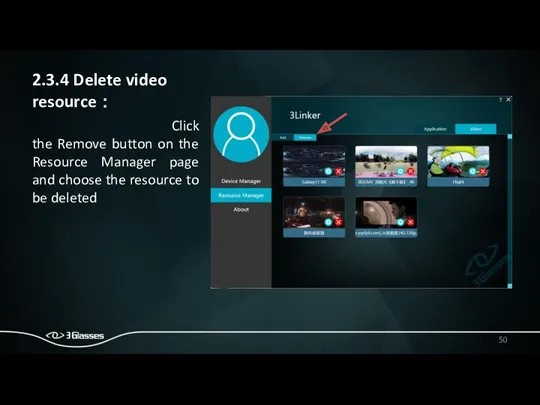
- 50. 2.3.4 Delete video resource : Click the Remove button on the Resource Manager page and choose
- 51. When the resource path modified unfortunately, then the preview icon of this vide will be set
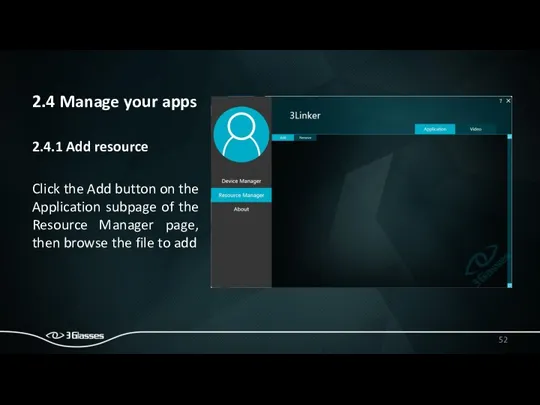
- 52. 2.4 Manage your apps 2.4.1 Add resource Click the Add button on the Application subpage of
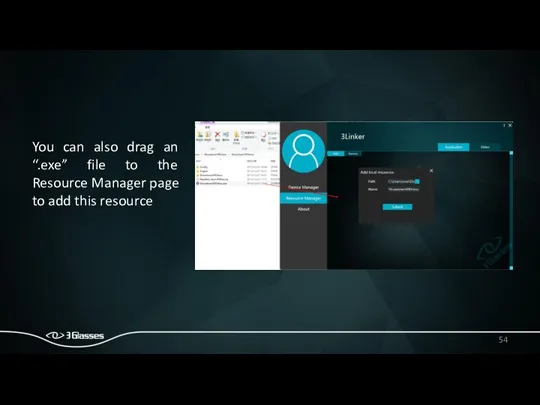
- 54. You can also drag an “.exe” file to the Resource Manager page to add this resource
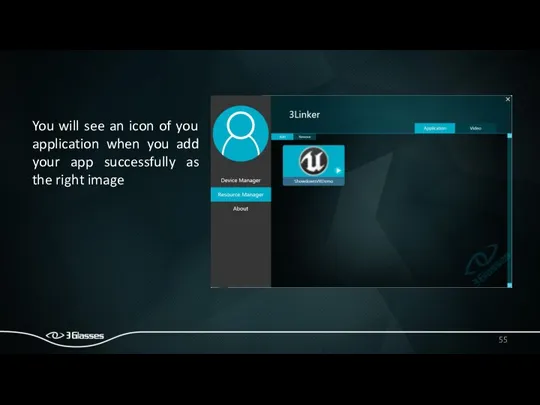
- 55. You will see an icon of you application when you add your app successfully as the
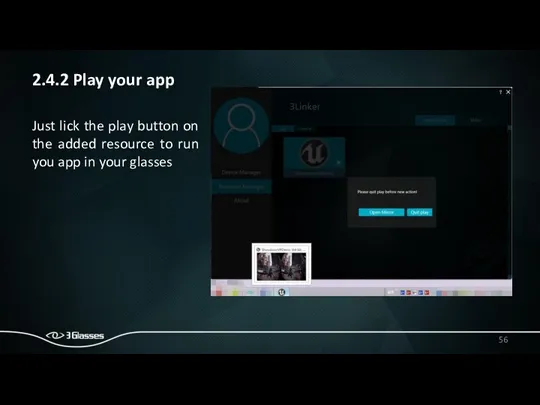
- 56. 2.4.2 Play your app Just lick the play button on the added resource to run you
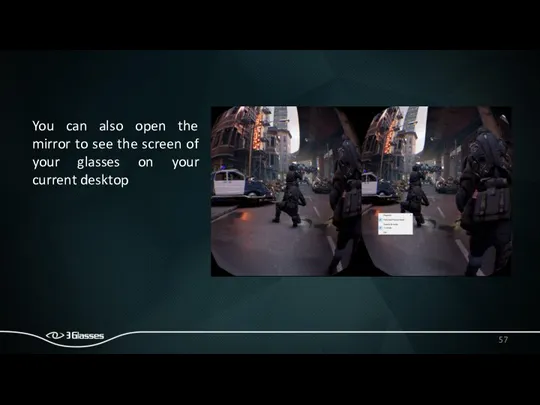
- 57. You can also open the mirror to see the screen of your glasses on your current
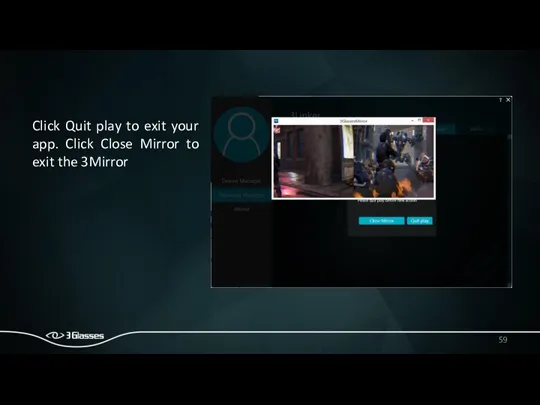
- 59. Click Quit play to exit your app. Click Close Mirror to exit the 3Mirror
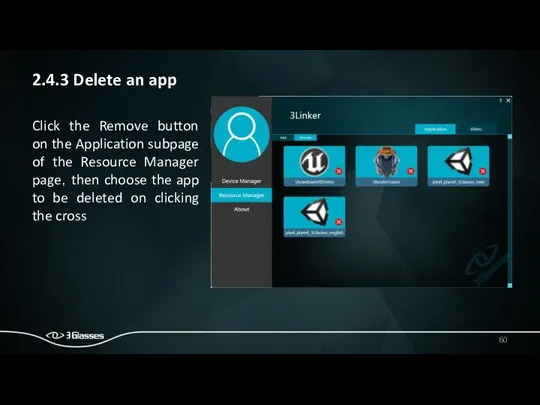
- 60. 2.4.3 Delete an app Click the Remove button on the Application subpage of the Resource Manager
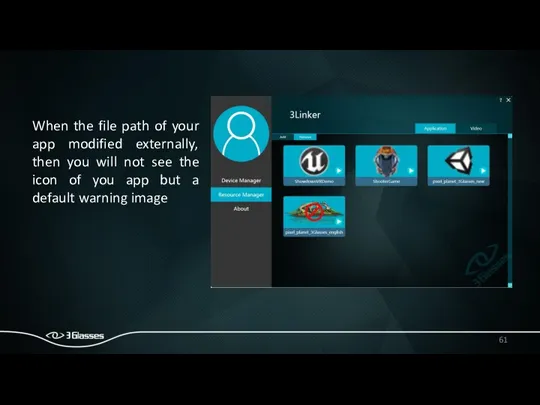
- 61. When the file path of your app modified externally, then you will not see the icon
- 62. D About
- 63. 3. Check updates of 3Linker You can click the Check updates button on the About page
- 64. When there is a new version, a download page will be opened automatically
- 65. When there is no updates, a warning window will be shown as the right image
- 67. Скачать презентацию


A
Installation
A
Installation
1.1 Double click your installation file
Warning: the installation will firstly uninstall
1.1 Double click your installation file
Warning: the installation will firstly uninstall

1.2 Choose necessary components
The installation program will choose the necessary
1.2 Choose necessary components
The installation program will choose the necessary


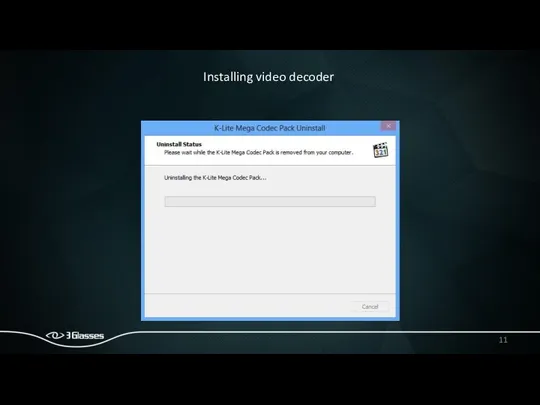
Installing video decoder
Installing video decoder


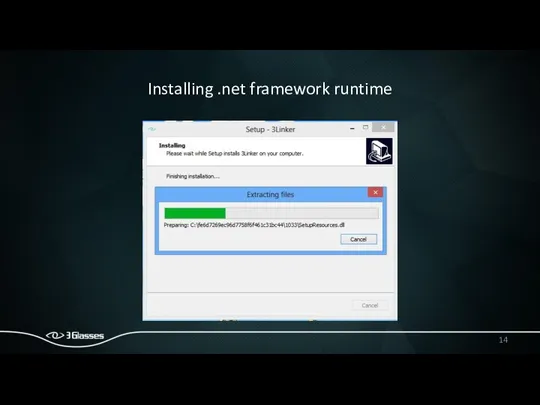
Installing .net framework runtime
Installing .net framework runtime


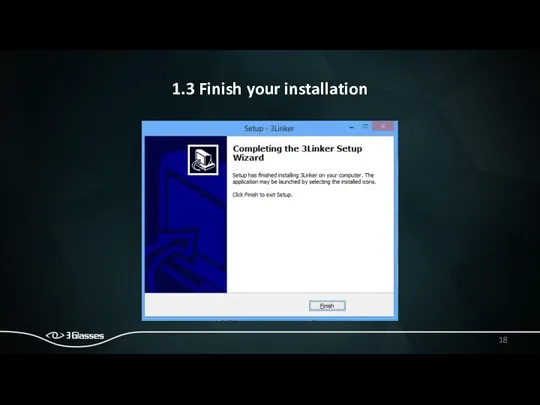
1.3 Finish your installation
1.3 Finish your installation
B
Device Management
B
Device Management
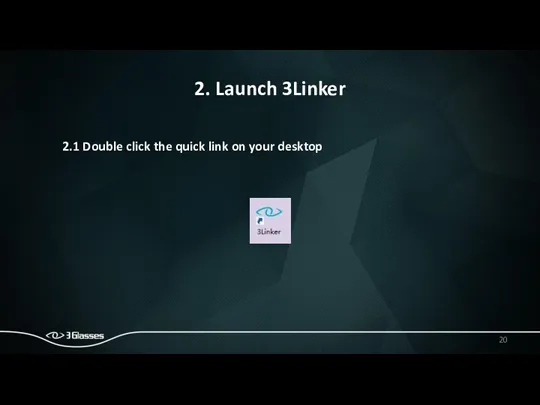
2. Launch 3Linker
2.1 Double click the quick link on your desktop
2. Launch 3Linker
2.1 Double click the quick link on your desktop
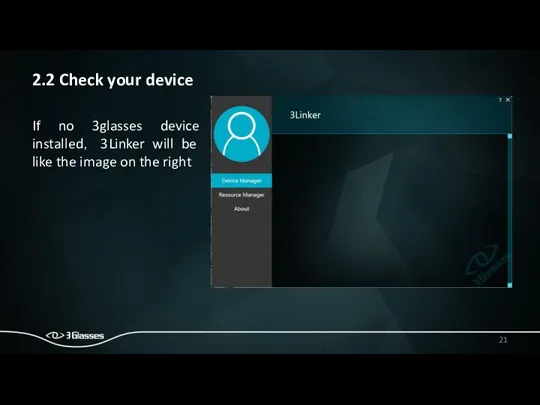
2.2 Check your device
If no 3glasses device installed, 3Linker will be
2.2 Check your device
If no 3glasses device installed, 3Linker will be
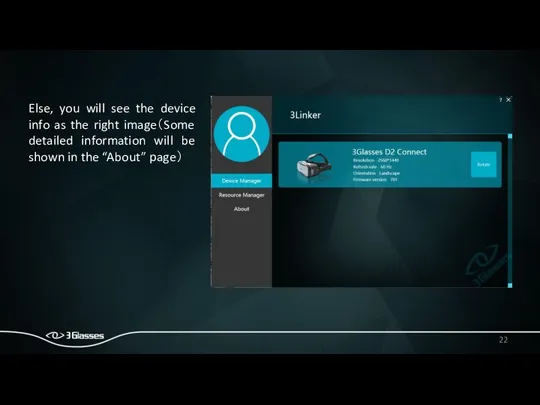
Else, you will see the device info as the right image(Some
Else, you will see the device info as the right image(Some
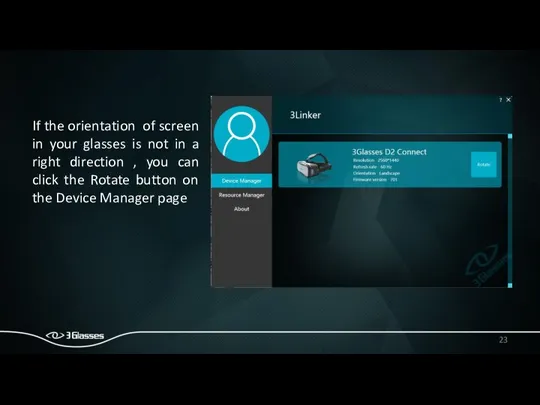
If the orientation of screen in your glasses is not in
If the orientation of screen in your glasses is not in
If you want to check this manual, you can click the

2.3 Update your firmware
When the version of your inserted device firmware,
2.3 Update your firmware
When the version of your inserted device firmware,

Click yes to update your firmware
This image shows the updating status
When update successes, you will see the new firmware version on
When update successes, you will see the new firmware version on
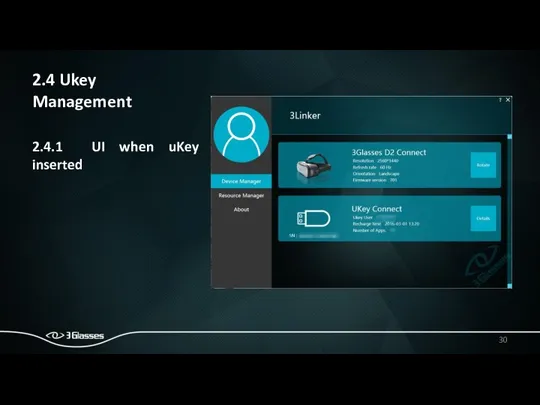
2.4 Ukey Management
2.4.1 UI when uKey inserted
2.4 Ukey Management
2.4.1 UI when uKey inserted
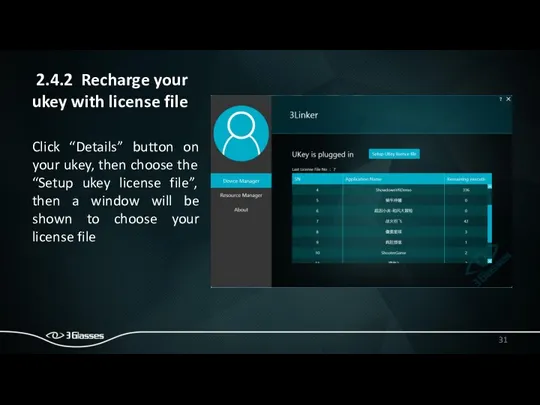
2.4.2 Recharge your ukey with license file
Click “Details” button on
2.4.2 Recharge your ukey with license file
Click “Details” button on
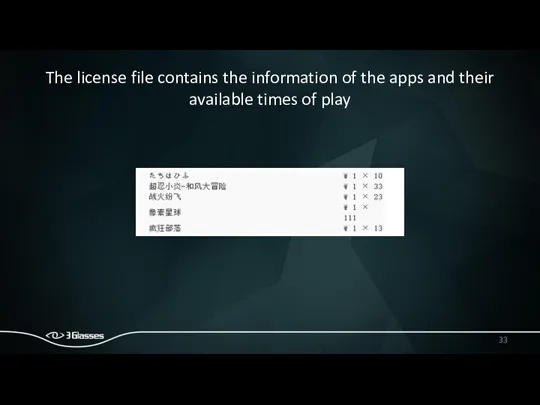
The license file contains the information of the apps and their
The license file contains the information of the apps and their

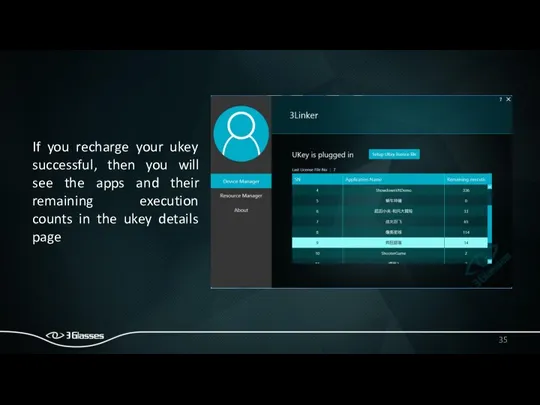
If you recharge your ukey successful, then you will see the
2.4.2 Failed to recharge your ukey
If you are using a license
2.4.2 Failed to recharge your ukey
If you are using a license
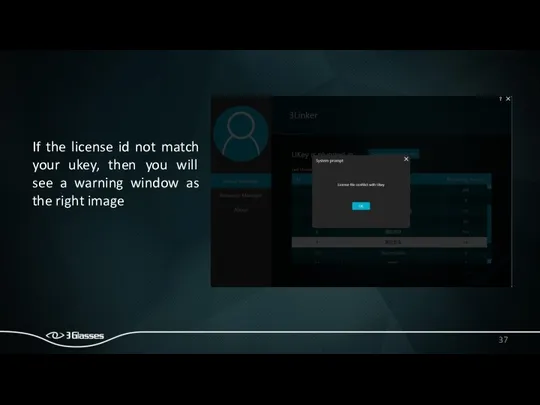
If the license id not match your ukey, then you will
C
Resource management
C
Resource management
3 Manage your video resource
3.1 Add new video resource
You can click
3 Manage your video resource
3.1 Add new video resource
You can click
Then browse the file to add. Remember to set the video
Then browse the file to add. Remember to set the video
You can also drag and drop a video from your local
You can also drag and drop a video from your local
When you add your video successfully, you will see a preview
When you add your video successfully, you will see a preview
2.3.2 Change the play mode
2.3.2 Change the play mode

2.3.3 Play your video
Click the play button of your video icon,
2.3.3 Play your video
Click the play button of your video icon,
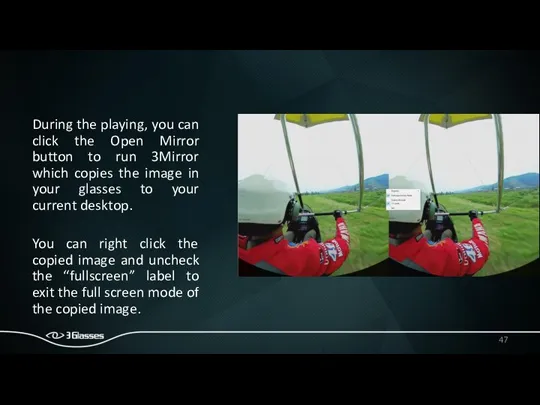
During the playing, you can click the Open Mirror button to
During the playing, you can click the Open Mirror button to

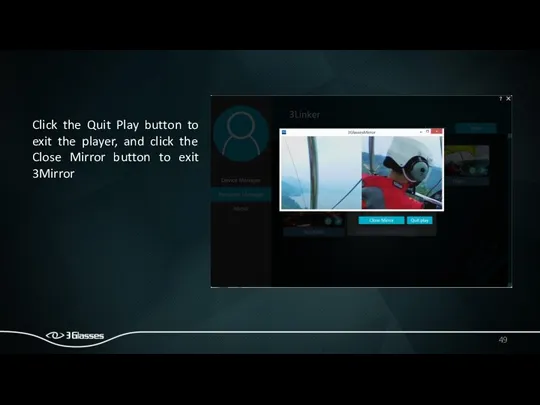
Click the Quit Play button to exit the player, and click
Click the Quit Play button to exit the player, and click
2.3.4 Delete video resource :
Click the Remove button on the
2.3.4 Delete video resource :
Click the Remove button on the
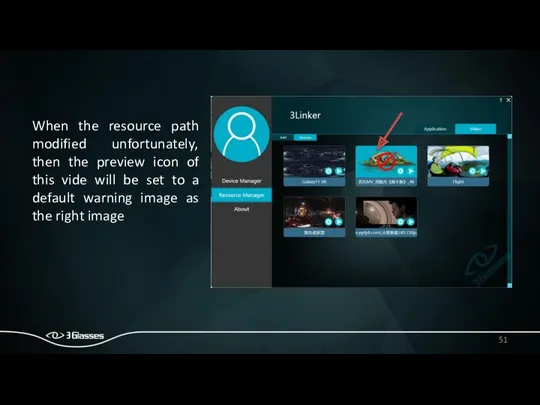
When the resource path modified unfortunately, then the preview icon of
When the resource path modified unfortunately, then the preview icon of
2.4 Manage your apps
2.4.1 Add resource
Click the Add button on the
2.4 Manage your apps
2.4.1 Add resource
Click the Add button on the
You can also drag an “.exe” file to the Resource Manager
You will see an icon of you application when you add
You will see an icon of you application when you add
2.4.2 Play your app
Just lick the play button on the added
2.4.2 Play your app
Just lick the play button on the added
You can also open the mirror to see the screen of
You can also open the mirror to see the screen of

Click Quit play to exit your app. Click Close Mirror to
Click Quit play to exit your app. Click Close Mirror to
2.4.3 Delete an app
Click the Remove button on the Application subpage
2.4.3 Delete an app
Click the Remove button on the Application subpage
When the file path of your app modified externally, then you
When the file path of your app modified externally, then you

D
About
D
About
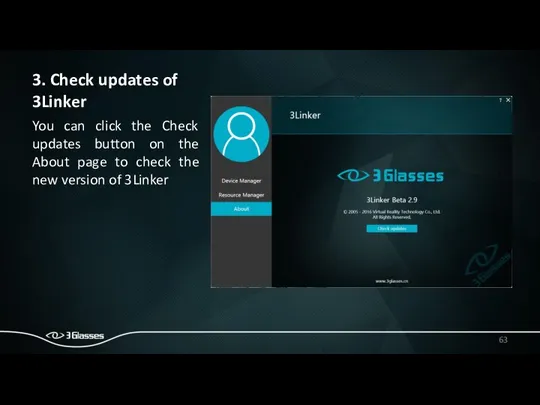
3. Check updates of 3Linker
You can click the Check updates button
3. Check updates of 3Linker
You can click the Check updates button
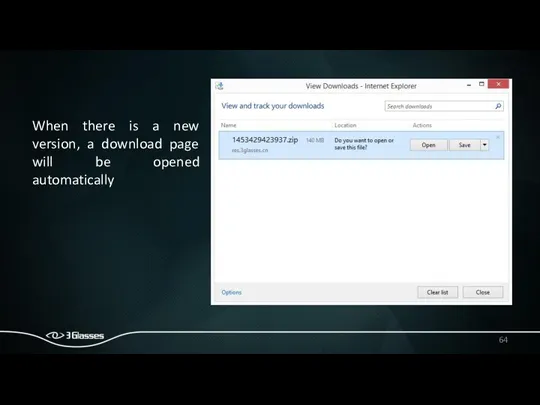
When there is a new version, a download page will be
When there is a new version, a download page will be
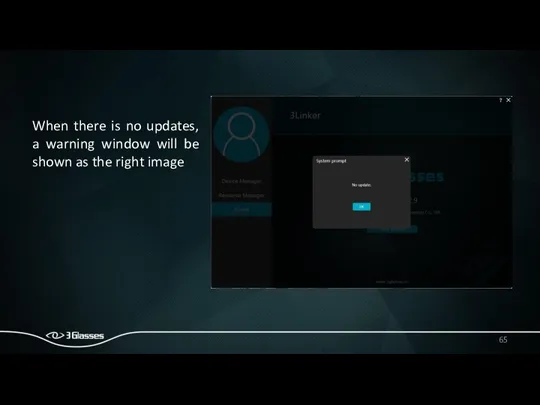
When there is no updates, a warning window will be shown
When there is no updates, a warning window will be shown
 Вставка гиперссылки в веб-страницу
 Понятие как форма мышления. 6 класс
 Интеллектуальные информационные системы и технологии
 Операторы языка Бейсик
 Медіахолдинг Новини
 Сети: основные понятия IT Essentials v7.0
 Введение. Проектирование и разработка веб-сервисов
 Файловая система ОС UNIX. (Занятия 5 и 6)
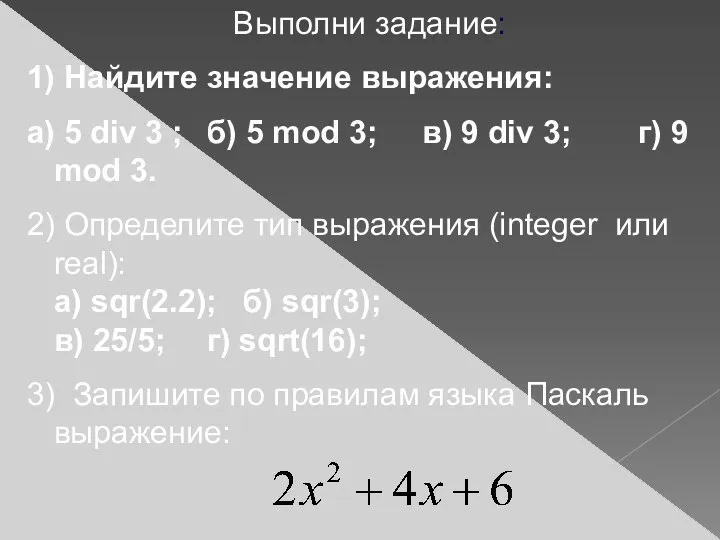 Оператор ветвления
 Interfaces. User Interface
 Определение количества информации
 Рабочий инструмент B2CTS
 Информационные технологии в отеле. Система бронирования номеров
 Алгоритмы. Введение в программирование
 IP-протокол. Визначення
 Продвижение бизнеса и бренда в социальных сетях
 Логика объектно-ориентированного подхода
 Универсальный современный популярный язык программирования
 Страницы. MS WORD 4
 Расшифровка VIN BMW
 Базы данных и управление ими
 Опасности в Интернете. Перечень опасностей
 История счета и систем счисления
 Язык запросов SQL. Введение. (Лекция 6, 7)
 Классификация ЧМ интерфейсов
 Запись вспомогательных алгоритмов на языке Python (9 класс)
 Презентация. Представление о Power Point
 Рекомендательные библиографические пособия : виды, структура, составление