- Configuring a SINAMICS G130 or G150 offline

Содержание
- 2. In the Project Navigator, click on Configure drive unit in order to start the Wizard.
- 3. Here, select the line supply voltage of the drive inverter. Selecting the drive unit Here, select
- 4. Selecting the options that you have ordered In this dialog, you can select the options used
- 5. Selecting the function modules and the control mode In this dialog you have to choose the
- 6. Select the Standard applicable for the motor Select the Standard for operation. International Standard IEC (Standard)
- 7. Ways of selecting motors You can either select a SIEMENS motor from the list - or
- 8. Entering motor data according to the rating plate This dialog box is only displayed if Enter
- 9. Selecting the default settings for your command and setpoint sources for the standard data set (CDS0)
- 10. Make the appropriate control settings and select a Profibus telegram Here, you can define the type
- 11. Select a Profibus telegram Here, you can select the Profibus telegram. You can either select a
- 12. Entering the most important drive parameters Here, enter the most important drive parameters. Click on Continue
- 13. Summary of the settings made In this window you can see a summary of the settings
- 15. Скачать презентацию
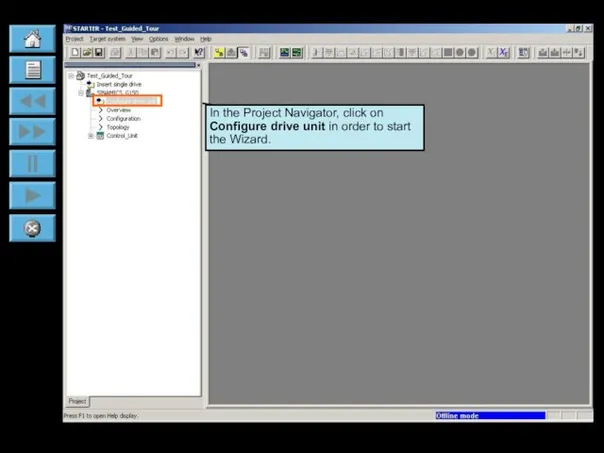
In the Project Navigator, click on Configure drive unit in order
In the Project Navigator, click on Configure drive unit in order
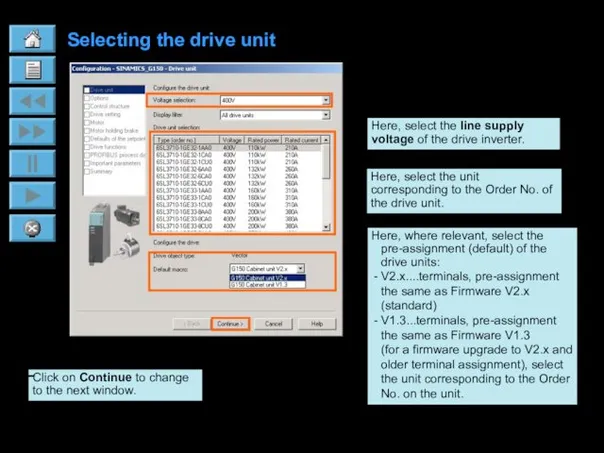
Here, select the line supply voltage of the drive inverter.
Selecting the
Here, select the line supply voltage of the drive inverter.
Selecting the
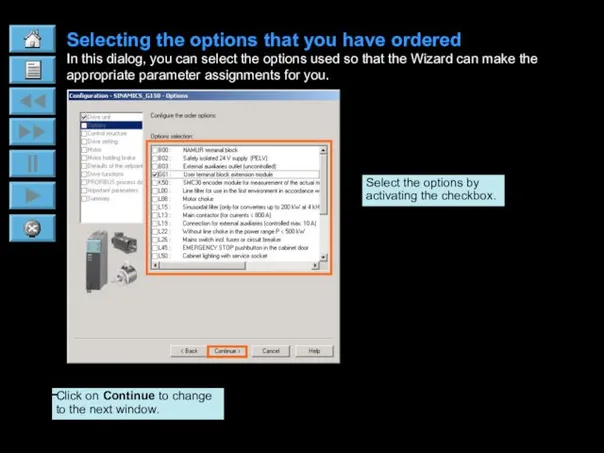
Selecting the options that you have ordered
In this dialog, you can
Selecting the options that you have ordered
In this dialog, you can

Selecting the function modules and the control mode
In this dialog you
Selecting the function modules and the control mode
In this dialog you
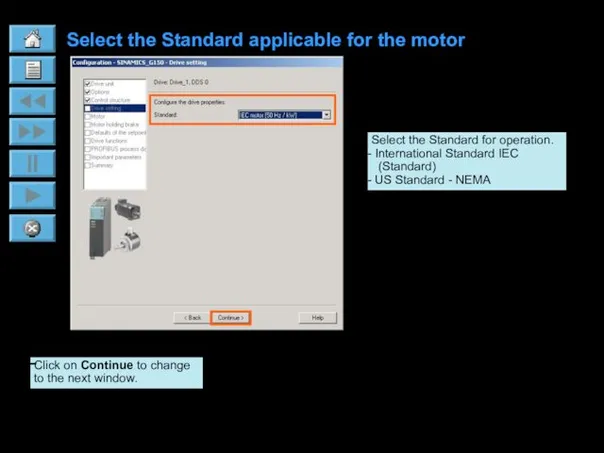
Select the Standard applicable for the motor
Select the Standard for operation.
Select the Standard applicable for the motor
Select the Standard for operation.
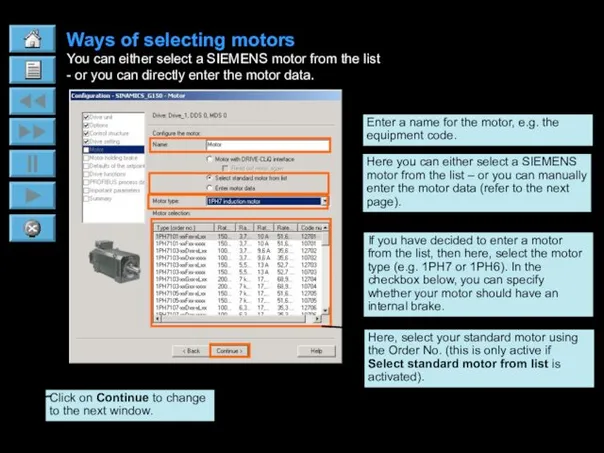
Ways of selecting motors
You can either select a SIEMENS motor from
Ways of selecting motors
You can either select a SIEMENS motor from
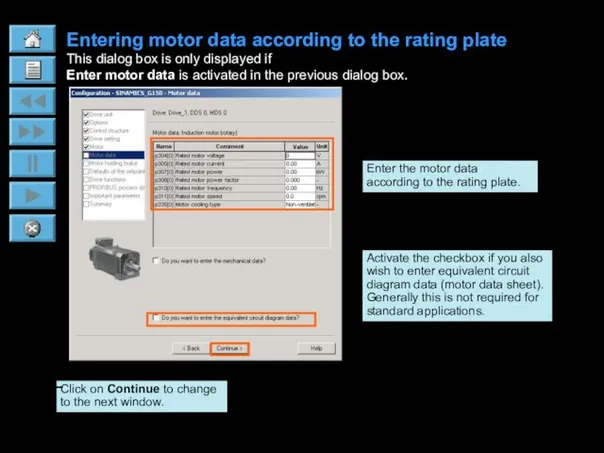
Entering motor data according to the rating plate
This dialog box is
Entering motor data according to the rating plate
This dialog box is
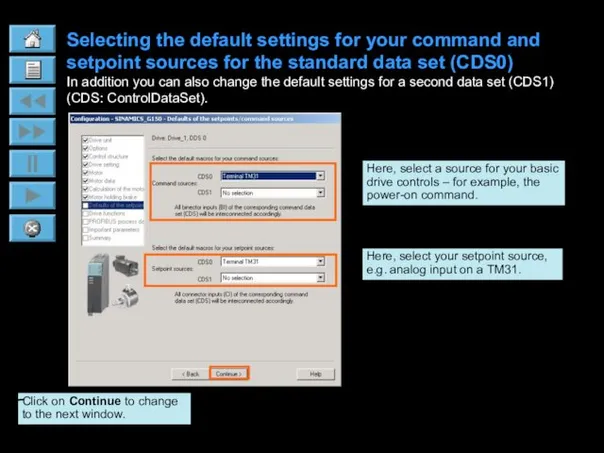
Selecting the default settings for your command and setpoint sources for
Selecting the default settings for your command and setpoint sources for
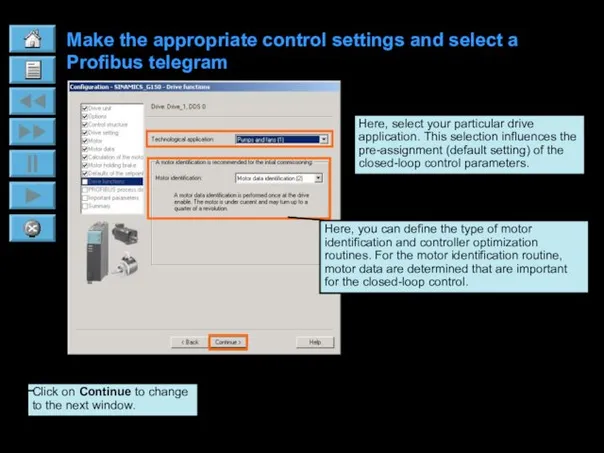
Make the appropriate control settings and select a Profibus telegram
Here, you
Make the appropriate control settings and select a Profibus telegram
Here, you
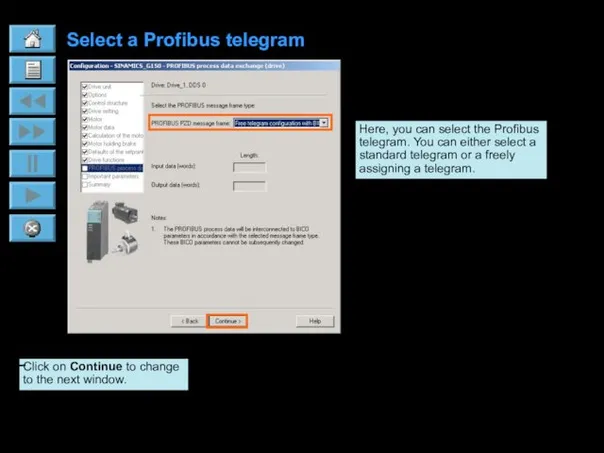
Select a Profibus telegram
Here, you can select the Profibus telegram. You
Select a Profibus telegram
Here, you can select the Profibus telegram. You
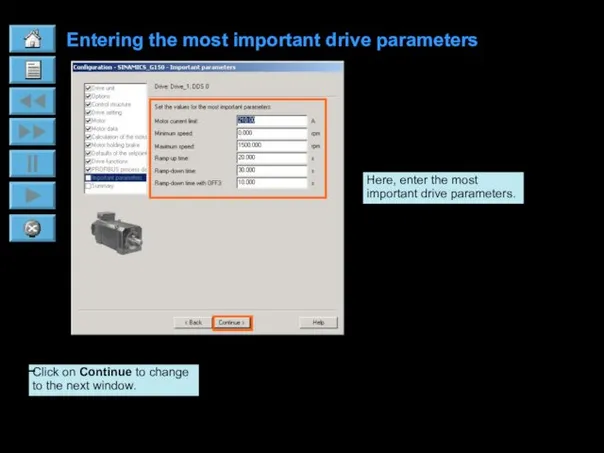
Entering the most important drive parameters
Here, enter the most important drive
Entering the most important drive parameters
Here, enter the most important drive
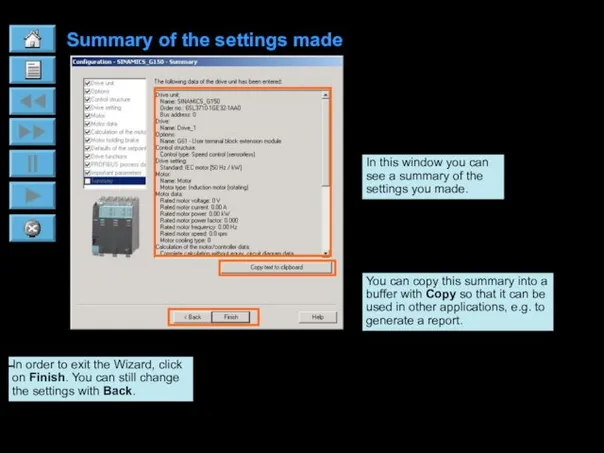
Summary of the settings made
In this window you can see a
Summary of the settings made
In this window you can see a
 Объекты ядра Windows
 Базы данных и системы управления базами данных
 Электронная почта
 Google Drive
 Асинхронный js
 Журналистика. Первые шаги в создании сюжетов
 Dressage Training Tips from Experts
 Бинарные деревья
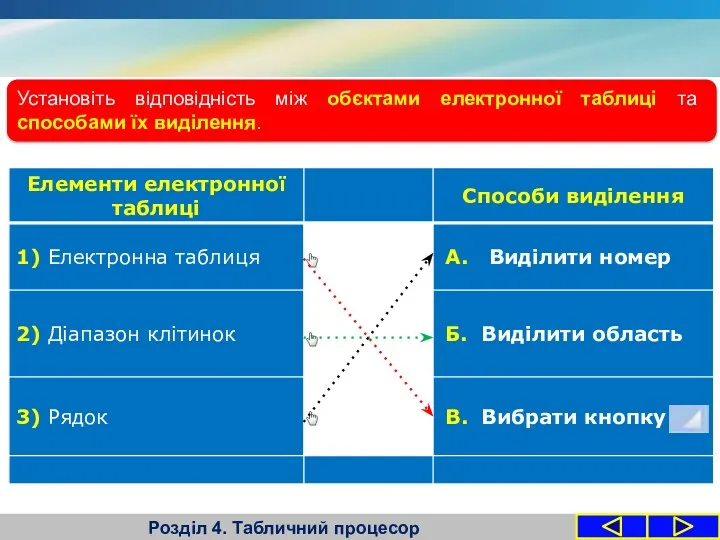 Формати даних: числовий, текстовий, формат дати. Табличний процесор
 Тораптық утелиттердің жұмысын оқып үйрену
 Интернет в жизни человека
 Отчет по Проекту 9САД2.20. О компании
 Repository and Unit of Work
 Форматы_графических_файлов
 Основы разработки серверной части Web-приложения
 Мультипрограммирование на основе прерываний
 Организация ветвления на языке Паскаль
 Сжатие, архивация и разархивация данных. Архиваторы. Работа с архивами
 MrBeast
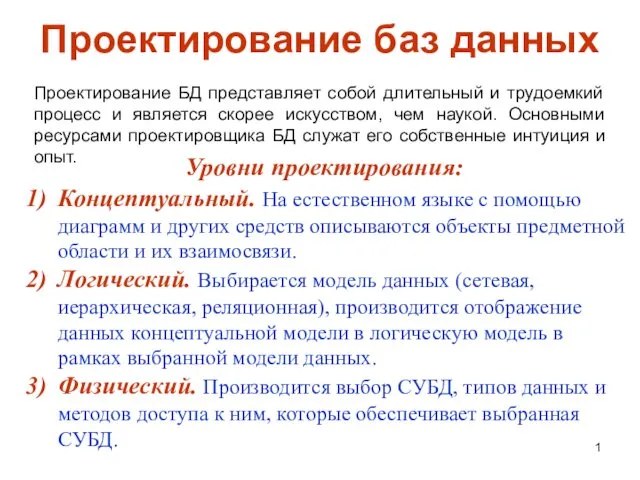 Проектирование баз данных
 Алгоритм. Свойства. Способы записи. Линейные алгоритмы
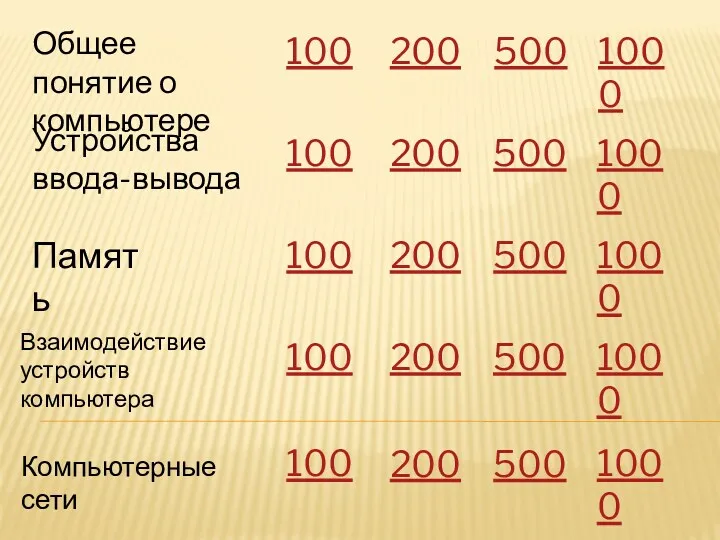 Игровая презентация СВОЯ ИГРА на тему Компьютер как средство обработки информации
 Создание Web-сайта. Структура Web-сайта
 Автоматическая обработка информации
 Троянские программы и защита от них
 Циклы в Паскале
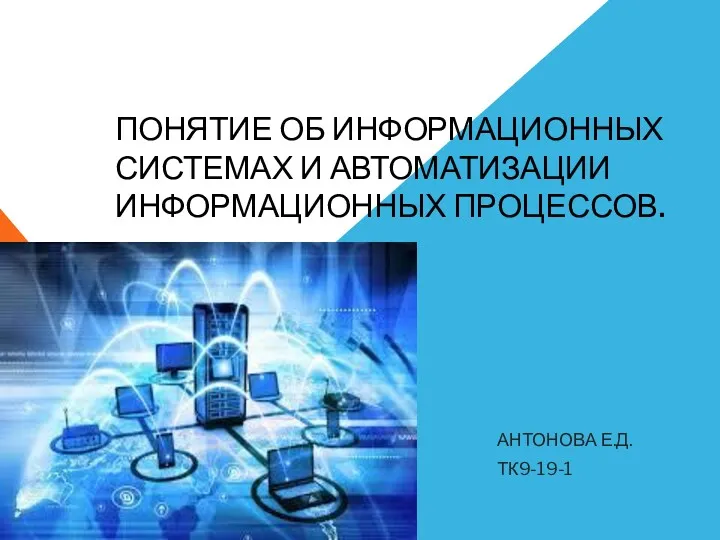 Понятие об информационных системах и автоматизации информационных процессов
 3. Java Persistence API. 5. Transaction Management