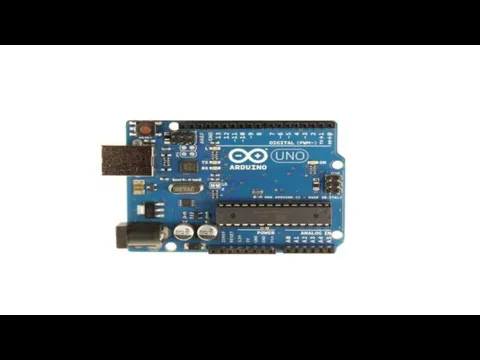
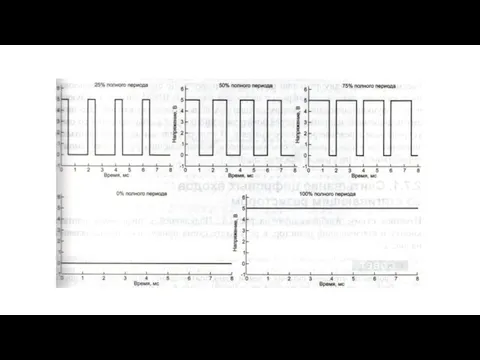
- Arduino Uno. Цифровые контакты ввода-вывода. Широтно-импульсная модуляция

Содержание
- 2. Первая программа Задача: Необходимо заставить мигать светодиод, расположенный на плате. Этот светодиод подключен к цифровому контакту
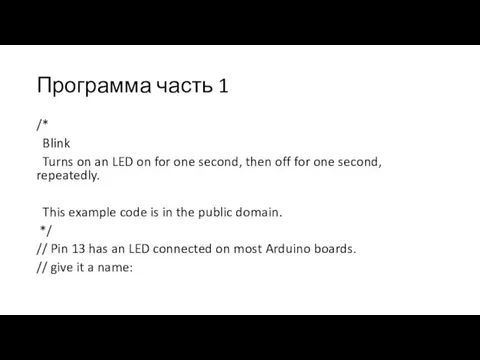
- 5. Программа часть 1 /* Blink Turns on an LED on for one second, then off for
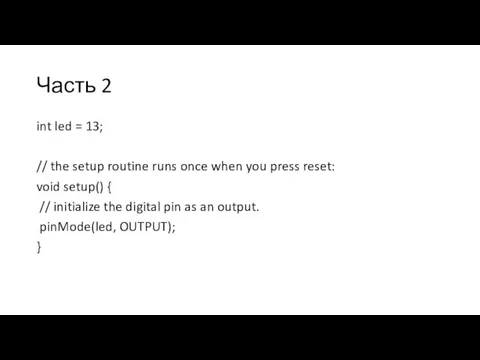
- 6. Часть 2 int led = 13; // the setup routine runs once when you press reset:
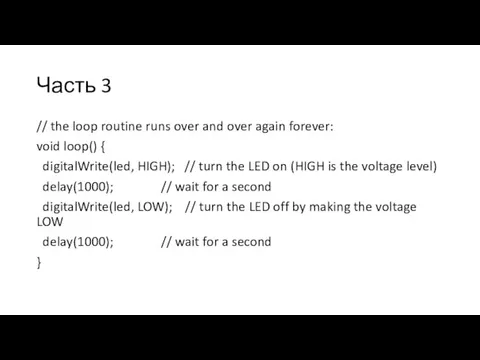
- 7. Часть 3 // the loop routine runs over and over again forever: void loop() { digitalWrite(led,
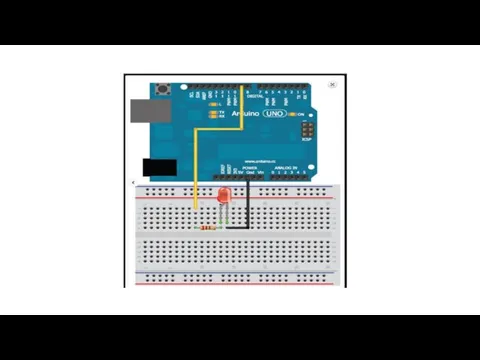
- 8. Подключение внешнего светодиода
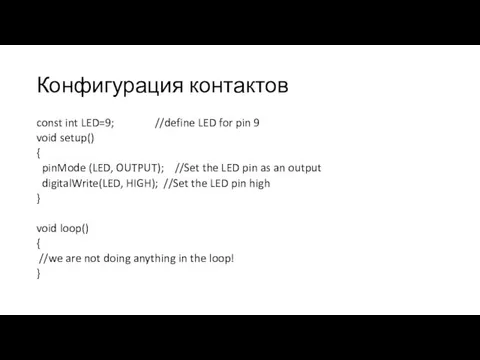
- 10. Конфигурация контактов const int LED=9; //define LED for pin 9 void setup() { pinMode (LED, OUTPUT);
- 11. Изменение частоты мигания светодиода const int LED=9; //define LED for Pin 9 void setup() { pinMode
- 12. Изменение яркости светодиода const int LED=9; //define LED for Pin 9 void setup() { pinMode (LED,
- 14. Считывание данных с цифровых контактов
- 15. const int LED=9; //The LED is connected to pin 9 const int BUTTON=2; //The Button is
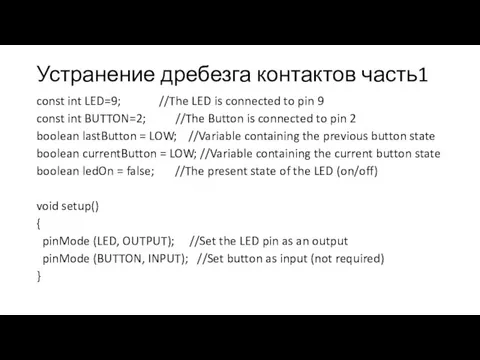
- 16. Устранение дребезга контактов часть1 const int LED=9; //The LED is connected to pin 9 const int
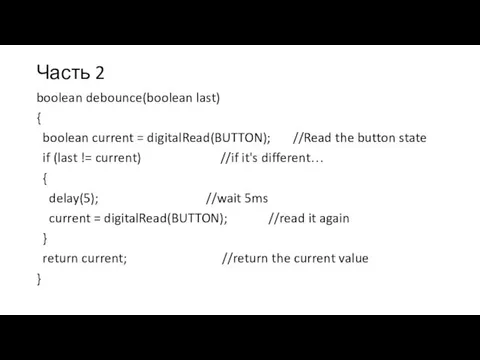
- 17. Часть 2 boolean debounce(boolean last) { boolean current = digitalRead(BUTTON); //Read the button state if (last
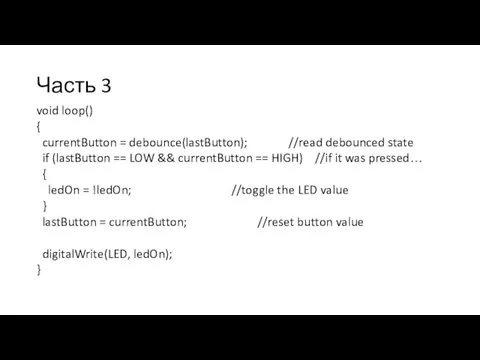
- 18. Часть 3 void loop() { currentButton = debounce(lastButton); //read debounced state if (lastButton == LOW &&
- 19. Управление RBG-светодиодом
- 20. Часть 1 const int BLED=9; //Blue LED on Pin 9 const int GLED=10; //Green LED on
- 21. Часть 2 void setup() { pinMode (BLED, OUTPUT); //Set Blue LED as Output pinMode (GLED, OUTPUT);
- 22. Часть 3 boolean debounce(boolean last) { boolean current = digitalRead(BUTTON); //Read the button state if (last
- 23. Часть 4 void setMode(int mode) { //RED if (mode == 1) { digitalWrite(RLED, HIGH); digitalWrite(GLED, LOW);
- 24. Часть 5 //BLUE else if (mode == 3) { digitalWrite(RLED, LOW); digitalWrite(GLED, LOW); digitalWrite(BLED, HIGH); }
- 25. Часть 6 //TEAL (BLUE+GREEN) else if (mode == 5) { analogWrite(RLED, 0); analogWrite(GLED, 127); analogWrite(BLED, 127);
- 26. Часть 7 //WHITE (GREEN+RED+BLUE) else if (mode == 7) { analogWrite(RLED, 85); analogWrite(GLED, 85); analogWrite(BLED, 85);
- 28. Скачать презентацию

Первая программа
Задача:
Необходимо заставить мигать светодиод, расположенный на плате.
Этот светодиод подключен к
Первая программа
Задача:
Необходимо заставить мигать светодиод, расположенный на плате.
Этот светодиод подключен к
Программа часть 1
/*
Blink
Turns on an LED on for one
Программа часть 1
/*
Blink
Turns on an LED on for one
Часть 2
int led = 13;
// the setup routine runs once when
Часть 2
int led = 13;
// the setup routine runs once when
Часть 3
// the loop routine runs over and over again forever:
void
Часть 3
// the loop routine runs over and over again forever:
void
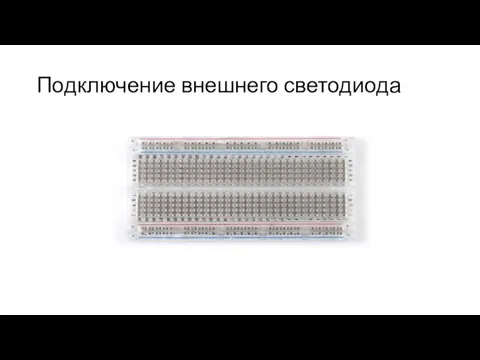
Подключение внешнего светодиода
Подключение внешнего светодиода
Конфигурация контактов
const int LED=9; //define LED for pin 9
void setup()
{
pinMode
Конфигурация контактов
const int LED=9; //define LED for pin 9
void setup()
{
pinMode
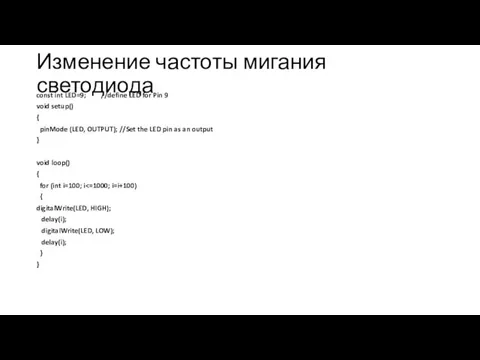
Изменение частоты мигания светодиода
const int LED=9; //define LED for Pin 9
void
Изменение частоты мигания светодиода
const int LED=9; //define LED for Pin 9
void
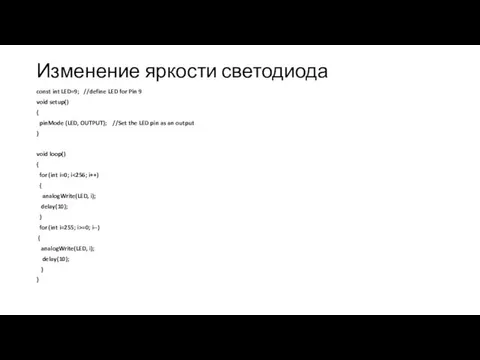
Изменение яркости светодиода
const int LED=9; //define LED for Pin 9
void setup()
{
Изменение яркости светодиода
const int LED=9; //define LED for Pin 9
void setup()
{
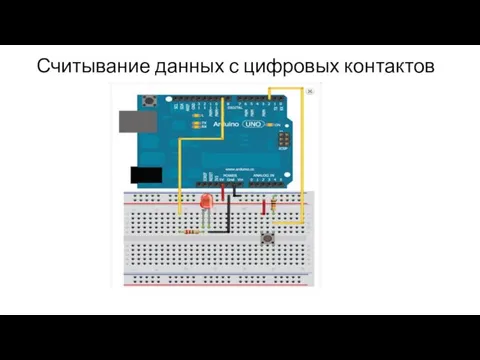
Считывание данных с цифровых контактов
Считывание данных с цифровых контактов
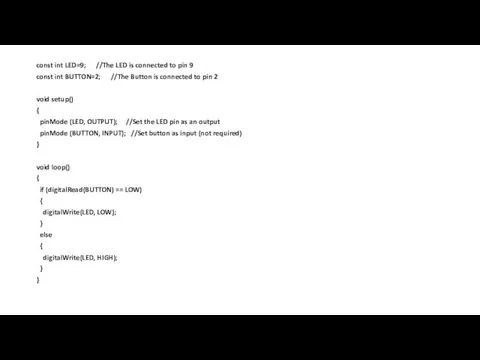
const int LED=9; //The LED is connected to pin 9
const int
const int LED=9; //The LED is connected to pin 9
const int
Устранение дребезга контактов часть1
const int LED=9; //The LED is connected to
Устранение дребезга контактов часть1
const int LED=9; //The LED is connected to
Часть 2
boolean debounce(boolean last)
{
boolean current = digitalRead(BUTTON); //Read the button
Часть 2
boolean debounce(boolean last)
{
boolean current = digitalRead(BUTTON); //Read the button
Часть 3
void loop()
{
currentButton = debounce(lastButton); //read debounced state
if (lastButton
Часть 3
void loop()
{
currentButton = debounce(lastButton); //read debounced state
if (lastButton
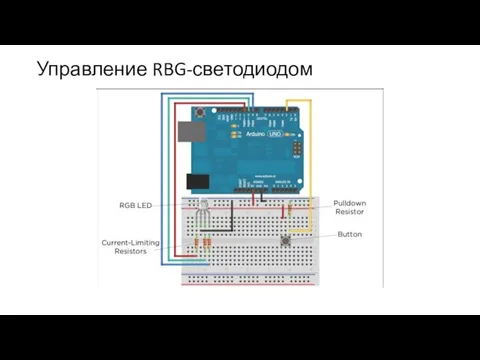
Управление RBG-светодиодом
Управление RBG-светодиодом
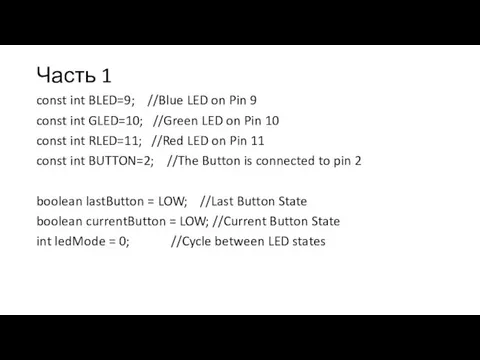
Часть 1
const int BLED=9; //Blue LED on Pin 9
const int GLED=10;
Часть 1
const int BLED=9; //Blue LED on Pin 9
const int GLED=10;
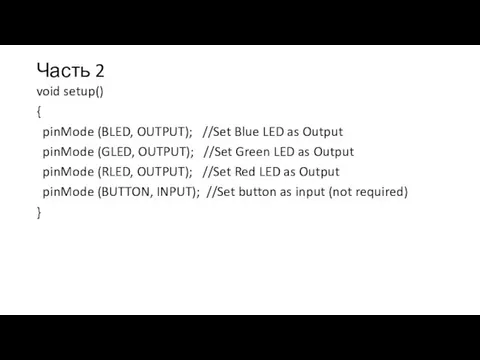
Часть 2
void setup()
{
pinMode (BLED, OUTPUT); //Set Blue LED as Output
Часть 2
void setup()
{
pinMode (BLED, OUTPUT); //Set Blue LED as Output
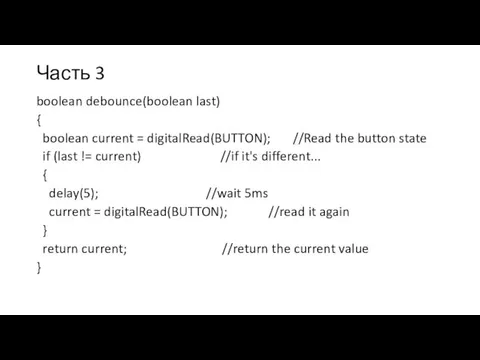
Часть 3
boolean debounce(boolean last)
{
boolean current = digitalRead(BUTTON); //Read the button
Часть 3
boolean debounce(boolean last)
{
boolean current = digitalRead(BUTTON); //Read the button
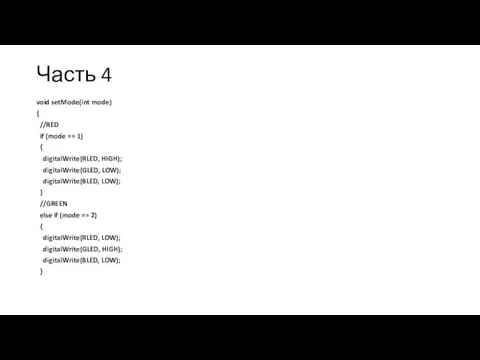
Часть 4
void setMode(int mode)
{
//RED
if (mode == 1)
{
digitalWrite(RLED,
Часть 4
void setMode(int mode)
{
//RED
if (mode == 1)
{
digitalWrite(RLED,
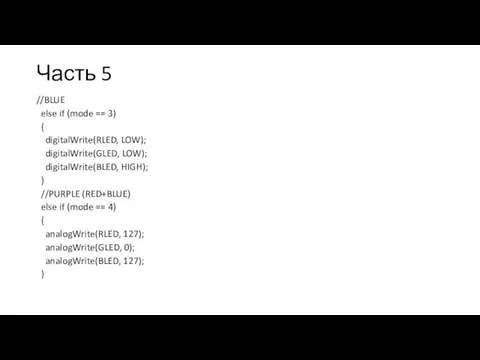
Часть 5
//BLUE
else if (mode == 3)
{
digitalWrite(RLED, LOW);
digitalWrite(GLED,
Часть 5
//BLUE
else if (mode == 3)
{
digitalWrite(RLED, LOW);
digitalWrite(GLED,
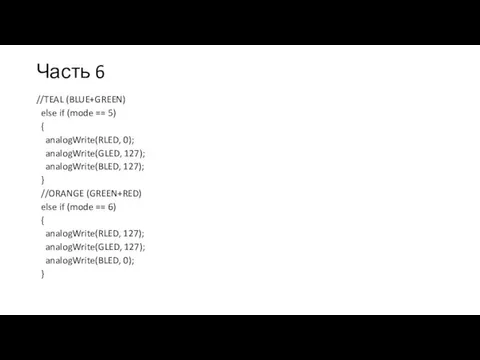
Часть 6
//TEAL (BLUE+GREEN)
else if (mode == 5)
{
analogWrite(RLED, 0);
Часть 6
//TEAL (BLUE+GREEN)
else if (mode == 5)
{
analogWrite(RLED, 0);
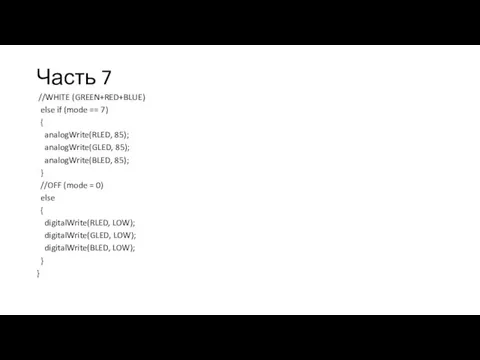
Часть 7
//WHITE (GREEN+RED+BLUE)
else if (mode == 7)
{
analogWrite(RLED,
Часть 7
//WHITE (GREEN+RED+BLUE)
else if (mode == 7)
{
analogWrite(RLED,
 Презентация по теме: Соли и их классификация
 Ландшафтный дизайн и озеленение участка
 Презентация викторина 12 декабря день Конституции России
 Овеянные славою флаг наш и герб
 Внутренняя секреция. Гормоны. Адаптационный синдром
 Оценка эффективности инвестиционного проекта
 Память: механизмы запоминания, кратковременная и долговременная память
 Основы пайки
 Массаж по Дьяковой Е.А.
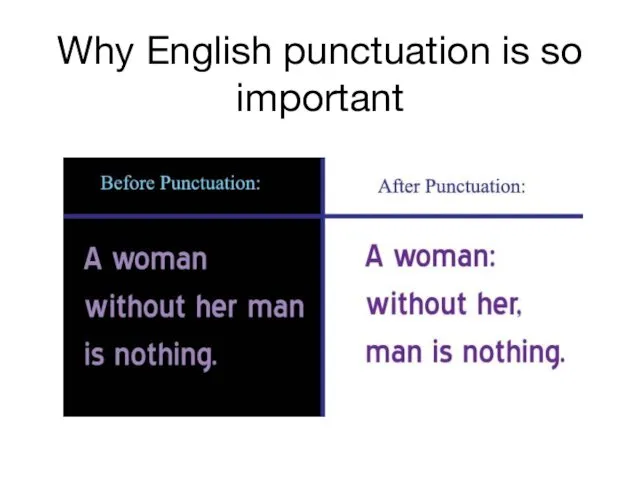 Why English punctuation is so important
 Все народы воспевают материнство. Авторский урок 4 класс
 Watch the animals and choose true ‘true’ or ‘false’. False
 Презентация к уроку технологии Грибы
 Тип хордовые. Общая характеристика
 Классный час: 200 - летие Бородинской битвы. Конспект и презентация. 3- 4 класс.
 Особенности подачи закусок, блюд и напитков
 Препарация зубов под Targis/Vectris
 Морфология русского языка
 Педсовет по теме Организация исследовательской деятельности в урочное и внеурочное время (теория).
 Воспитание и обучение в Древней Индии
 Волонтерское движение в России и мире
 Спутник-1. Первый искусственный спутник Земли, советский космический аппарат, запущенный на орбиту
 История автоматизированных измерений аудитории радио и телевидения
 Свет Рождественской свечи
 Фонд Молодежный центр стратегических инициатив и проектов. План реализации мероприятий
 Электронные образовательные ресурсы в начальной школе
 Мастер класс
 Эволюция кровообращения