- Cowon D2 Service Manual

Содержание
- 2. TOC
- 3. Phone-jack Polarity I/O Configuration 3. Components (2/2) EXT Port Polarity Phone-jack Port Polarity
- 4. Subject: How to Use D2 Recovery Program v0.27 L13 Step 1. Install the provided driver on
- 5. Subject: How to Use D2 Recovery Program v0.27 ③ Click File > Open ROM File and
- 6. 6. Case Perspective View 1 2 3 4 5 6 7 8 6 9 6 10
- 7. 7. Circuit Parts List (1/3) (1) Main Board Front PART NAME : COWON D2 MAIN BOARD
- 8. 7. Circuit Parts List (2/3) (2) Main Board Rear PART NAME : COWON D2 MAIN BOARD
- 9. 7. Circuit Parts List (3/3) (3) EMI CUSHION / SHEET PART NAME : COWON D2 EMI
- 10. 8. COWON D2 Block Diagram AV OUT Jack TV / Line IN, OUT Touch PAD
- 11. 9. Power Checkpoints(1/2)
- 12. 9. Power Checkpoints (2/2) ① IOVDD (Regulator / LDO) - Used in I/O transaction between PMU
- 13. 10. Fault Diagnosis Flow (1/5) POWER ON Can you turn on the player? Check J5 for
- 14. 10. Fault Diagnosis Flow (2/5) Check CPU control signals DMB module 33, 39Pin: HI 3.0V Run
- 15. 10. Fault Diagnosis Flow (3/5) Check U5 CODEC IC for the output L OUT 30Pin, R
- 16. 10. Fault Diagnosis Flow (4/5) Play movie Can you run the program? Re-download the firmware Check
- 17. 10. Fault Diagnosis Flow (5/5) Run the touchpad Is it pressed down? Check PMU U16 20~24Pins
- 18. 11. Key Parts Circuit Diagram
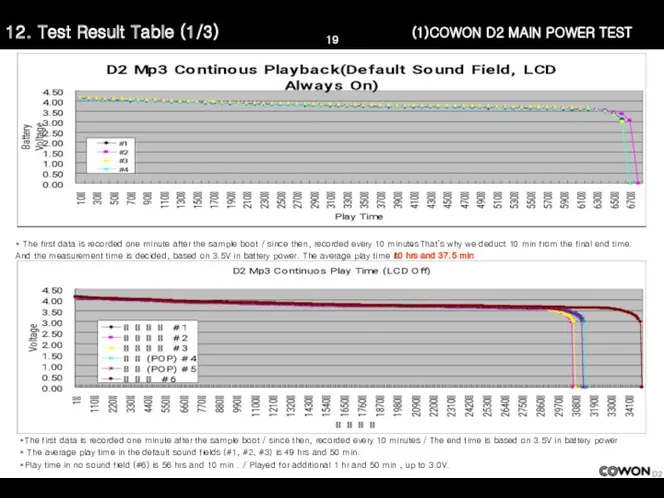
- 19. 12. Test Result Table (1/3) (1)COWON D2 MAIN POWER TEST * The first data is recorded
- 20. 12. Test Result Table (2/3) (2)COWON D2 Recharging Average Time: Approx. 3 hrs 40 min. Average
- 21. 12. Test Result Table (3/3) (3)COWON D2 Power Consumption Analysis
- 23. Скачать презентацию

TOC
TOC
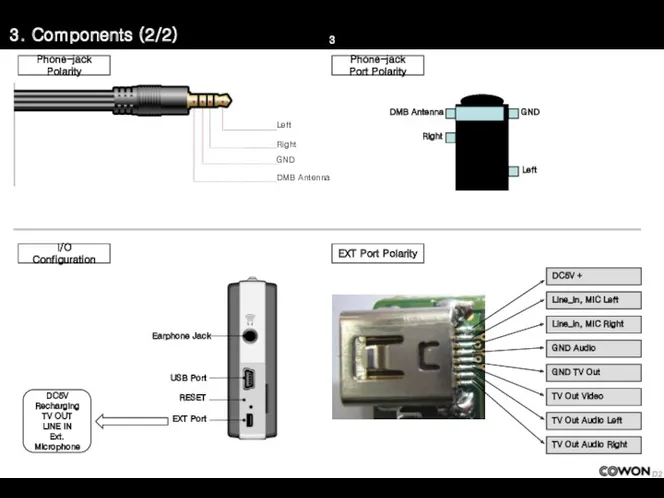
Phone-jack Polarity
I/O Configuration
3. Components (2/2)
EXT Port Polarity
Phone-jack
Port Polarity
Phone-jack Polarity
I/O Configuration
3. Components (2/2)
EXT Port Polarity
Phone-jack
Port Polarity
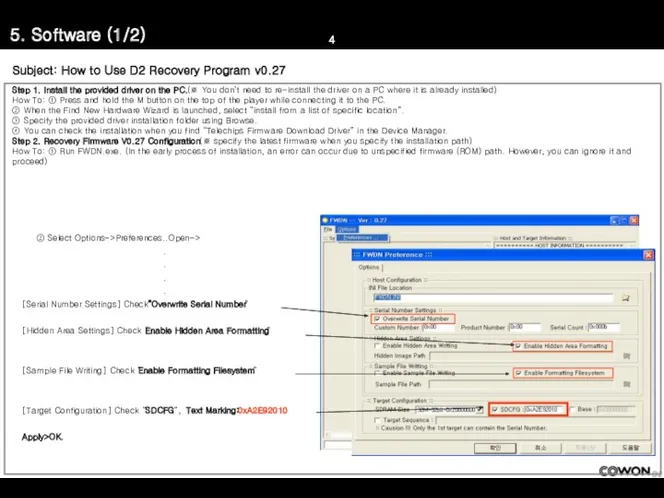
Subject: How to Use D2 Recovery Program v0.27
L13
Step 1. Install
Subject: How to Use D2 Recovery Program v0.27
L13
Step 1. Install
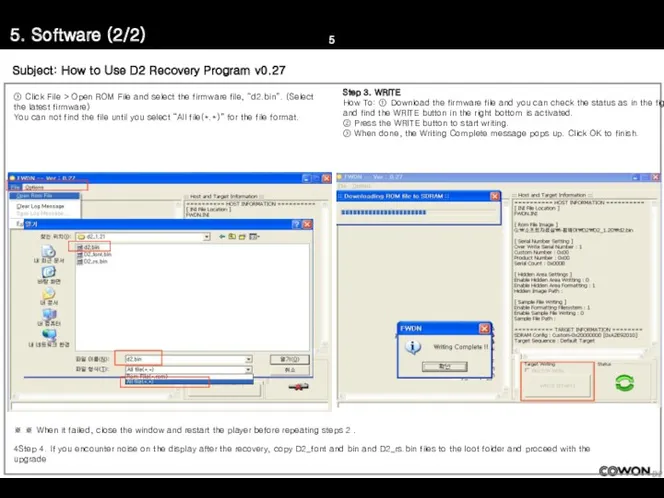
Subject: How to Use D2 Recovery Program v0.27
③ Click File
Subject: How to Use D2 Recovery Program v0.27
③ Click File
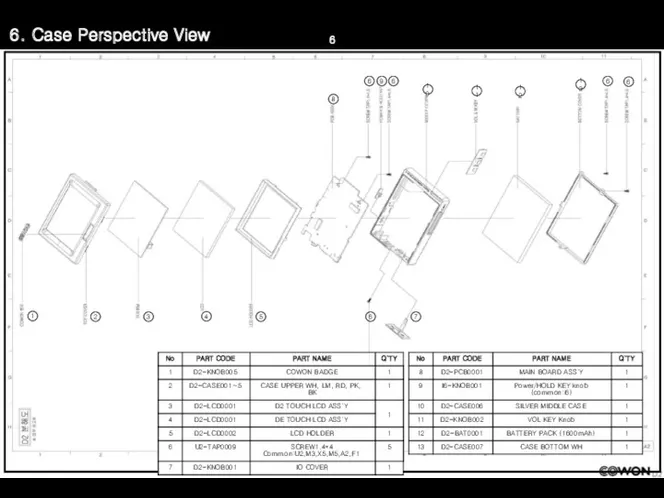
6. Case Perspective View
1
2
3
4
5
6
7
8
6
9
6
10
11
12
13
6
6
6. Case Perspective View
1
2
3
4
5
6
7
8
6
9
6
10
11
12
13
6
6
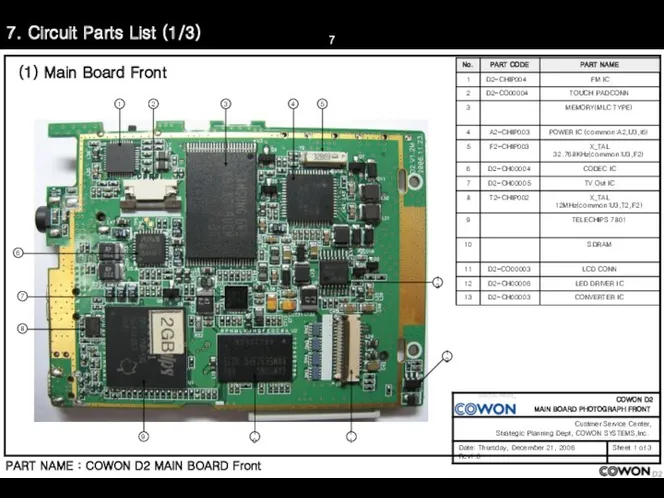
7. Circuit Parts List (1/3)
(1) Main Board Front
PART NAME : COWON
7. Circuit Parts List (1/3)
(1) Main Board Front
PART NAME : COWON
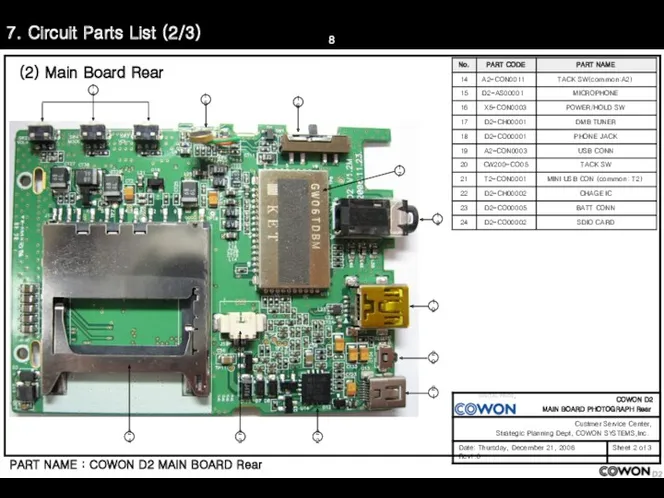
7. Circuit Parts List (2/3)
(2) Main Board Rear
PART NAME : COWON
7. Circuit Parts List (2/3)
(2) Main Board Rear
PART NAME : COWON
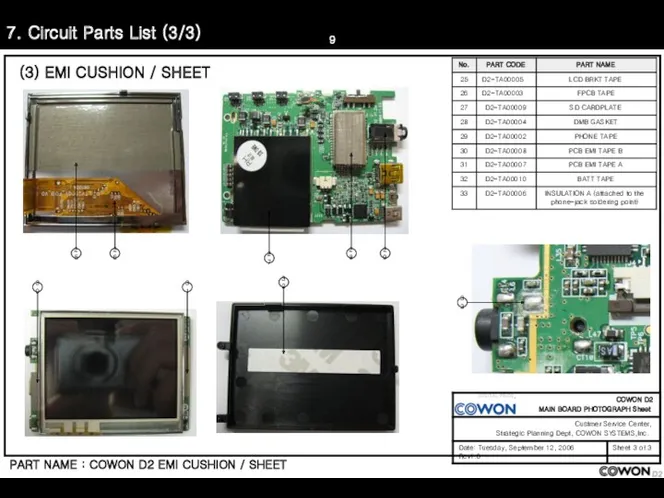
7. Circuit Parts List (3/3)
(3) EMI CUSHION / SHEET
PART NAME :
7. Circuit Parts List (3/3)
(3) EMI CUSHION / SHEET
PART NAME :

8. COWON D2 Block Diagram
AV OUT Jack
TV / Line IN, OUT
Touch
8. COWON D2 Block Diagram
AV OUT Jack
TV / Line IN, OUT
Touch
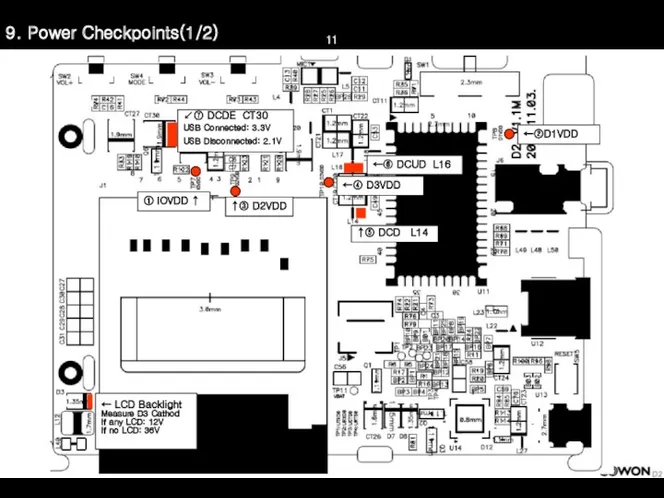
9. Power Checkpoints(1/2)
9. Power Checkpoints(1/2)
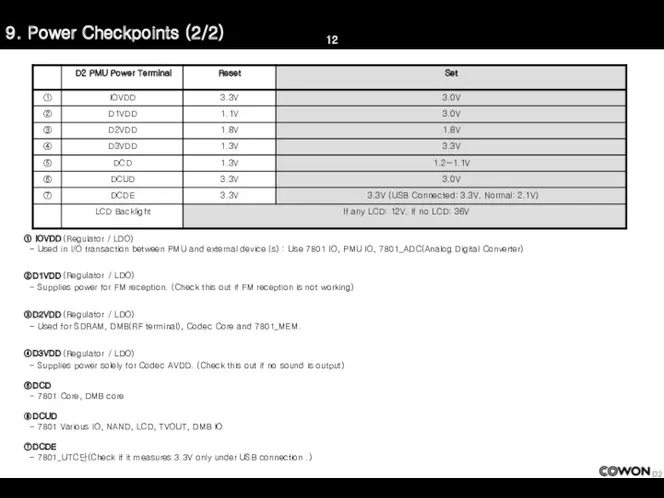
9. Power Checkpoints (2/2)
① IOVDD (Regulator / LDO)
- Used
9. Power Checkpoints (2/2)
① IOVDD (Regulator / LDO)
- Used
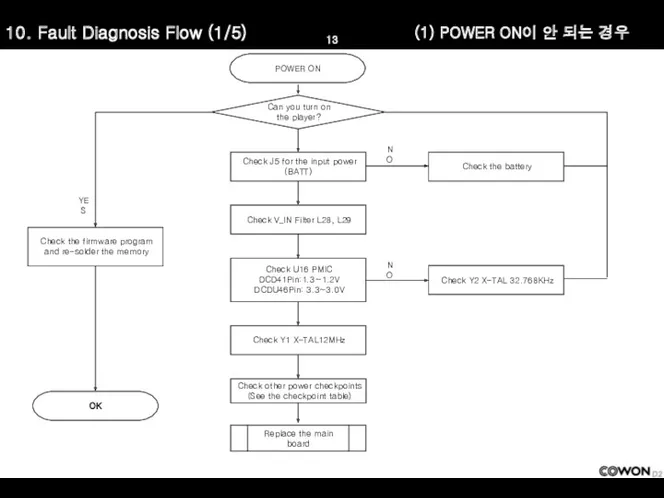
10. Fault Diagnosis Flow (1/5)
POWER ON
Can you turn on the player?
Check
10. Fault Diagnosis Flow (1/5)
POWER ON
Can you turn on the player?
Check
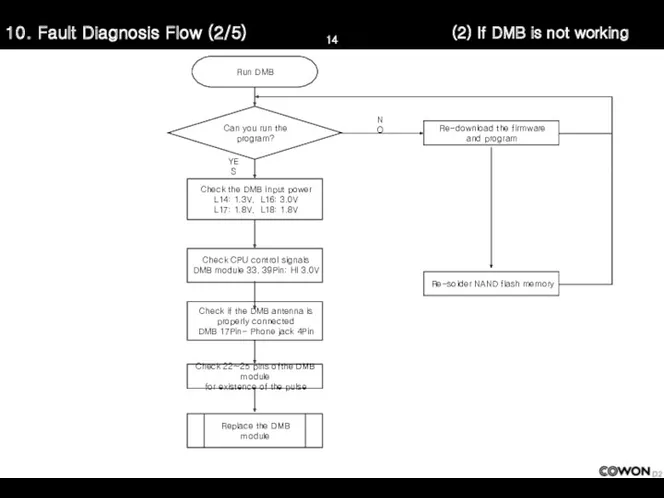
10. Fault Diagnosis Flow (2/5)
Check CPU control signals
DMB module 33, 39Pin:
10. Fault Diagnosis Flow (2/5)
Check CPU control signals
DMB module 33, 39Pin:
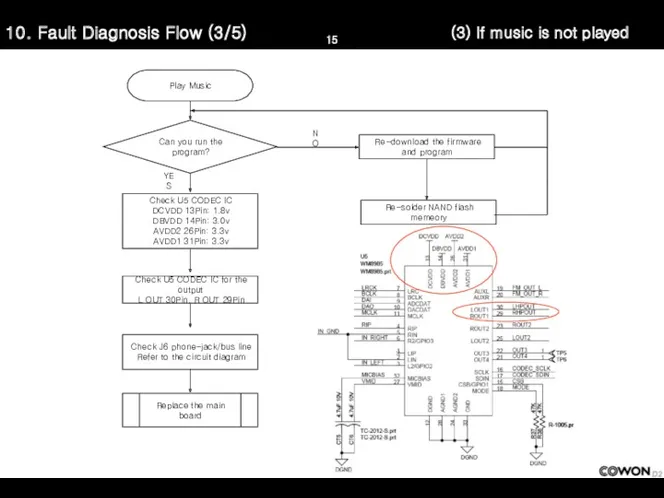
10. Fault Diagnosis Flow (3/5)
Check U5 CODEC IC for the output
L
10. Fault Diagnosis Flow (3/5)
Check U5 CODEC IC for the output
L
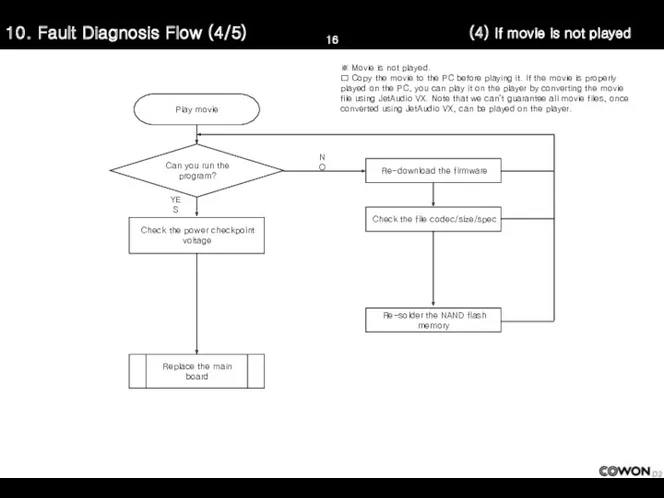
10. Fault Diagnosis Flow (4/5)
Play movie
Can you run the program?
Re-download the
10. Fault Diagnosis Flow (4/5)
Play movie
Can you run the program?
Re-download the
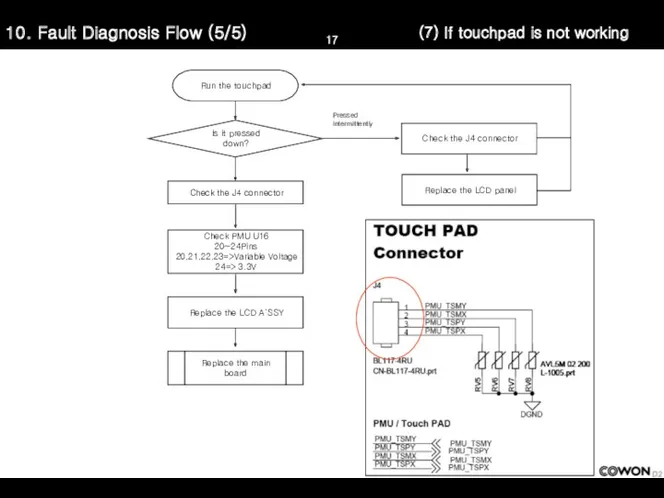
10. Fault Diagnosis Flow (5/5)
Run the touchpad
Is it pressed down?
Check PMU
10. Fault Diagnosis Flow (5/5)
Run the touchpad
Is it pressed down?
Check PMU
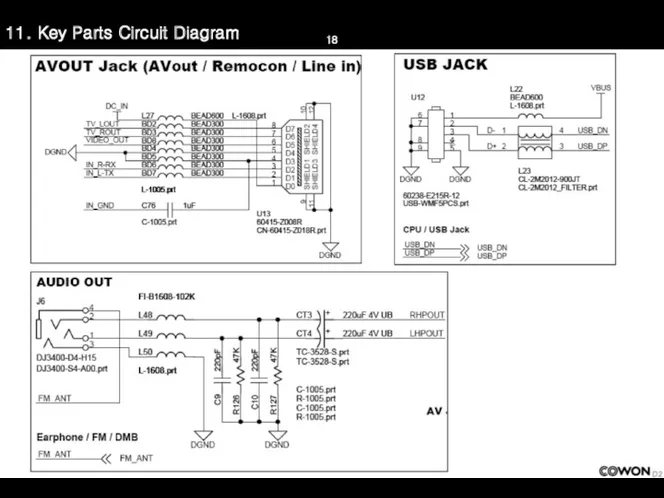
11. Key Parts Circuit Diagram
11. Key Parts Circuit Diagram
12. Test Result Table (1/3)
(1)COWON D2 MAIN POWER TEST
* The first
12. Test Result Table (1/3)
(1)COWON D2 MAIN POWER TEST
* The first
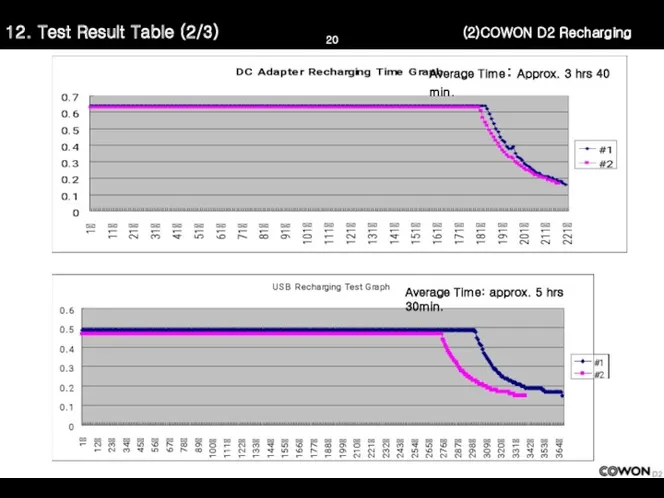
12. Test Result Table (2/3)
(2)COWON D2 Recharging
Average Time: Approx. 3 hrs
12. Test Result Table (2/3)
(2)COWON D2 Recharging
Average Time: Approx. 3 hrs
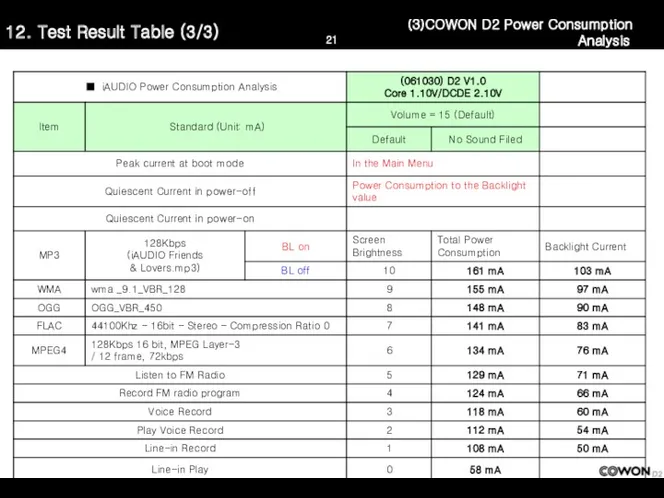
12. Test Result Table (3/3)
(3)COWON D2 Power Consumption Analysis
12. Test Result Table (3/3)
(3)COWON D2 Power Consumption Analysis
 ТЕСТЫ ПО ГЕОГРАФИИ ДЛЯ 8 КЛАССА ПО ТЕМЕ ВНУТРЕННИЕ ВОДЫ РОССИИ
 Зачем идти в интернет?
 Lexema ERP v2 (4)
 Создание визуальных компонентов
 Презентация к уроку химии в 8 классе по теме Растворы
 Краска de luxe - новые оттенки
 20230918_slaydy_k_uroku
 Тест с подсказками для закрепления знаний по теме Кислоты (8 класс)
 Корзинка на Пасху
 Нефтяные проблемы на Каспии и вопросы преодоления экологических угроз и рисков Прикаспийского региона
 Классный час Поговорим о толерантности
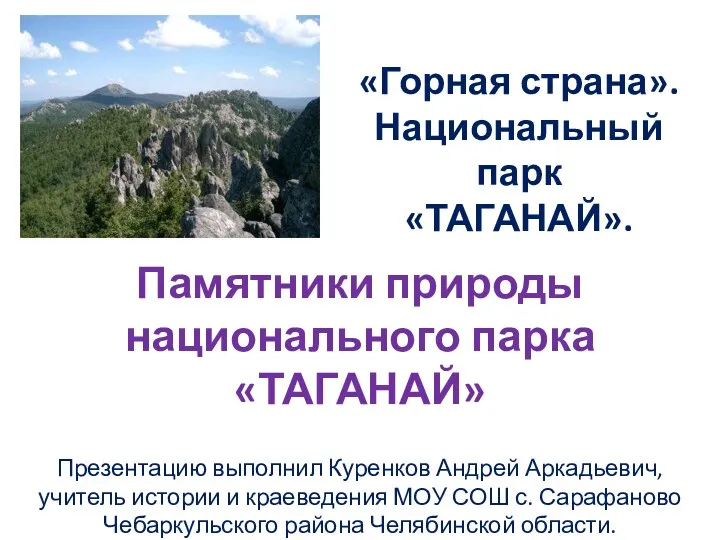 Памятники природы национального парка ТАГАНАЙ
 Уголок настроения
 Русь во времена политической раздробленности
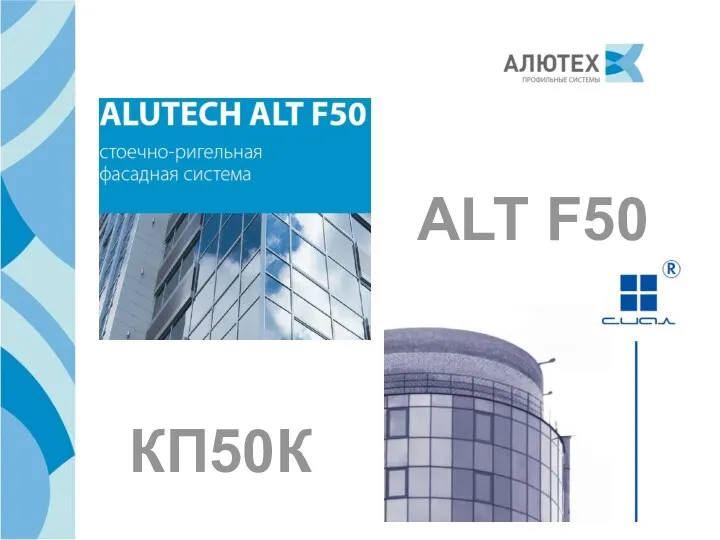 Сравнение окон ALT F50 и СИАЛ
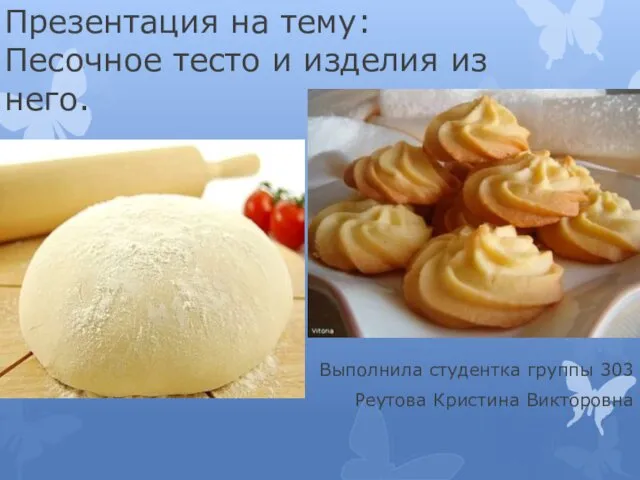 Песочное тесто и изделия из него
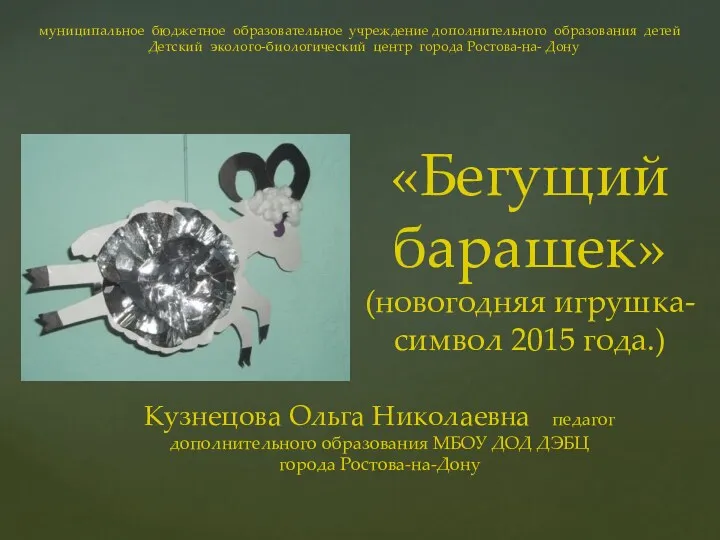 Мастер-класс Бегущий барашек
 Милосердие и сострадание
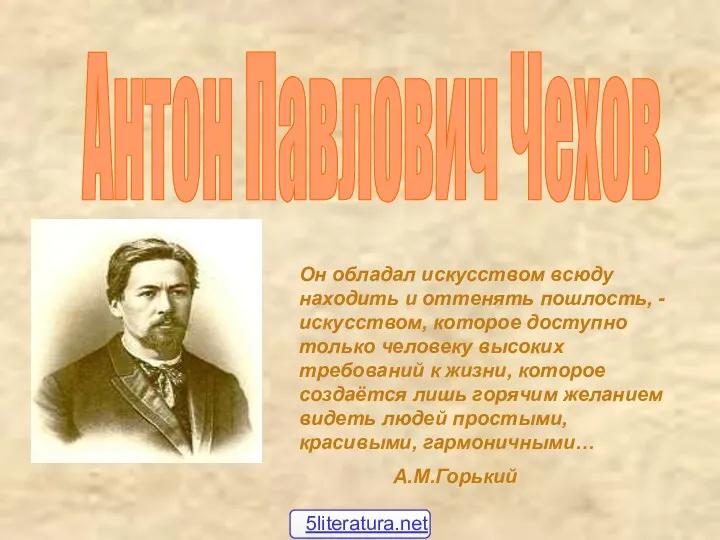 Жизненный путь Чехова
 Презентация Притча о доброте
 Курс занятий Олимпиада
 Презентация к собранию родителей будущих первоклассников
 Проектная деятельность учащихся на уроках музыки
 Послеродовые гнойно-септические заболевания (перитонит, сепсис, токсико-инфекционный шок)
 Семь чудес света
 Легочная гипертензия
 Разработка родительского собрания Наши дети не для насилия
 Взаимосвязь урочной и внеурочной деятельности