- e- Doctor 2.00

Содержание
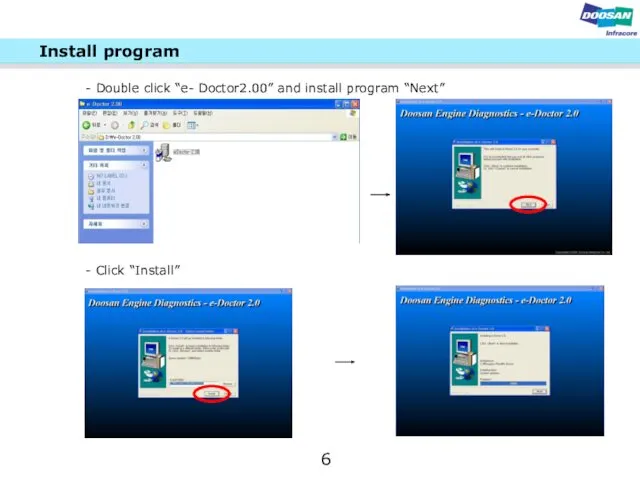
- 2. Install program - Double click “e- Doctor2.00” and install program “Next” - Click “Install” 6
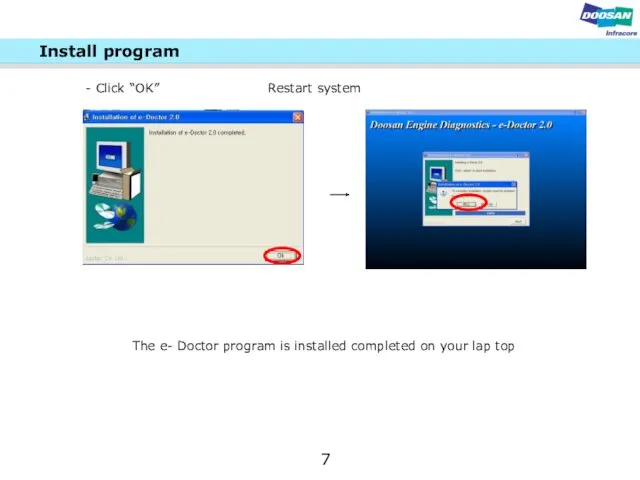
- 3. Install program - Click “OK” Restart system The e- Doctor program is installed completed on your
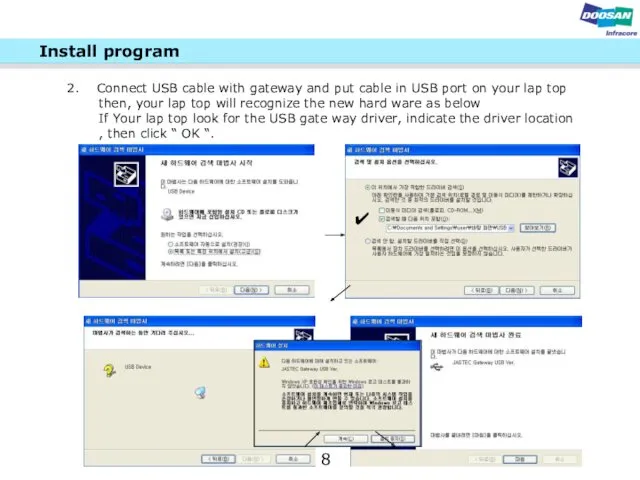
- 4. Install program Connect USB cable with gateway and put cable in USB port on your lap
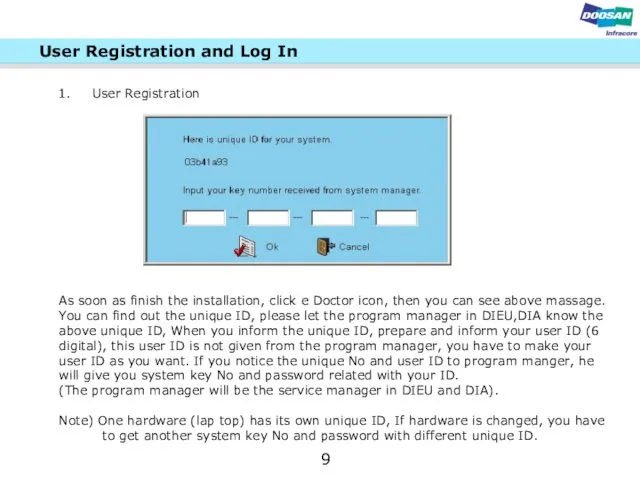
- 5. User Registration and Log In User Registration As soon as finish the installation, click e Doctor
- 6. If you fill the system key No which is acquired from the program manager, you can
- 7. Log in Enter your ID and password when you run the program. ※ If you lost
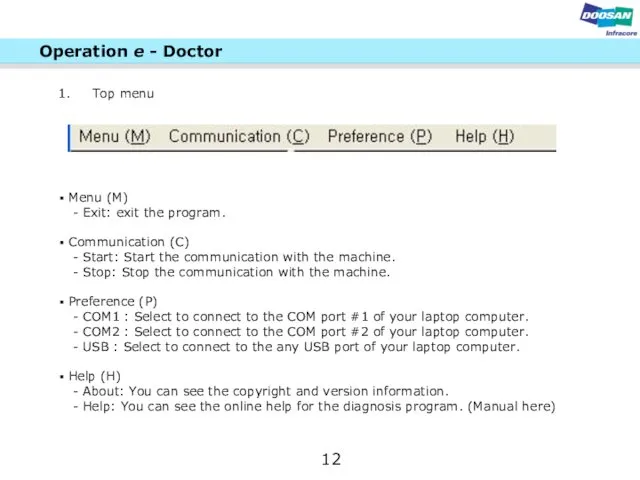
- 8. Operation e - Doctor Top menu Menu (M) - Exit: exit the program. Communication (C) -
- 9. Start communication icon - Make the e Doctor and engine ECU communicate. - Let you know
- 10. Communication port selection COM1 : Connect the main harness cable (which is connected to a gateway
- 12. Скачать презентацию
Install program
- Double click “e- Doctor2.00” and install program
Install program
- Double click “e- Doctor2.00” and install program
Install program
- Click “OK” Restart system
The e- Doctor
Install program
- Click “OK” Restart system
The e- Doctor
Install program
Connect USB cable with gateway and put cable in
Install program
Connect USB cable with gateway and put cable in
User Registration and Log In
User Registration
As soon as
User Registration and Log In
User Registration
As soon as
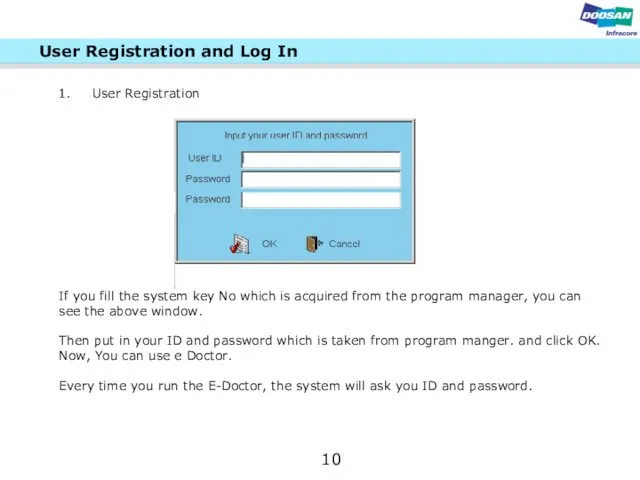
If you fill the system key No which is acquired from
If you fill the system key No which is acquired from
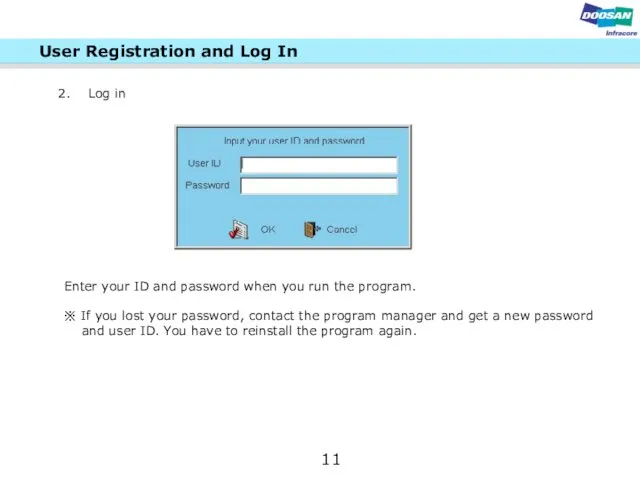
Log in
Enter your ID and password when you run the
Log in
Enter your ID and password when you run the
Operation e - Doctor
Top menu
Menu (M)
- Exit:
Operation e - Doctor
Top menu
Menu (M)
- Exit:

Start communication icon
- Make the e Doctor and
Start communication icon
- Make the e Doctor and
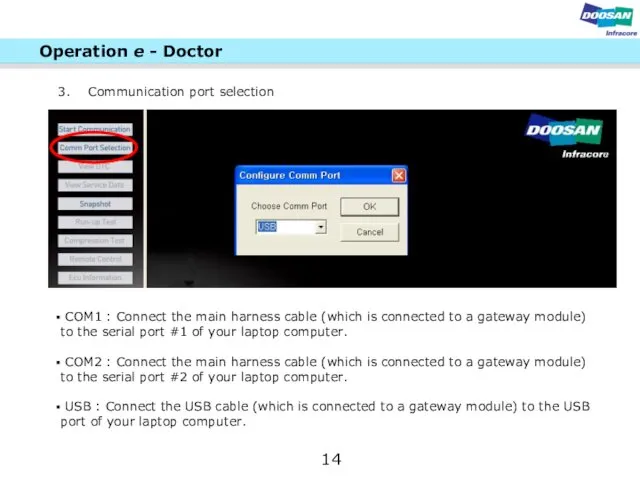
Communication port selection
COM1 : Connect the main harness cable (which
Communication port selection
COM1 : Connect the main harness cable (which
 Позиционные системы счисления
 Локальные сети. Параметры сетей и их стандарты
 Сбор и подготовка данных
 Современные накопители информации, используемые в вычислительной технике
 Использование технологии веб-квест как средство развития познавательных и творческих способностей учащихся
 Блочные алгоритмы. Блочное шифрование. Сравнение блочных и поточных шифров. Предпосылки создания шифра Фейстеля
 Параллельное программирование. С++. Thread Support Library. Atomic Operations Library
 Функции в Excel
 Организация и средства информационных технологий обеспечения управленческой деятельности
 Поиск публикаций и показатели деятельности ученого в Web of Science
 Бездротові мережі
 Занятие 1. Знакомство с программой Adobe Photoshop
 Microsoft Visual Studio — линейка продуктов компании Microsoft
 Операторы цикла
 Понятие об информации. Представление информации. Информационная деятельность человека.
 Автоматизоване створення запитів у базі даних
 Архітектура операційних систем
 Windows System Programming
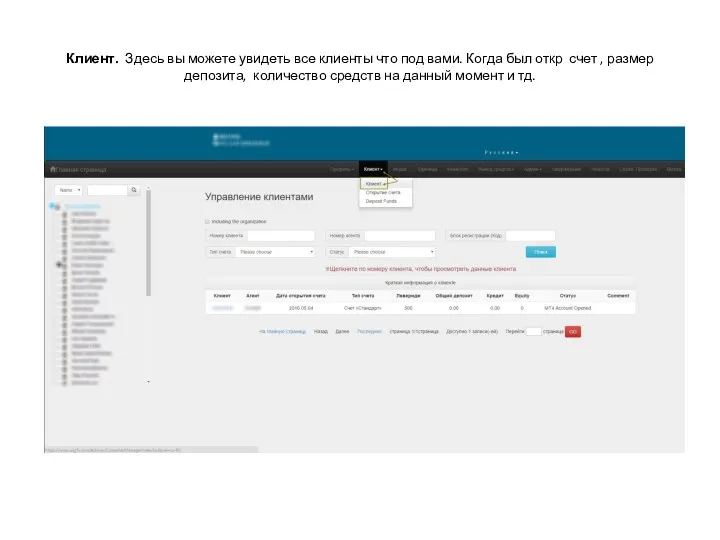 Личный кабинет
 Мир станочника. Аддитивные технологии и 3D-сканирование
 Методы и средства защиты программ от компьютерных вирусов
 46_Yaroslavskaya_Sasha
 Локальные и глобальные сети ЭВМ. Защита информации в сетях. (Тема 6)
 Godseeker. Игра
 Рабочий стол. Управление компьютером с помощью мыши
 Проектирование изделий из листового металла в NX
 Эти люди изменили мир
 Электронные ресурсы для детей и юношества в общедоступных библиотеках: создание и использование