Слайд 2
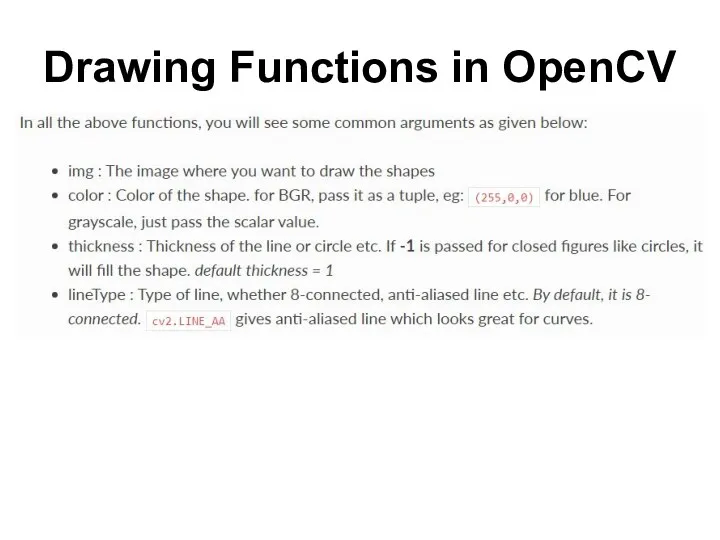
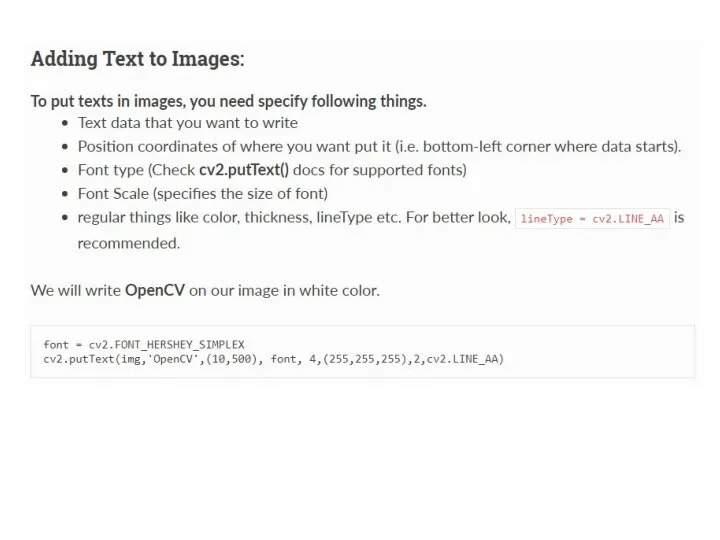
Drawing Functions in OpenCV
Слайд 3
Слайд 4
Слайд 5
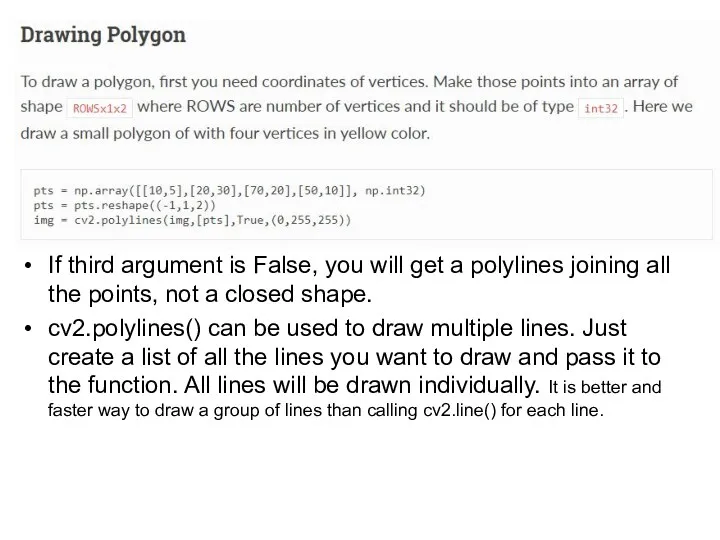
If third argument is False, you will get a polylines joining all
the points, not a closed shape.
cv2.polylines() can be used to draw multiple lines. Just create a list of all the lines you want to draw and pass it to the function. All lines will be drawn individually. It is better and faster way to draw a group of lines than calling cv2.line() for each line.
Слайд 6
Слайд 7

Слайд 8
Слайд 9
Слайд 10
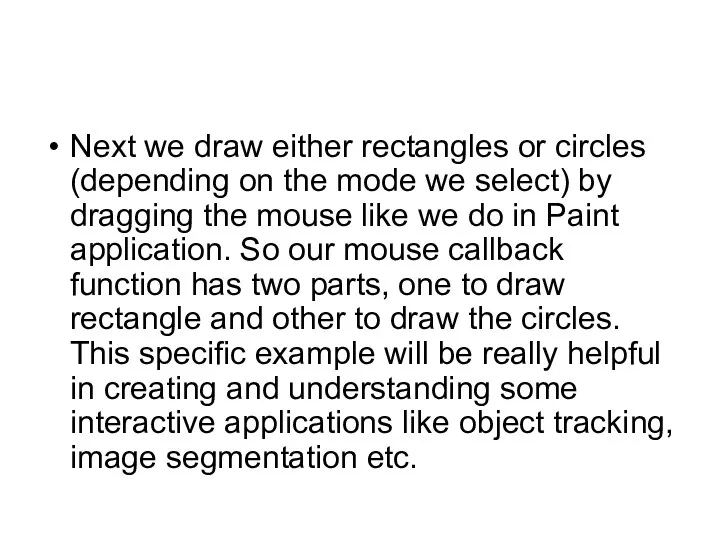
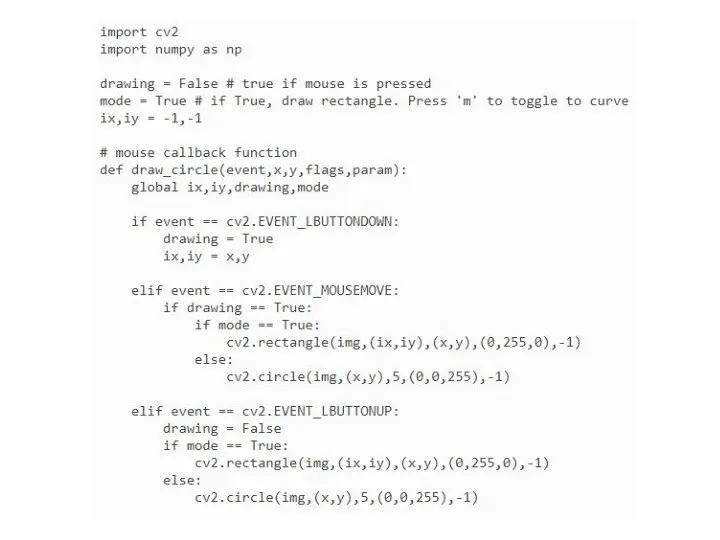
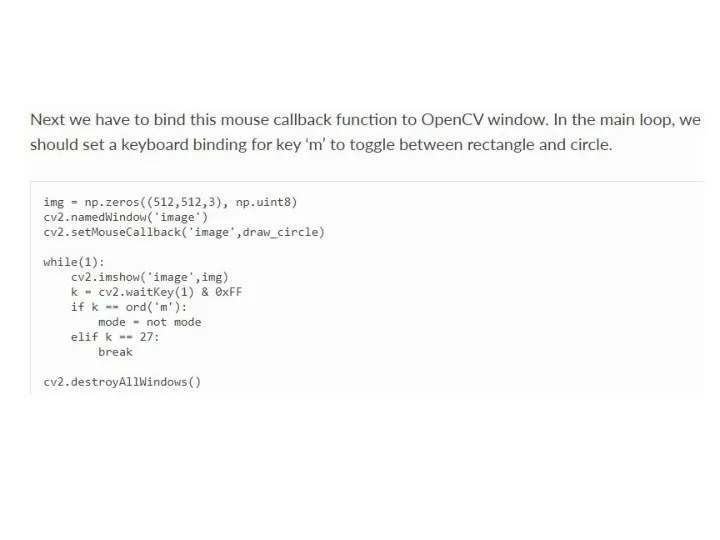
Next we draw either rectangles or circles (depending on the mode
we select) by dragging the mouse like we do in Paint application. So our mouse callback function has two parts, one to draw rectangle and other to draw the circles. This specific example will be really helpful in creating and understanding some interactive applications like object tracking, image segmentation etc.
Слайд 11
Слайд 12
Слайд 13
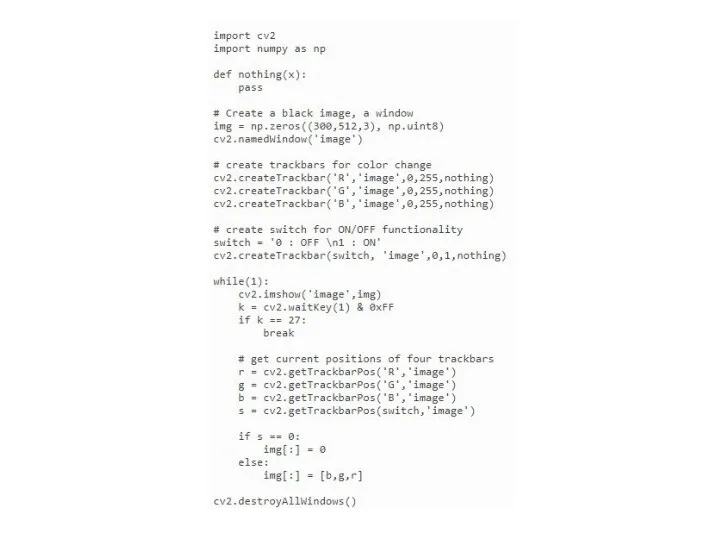
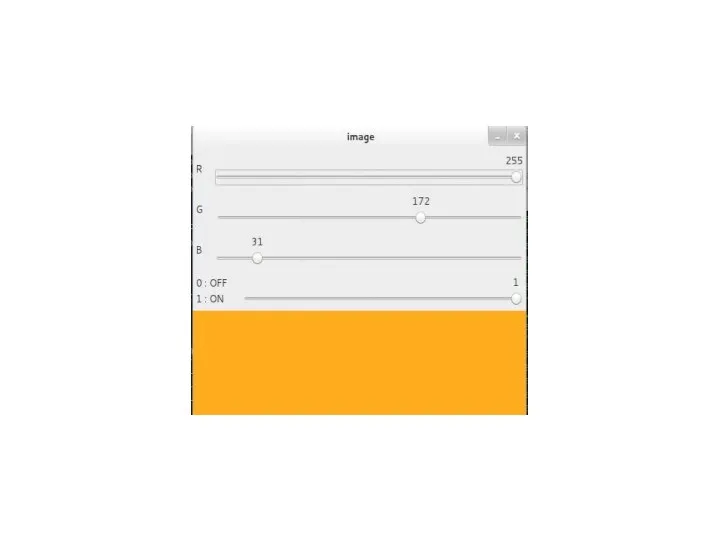
We will create a simple application which shows the color you
specify. You have a window which shows the color and three trackbars to specify each of B,G,R colors. You slide the trackbar and correspondingly window color changes. By default, initial color will be set to Black.
For cv2.getTrackbarPos() function, first argument is the trackbar name, second one is the window name to which it is attached, third argument is the default value, fourth one is the maximum value and fifth one is the callback function which is executed everytime trackbar value changes. The callback function always has a default argument which is the trackbar position. In our case, function does nothing, so we simply pass.
Another important application of trackbar is to use it as a button or switch. OpenCV, by default, doesn’t have button functionality. So you can use trackbar to get such functionality. In our application, we have created one switch in which application works only if switch is ON, otherwise screen is always black.
Слайд 14
Слайд 15

 Configuration and management
 Общие понятия информатики и кодирования информации. Лекция 1
 HDD - плата управления
 Тесты 6 класс
 Человек и информация
 Сортировка выбором. Методы сортировки массивов
 История развития языка программирования С++
 Жанровый анализ интернет-издания The Village
 Уязвимости веб-приложений
 Презентация Файлы
 АНО Центр информационной безопасности в сети интернет Защита
 Блочные шифры. Лекция 4
 Работа с графиками функций в Еxcel: проект Ракета Диск
 Разработка программы для шифрования и дешифрования осмысленного текста с ключом
 Командные соревнования CTF
 Компьютерные технологии в журналистике и научных исследованиях
 Веночки, обручи, ободки, заколки. Удивительный мир научных книг-2018
 Структурные типы данных. Лекция 8
 Информационные технологии в историческом исследовании и образовании
 Методология создания информационных систем
 Язык программирования Pascal Массивы
 Диктант по теме Человек и информация
 Профессия мастер по обработке цифровой информации
 Основні сервіси Internet
 Модуль для OpenCart
 Модели и моделирование
 Медицинский личный кабинет
 Информация и знания