- Online Education

Содержание
- 2. Preparation before class
- 3. Teachers' equipment computer: Either desktop or laptop. Operating system requirements: win7 and above, i5 processor, memory
- 4. Students'equipment including all teachers' equipment and : mobile device : Ipad mini2 and above, ipad4 and
- 5. Notice 1.Check the current system of DirectX version number, need to be greater than 10, if
- 6. Client download and installation 1.download address: www.weclassroom.com/home/download 2.If the download and installation fail, please download again
- 7. A. How to log in to live cloud client After adding teachers or students in the
- 8. Initial login verification Users who log in for the first time need to complete the mobile
- 9. B.Schedule page - access to classroom 1.Class schedule - enter the classroom: after logging in, enter
- 10. C.Equipment testing (important) When entering the classroom for the first time, changing classes and restarting the
- 11. D.Classroom area
- 12. E.Video window operation area When the mouse is moved to the video window of the teacher,
- 13. F. Seats 1. [seat layout] 6-person layout and 16-person layout can be switched by buttons. Location:
- 14. G. Whole batch operation
- 15. H. The courseware operating
- 16. I. The answer part Teachers can give students multiple choice questions in class, after that the
- 17. J. Screen sharing
- 18. K. Chatting zone Used for sending text or pictures between teachers and students.
- 19. L. Tool box Dice Timer Responder
- 20. M. Evaluation and replay after class Teachers click “ finish the class” ,then will see the
- 22. Скачать презентацию
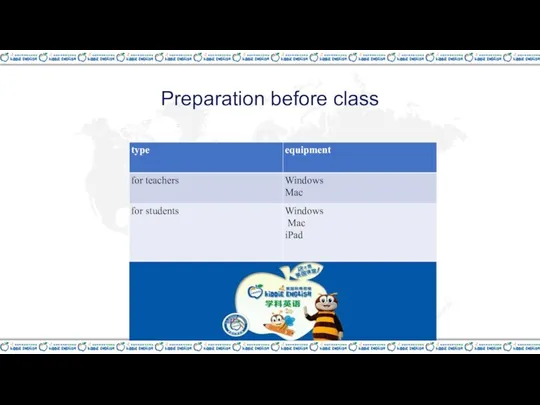
Preparation before class
Preparation before class
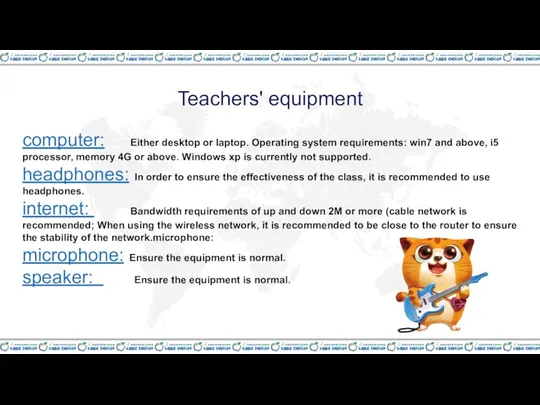
Teachers' equipment
computer: Either desktop or laptop. Operating system requirements: win7
Teachers' equipment
computer: Either desktop or laptop. Operating system requirements: win7
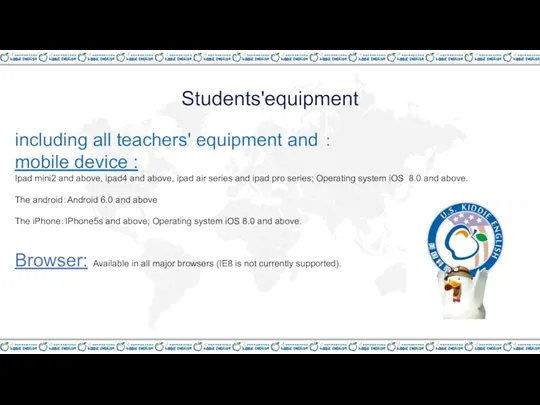
Students'equipment
including all teachers' equipment and :
mobile device :
Ipad mini2
Students'equipment
including all teachers' equipment and :
mobile device :
Ipad mini2
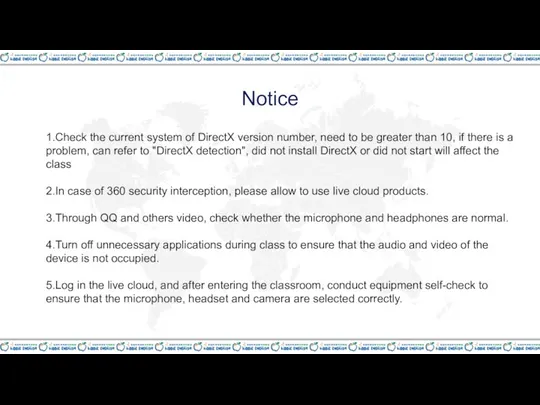
Notice
1.Check the current system of DirectX version number, need to be
Notice
1.Check the current system of DirectX version number, need to be
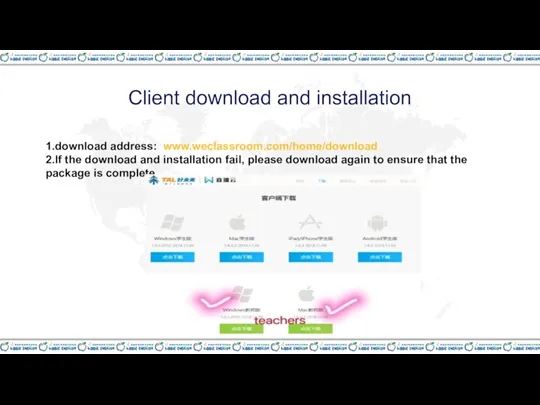
Client download and installation
1.download address: www.weclassroom.com/home/download
2.If the download and installation fail,
Client download and installation
1.download address: www.weclassroom.com/home/download
2.If the download and installation fail,
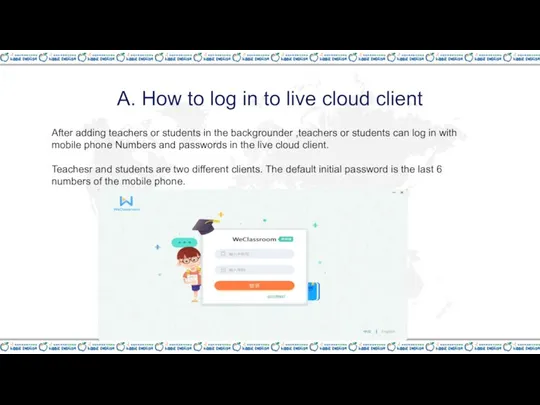
A. How to log in to live cloud client
After adding teachers
A. How to log in to live cloud client
After adding teachers
Initial login verification
Users who log in for the first time need
Initial login verification
Users who log in for the first time need
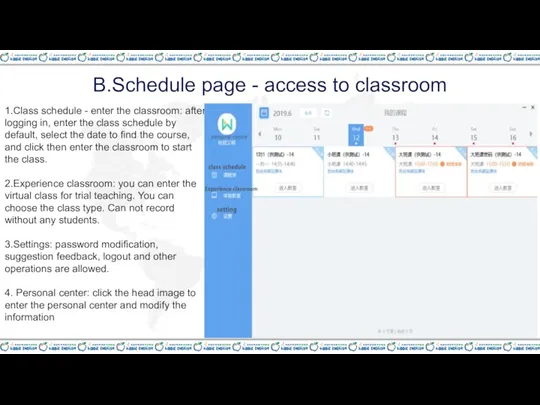
B.Schedule page - access to classroom
1.Class schedule - enter the classroom:
B.Schedule page - access to classroom
1.Class schedule - enter the classroom:
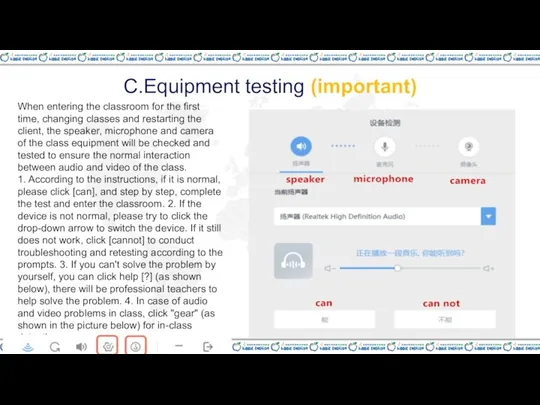
C.Equipment testing (important)
When entering the classroom for the first time, changing
C.Equipment testing (important)
When entering the classroom for the first time, changing
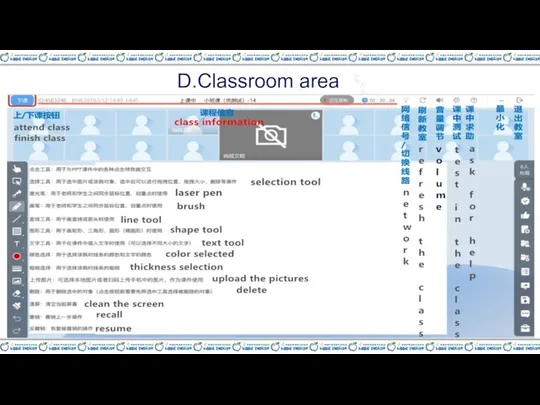
D.Classroom area
D.Classroom area
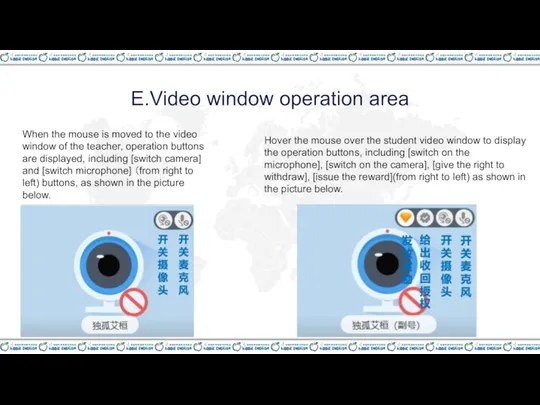
E.Video window operation area
When the mouse is moved to the video
E.Video window operation area
When the mouse is moved to the video
![F. Seats 1. [seat layout] 6-person layout and 16-person layout](/_ipx/f_webp&q_80&fit_contain&s_1440x1080/imagesDir/jpg/3463/slide-12.jpg)
F. Seats
1. [seat layout] 6-person layout and 16-person layout can
F. Seats
1. [seat layout] 6-person layout and 16-person layout can
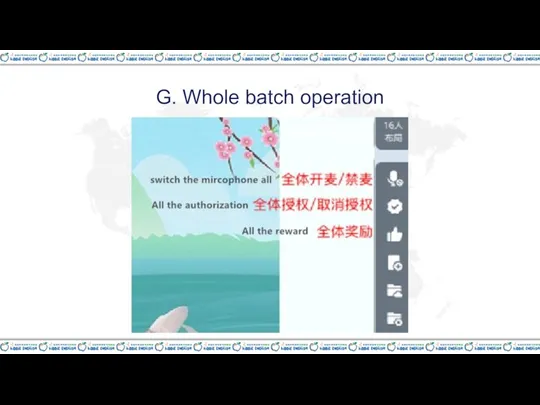
G. Whole batch operation
G. Whole batch operation
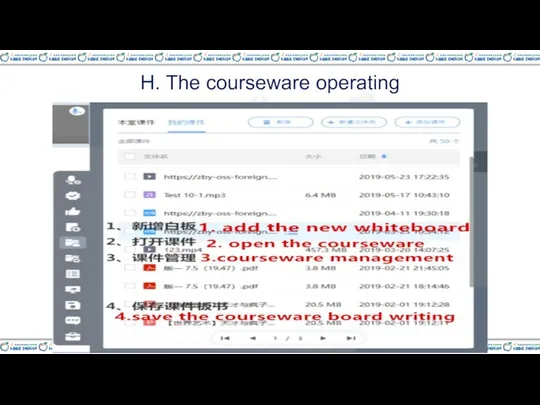
H. The courseware operating
H. The courseware operating
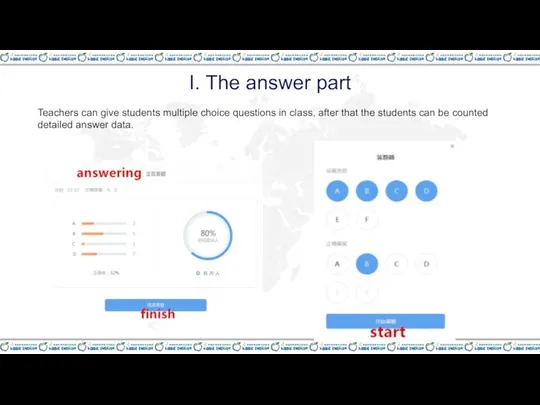
I. The answer part
Teachers can give students multiple choice questions in
I. The answer part
Teachers can give students multiple choice questions in
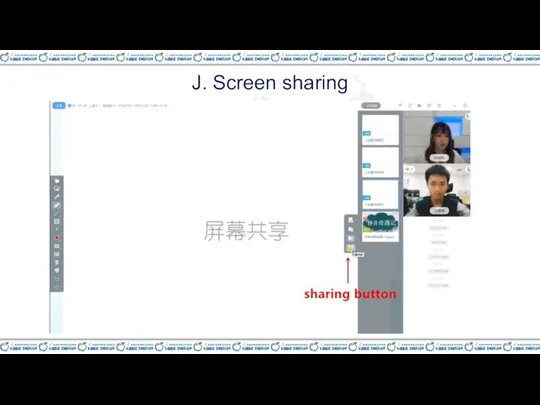
J. Screen sharing
J. Screen sharing
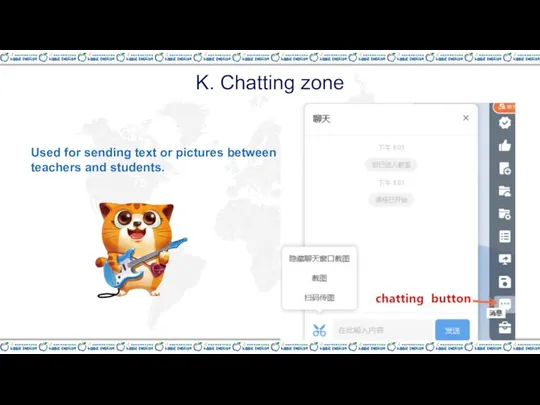
K. Chatting zone
Used for sending text or pictures between teachers and
K. Chatting zone
Used for sending text or pictures between teachers and
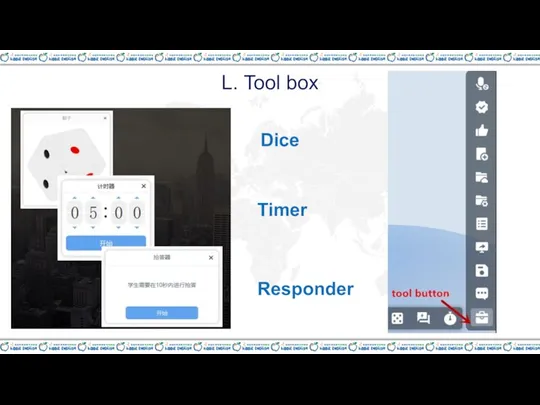
L. Tool box
Dice
Timer
Responder
L. Tool box
Dice
Timer
Responder
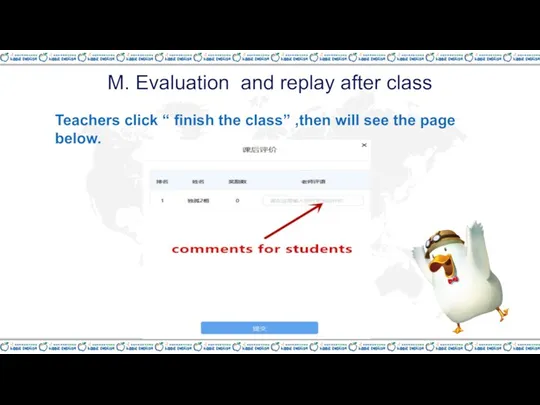
M. Evaluation and replay after class
Teachers click “ finish the
M. Evaluation and replay after class
Teachers click “ finish the
 Простейшая (каскадная) модель жизненного цикла ПО. Техническое задание. Требования к содержанию и оформлению
 Финансовая отчетность для владельца бизнеса. 1С:Управление небольшой фирмой 8
 СУБД MySQL PHP. Лекція №7
 Профессия: Оператор компьютерного набора
 Знакомство с языком программирования Python. Ввод. Вывод. Оператор присваивания
 Устройство компьютера. Схема устройства компьютера
 Лидар. Сбор входных данных
 Рекурсия
 Программирование разветвляющихся алгоритмов
 Фейковые новости и как их отличать от настоящих
 Как создать свой сайт
 Берсерк. Самоучитель
 Миркомир. Игра
 Предметно-ориентированные информационные системы
 Розробка системи обміну повідомленнями для Twitter, на базі мобільних технологій
 Эффективные инструменты визуализации учебной информации
 Тестирование программного обеспечения. Основы реляционных баз данных. Работа с SQL. (Урок 6)
 Логические выражения и таблицы истинности. Логика
 Что такое Unity и Vuforia
 Хранение и предварительная обработка больших наборов данных с помощью Tensor Flow
 Турбопоиск. Предложение для компании “Концепт-Строй”
 Кодирование звуковой информации. Представление информации в компьютере
 Математичне програмування. Задачі оптимізації. Задача лінійного програмування. Лекція 5
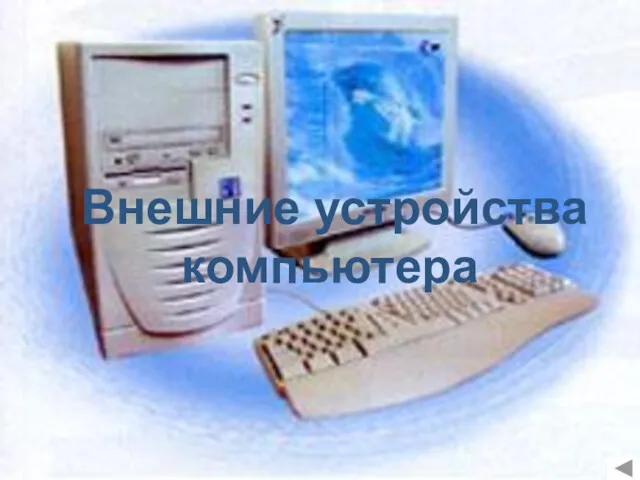 Внешние устройства компьютера
 История развития вычислительной техники
 Проектирование реляционных баз данных
 Графический редактор PAINT
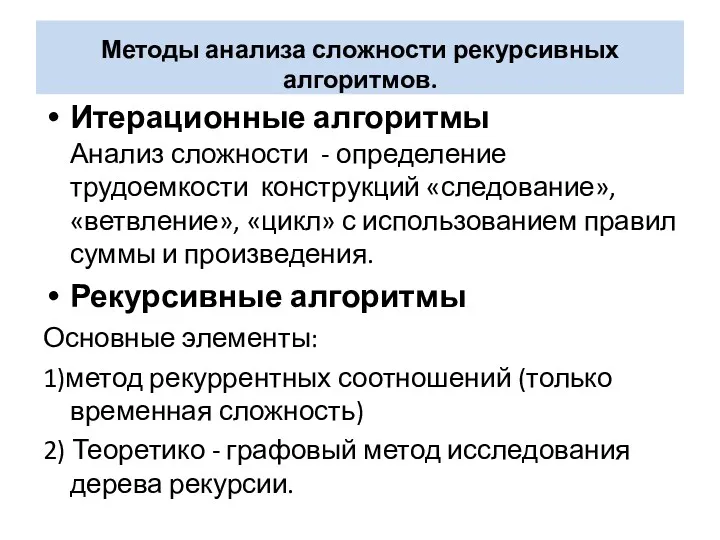 Методы анализа сложности рекурсивных алгоритмов