- Practice -1. Installing Windows Server 2022. Windows System Administration

Содержание
- 2. Task: Installing and Configuring Windows Server: Set up a virtualized environment using Hyper-V or VirtualBox Install
- 3. Technical requirements for Windows Server 2022 Technical requirements To complete the hands-on lab for this assignment
- 4. Download Windows Server 2022 Go to Microsoft official web-site: https://www.microsoft.com/en-us/evalcenter/evaluate-windows-server-2022 Register yourself to access Download portla
- 5. Download Windows Server 2022 Go to Microsoft official web-site: https://www.microsoft.com/en-us/evalcenter/evaluate-windows-server-2022 And click “Download the ISO” and
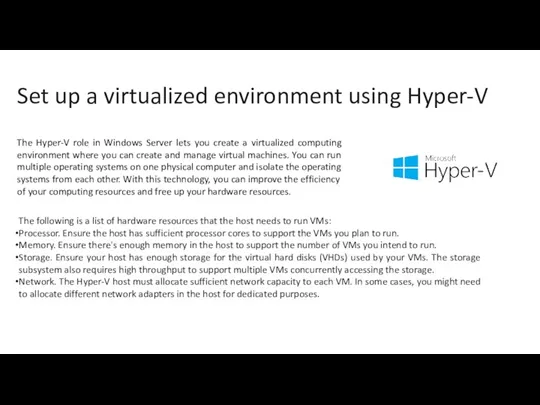
- 6. Set up a virtualized environment using Hyper-V The Hyper-V role in Windows Server lets you create
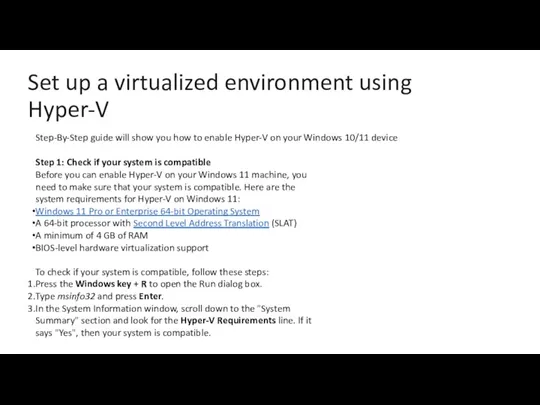
- 7. Set up a virtualized environment using Hyper-V Step-By-Step guide will show you how to enable Hyper-V
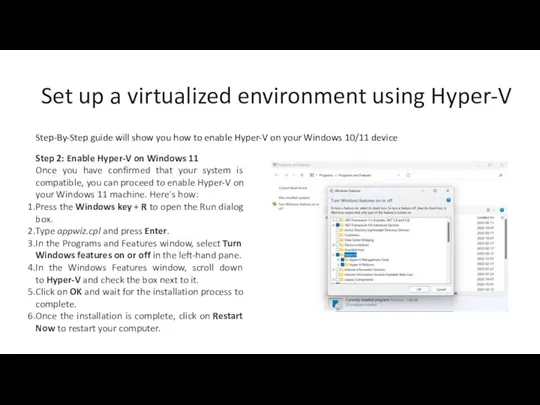
- 8. Set up a virtualized environment using Hyper-V Step-By-Step guide will show you how to enable Hyper-V
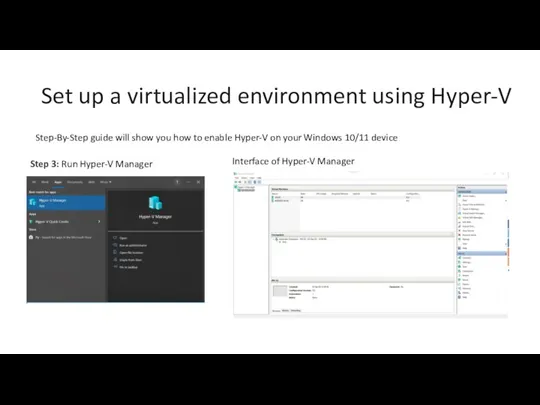
- 9. Set up a virtualized environment using Hyper-V Step-By-Step guide will show you how to enable Hyper-V
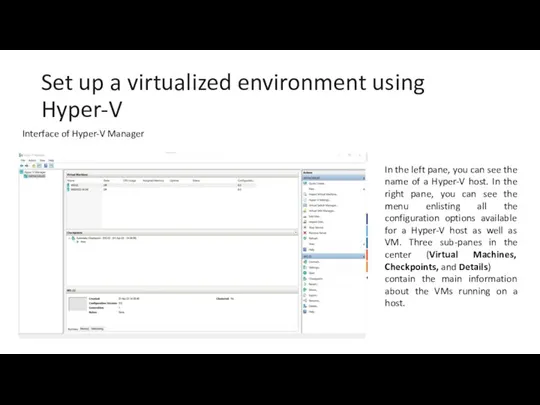
- 10. Set up a virtualized environment using Hyper-V Interface of Hyper-V Manager In the left pane, you
- 11. Create a virtual machine using Hyper-V Hyper-V Manager Open Hyper-V Manager. From the Action pane, click
- 12. Create a virtual machine using Hyper-V Hyper-V Manager 2 From the Action pane, click New, and
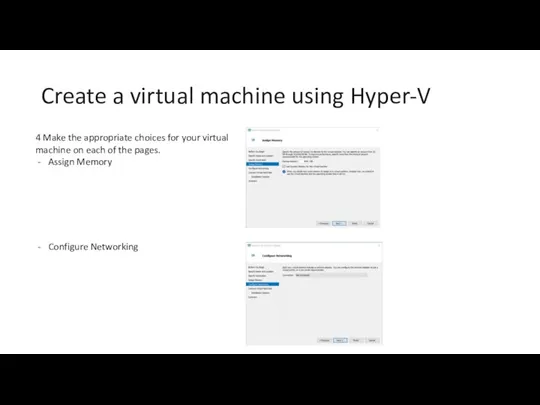
- 13. Create a virtual machine using Hyper-V 4 Make the appropriate choices for your virtual machine on
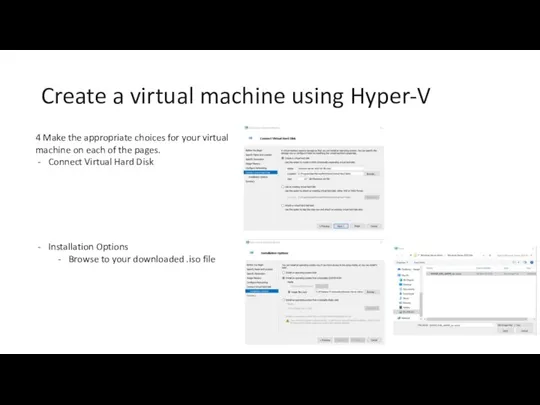
- 14. Create a virtual machine using Hyper-V 4 Make the appropriate choices for your virtual machine on
- 15. Create a virtual machine using Hyper-V 4 Make the appropriate choices for your virtual machine on
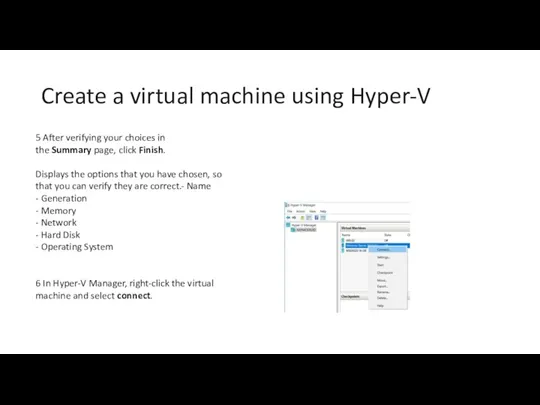
- 16. Create a virtual machine using Hyper-V 5 After verifying your choices in the Summary page, click
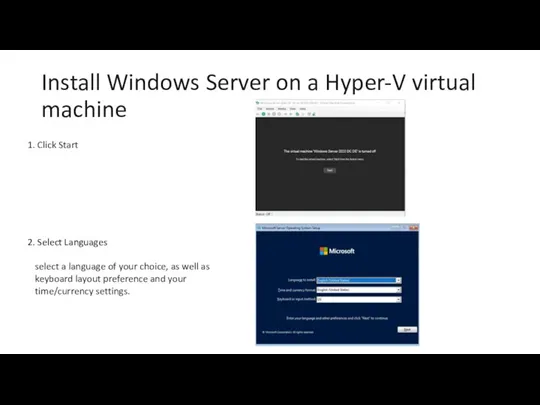
- 17. Install Windows Server on a Hyper-V virtual machine Click Start Select Languages select a language of
- 18. Install Windows Server on a Hyper-V virtual machine 3. Click Install Now button This initiate the
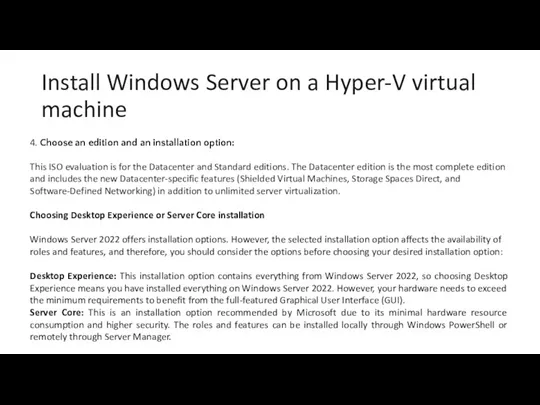
- 19. Install Windows Server on a Hyper-V virtual machine 4. Choose an edition and an installation option:
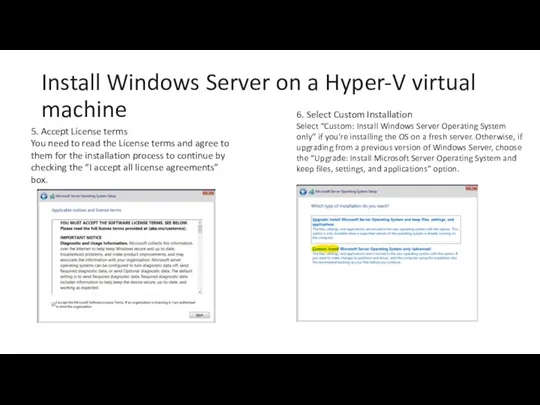
- 20. Install Windows Server on a Hyper-V virtual machine 5. Accept License terms You need to read
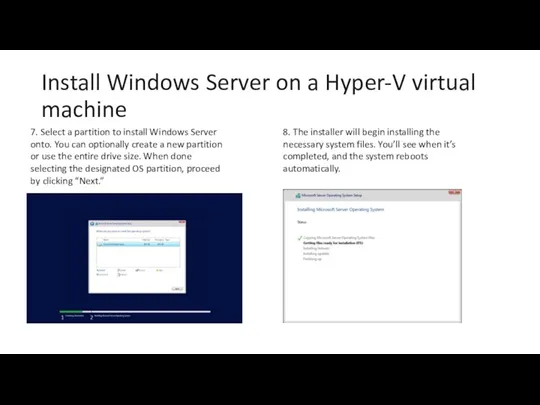
- 21. Install Windows Server on a Hyper-V virtual machine 7. Select a partition to install Windows Server
- 22. Install Windows Server on a Hyper-V virtual machine 9. After a successful installation, the system should
- 23. Install Windows Server on a Hyper-V virtual machine 11. The login screen will appear when you
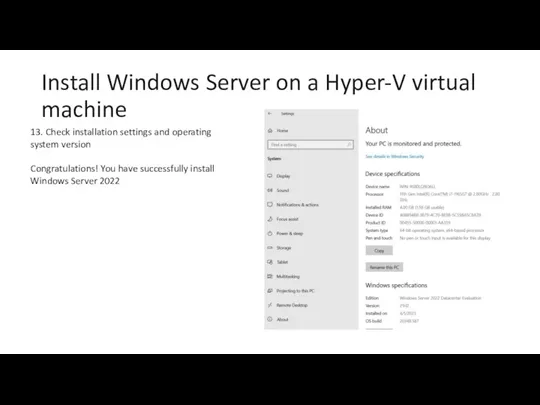
- 24. Install Windows Server on a Hyper-V virtual machine 13. Check installation settings and operating system version
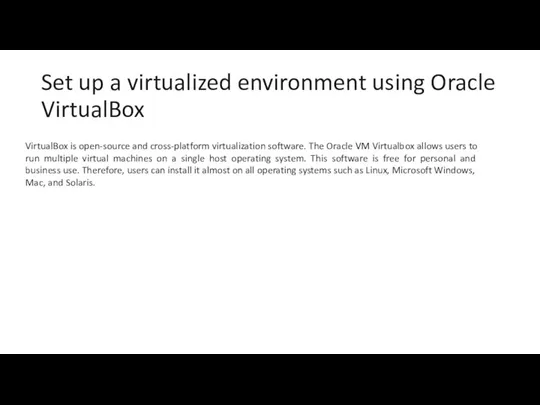
- 25. Set up a virtualized environment using Oracle VirtualBox VirtualBox is open-source and cross-platform virtualization software. The
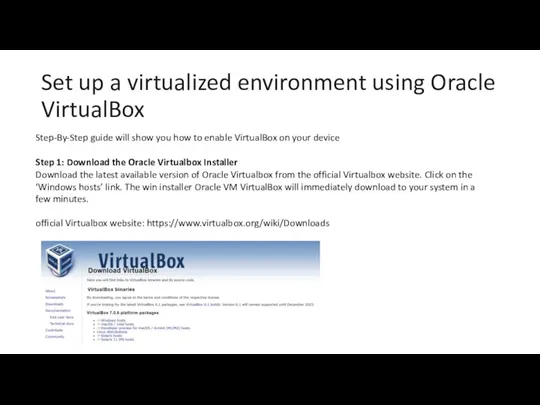
- 26. Set up a virtualized environment using Oracle VirtualBox Step-By-Step guide will show you how to enable
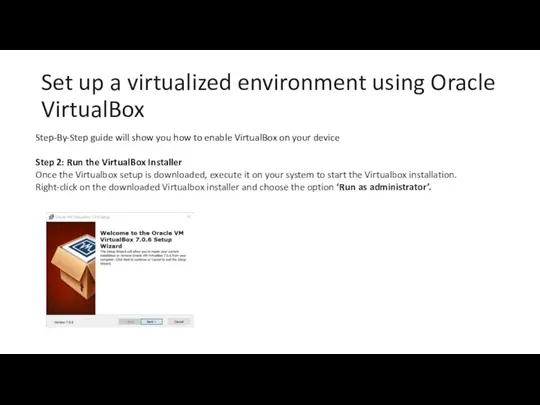
- 27. Set up a virtualized environment using Oracle VirtualBox Step-By-Step guide will show you how to enable
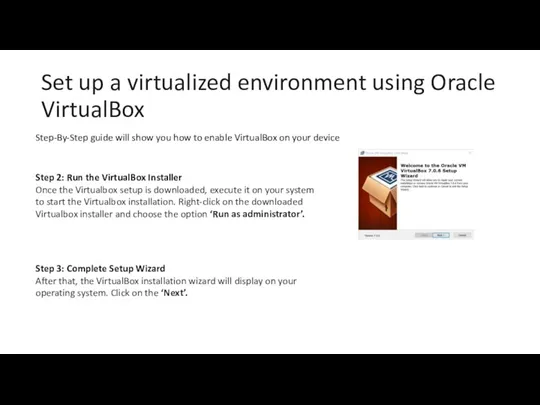
- 28. Set up a virtualized environment using Oracle VirtualBox Step-By-Step guide will show you how to enable
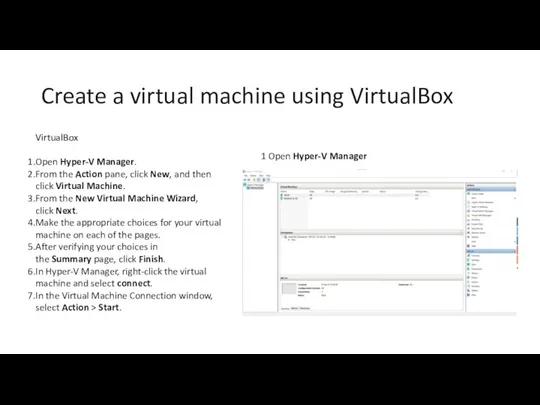
- 29. Create a virtual machine using VirtualBox VirtualBox Open Hyper-V Manager. From the Action pane, click New,
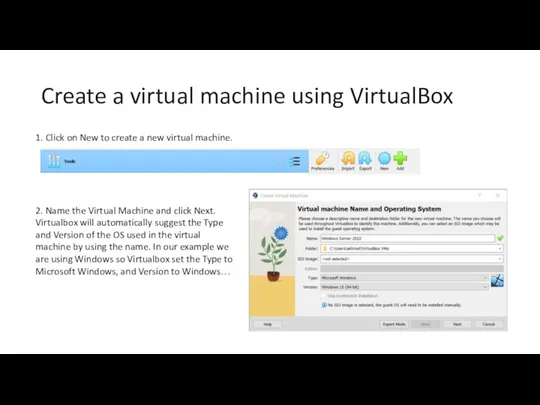
- 30. Create a virtual machine using VirtualBox 1. Click on New to create a new virtual machine.
- 31. Create a virtual machine using VirtualBox 3. Select your downloaded .iso file 4. Skip Unattended Installation
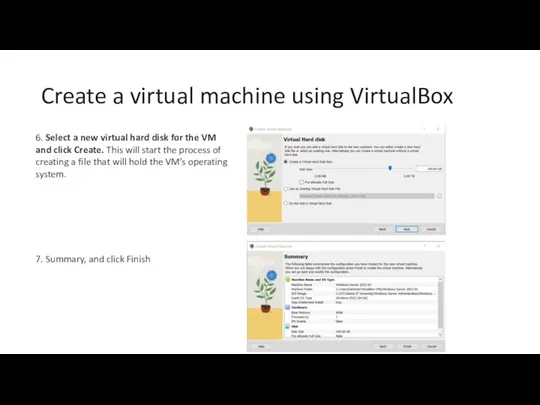
- 32. Create a virtual machine using VirtualBox 6. Select a new virtual hard disk for the VM
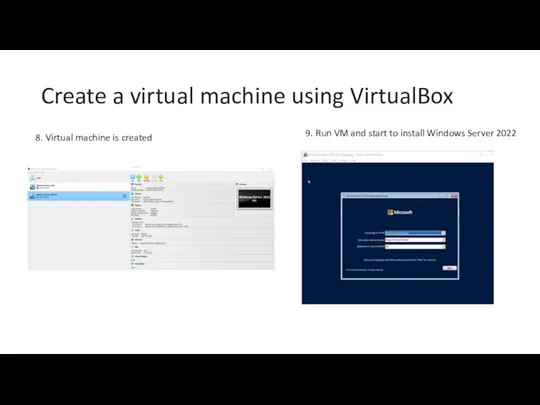
- 33. Create a virtual machine using VirtualBox 8. Virtual machine is created 9. Run VM and start
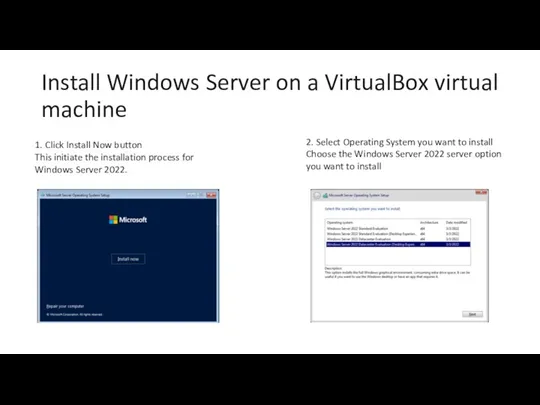
- 34. Install Windows Server on a VirtualBox virtual machine 1. Click Install Now button This initiate the
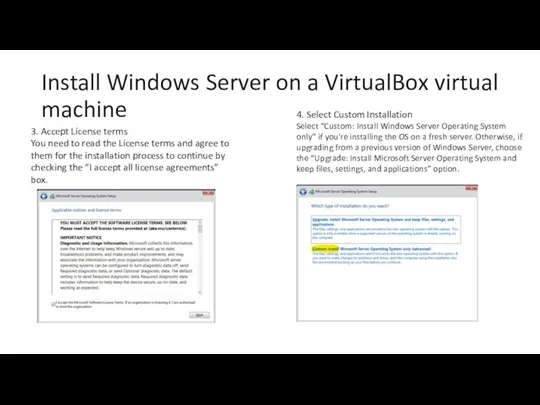
- 35. Install Windows Server on a VirtualBox virtual machine 3. Accept License terms You need to read
- 36. Install Windows Server on a VirtualBox virtual machine 5. Select a partition to install Windows Server
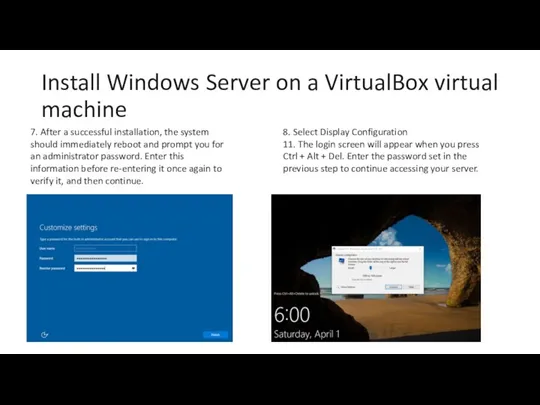
- 37. Install Windows Server on a VirtualBox virtual machine 7. After a successful installation, the system should
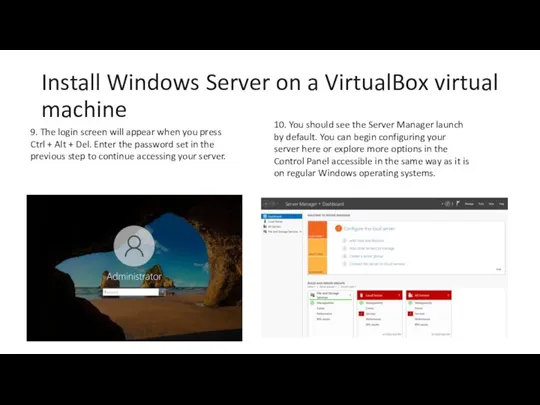
- 38. Install Windows Server on a VirtualBox virtual machine 9. The login screen will appear when you
- 39. Install Windows Server on a VirtualBox virtual machine 11. Check installation settings and operating system version
- 40. Practice-1 exercise Performing an initial Windows Server configuration This exercises will teach you how to perform
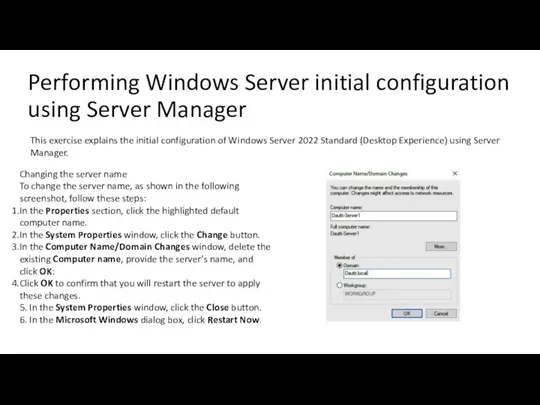
- 41. Performing Windows Server initial configuration using Server Manager This exercise explains the initial configuration of Windows
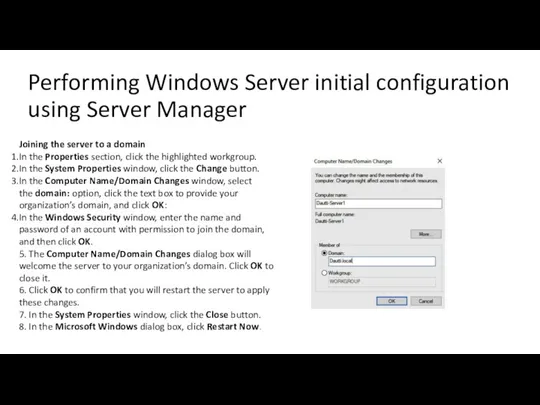
- 42. Performing Windows Server initial configuration using Server Manager Joining the server to a domain In the
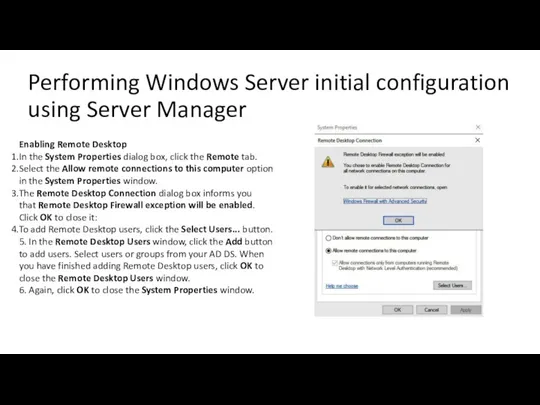
- 43. Performing Windows Server initial configuration using Server Manager Enabling Remote Desktop In the System Properties dialog
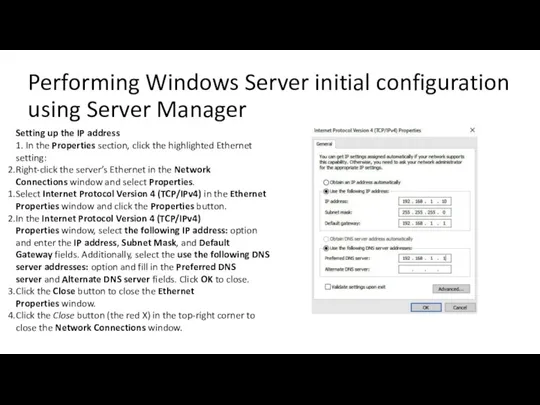
- 44. Performing Windows Server initial configuration using Server Manager Setting up the IP address 1. In the
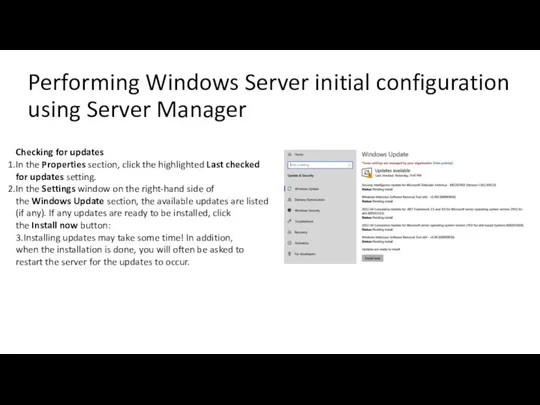
- 45. Performing Windows Server initial configuration using Server Manager Checking for updates In the Properties section, click
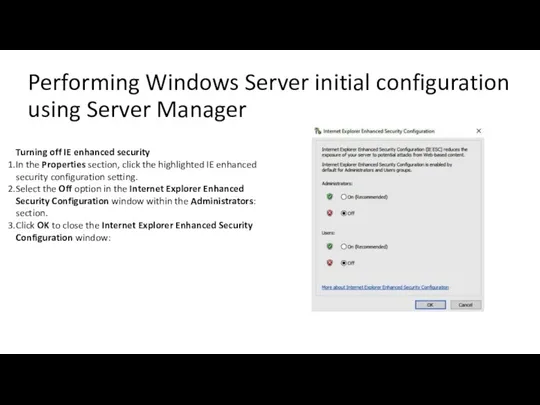
- 46. Performing Windows Server initial configuration using Server Manager Turning off IE enhanced security In the Properties
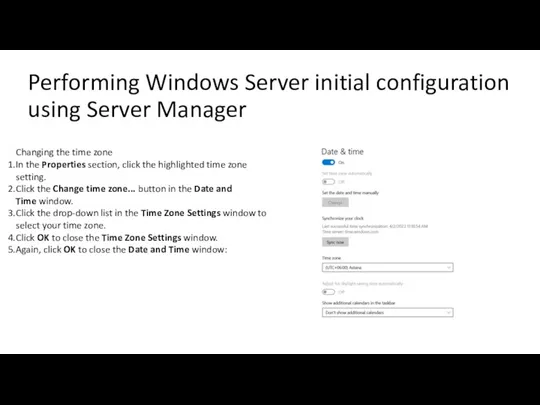
- 47. Performing Windows Server initial configuration using Server Manager Changing the time zone In the Properties section,
- 49. Скачать презентацию
Task:
Installing and Configuring Windows Server:
Set up a virtualized environment using
Task:
Installing and Configuring Windows Server:
Set up a virtualized environment using
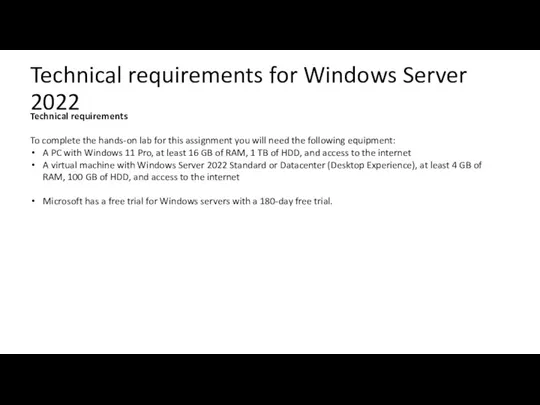
Technical requirements for Windows Server 2022
Technical requirements
To complete the hands-on lab
Technical requirements for Windows Server 2022
Technical requirements
To complete the hands-on lab
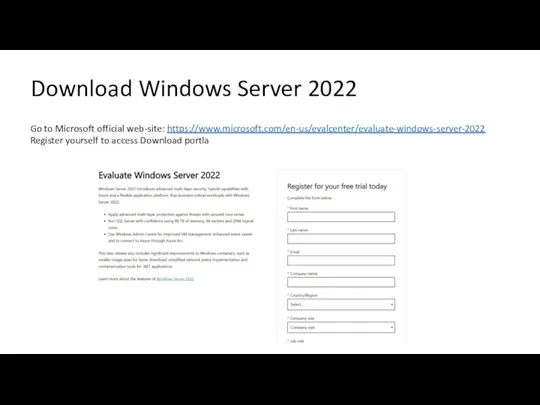
Download Windows Server 2022
Go to Microsoft official web-site: https://www.microsoft.com/en-us/evalcenter/evaluate-windows-server-2022
Register yourself to
Download Windows Server 2022
Go to Microsoft official web-site: https://www.microsoft.com/en-us/evalcenter/evaluate-windows-server-2022
Register yourself to
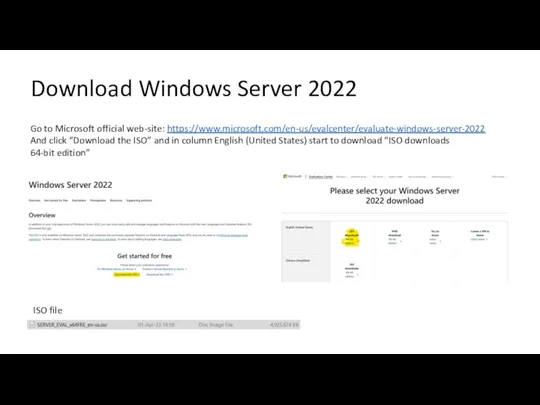
Download Windows Server 2022
Go to Microsoft official web-site: https://www.microsoft.com/en-us/evalcenter/evaluate-windows-server-2022
And click “Download
Download Windows Server 2022
Go to Microsoft official web-site: https://www.microsoft.com/en-us/evalcenter/evaluate-windows-server-2022
And click “Download
Set up a virtualized environment using Hyper-V
The Hyper-V role in Windows
Set up a virtualized environment using Hyper-V
The Hyper-V role in Windows
Set up a virtualized environment using Hyper-V
Step-By-Step guide will show you
Set up a virtualized environment using Hyper-V
Step-By-Step guide will show you
Set up a virtualized environment using Hyper-V
Step-By-Step guide will show you
Set up a virtualized environment using Hyper-V
Step-By-Step guide will show you
Set up a virtualized environment using Hyper-V
Step-By-Step guide will show you
Set up a virtualized environment using Hyper-V
Step-By-Step guide will show you
Set up a virtualized environment using Hyper-V
Interface of Hyper-V Manager
In the
Set up a virtualized environment using Hyper-V
Interface of Hyper-V Manager
In the
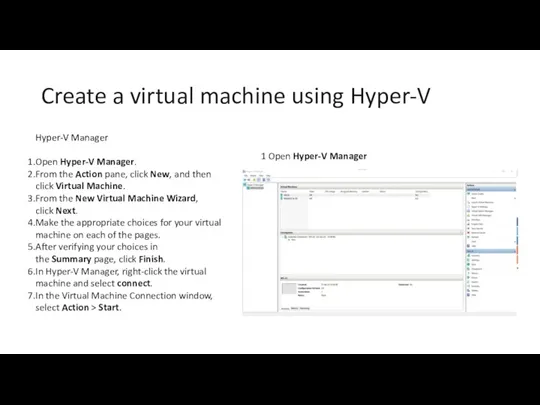
Create a virtual machine using Hyper-V
Hyper-V Manager
Open Hyper-V Manager.
From the Action pane, click New, and
Create a virtual machine using Hyper-V
Hyper-V Manager
Open Hyper-V Manager.
From the Action pane, click New, and
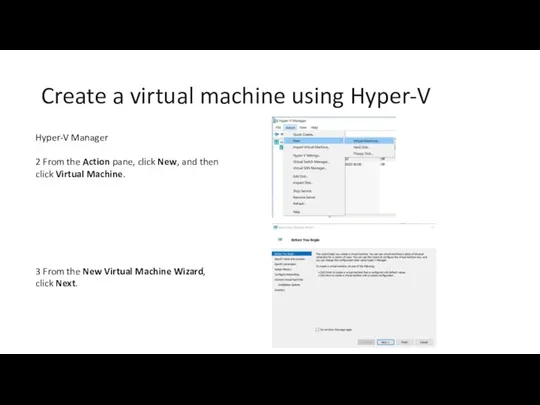
Create a virtual machine using Hyper-V
Hyper-V Manager
2 From the Action pane, click New, and
Create a virtual machine using Hyper-V
Hyper-V Manager
2 From the Action pane, click New, and
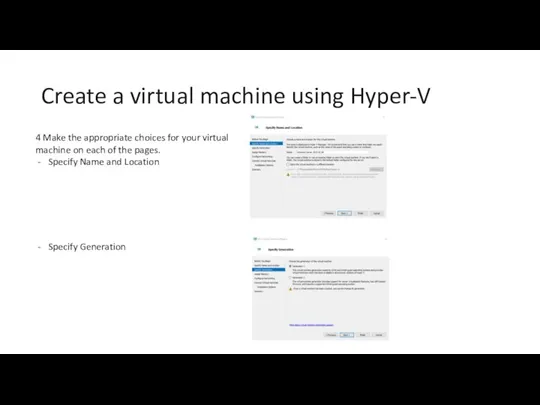
Create a virtual machine using Hyper-V
4 Make the appropriate choices for
Create a virtual machine using Hyper-V
4 Make the appropriate choices for
Create a virtual machine using Hyper-V
4 Make the appropriate choices for
Create a virtual machine using Hyper-V
4 Make the appropriate choices for
Create a virtual machine using Hyper-V
4 Make the appropriate choices for
Create a virtual machine using Hyper-V
4 Make the appropriate choices for
Create a virtual machine using Hyper-V
5 After verifying your choices in
Create a virtual machine using Hyper-V
5 After verifying your choices in
Install Windows Server on a Hyper-V virtual machine
Click Start
Select
Install Windows Server on a Hyper-V virtual machine
Click Start
Select

Install Windows Server on a Hyper-V virtual machine
3. Click Install Now
Install Windows Server on a Hyper-V virtual machine
3. Click Install Now
Install Windows Server on a Hyper-V virtual machine
4. Choose an edition
Install Windows Server on a Hyper-V virtual machine
4. Choose an edition
Install Windows Server on a Hyper-V virtual machine
5. Accept License terms
You
Install Windows Server on a Hyper-V virtual machine
5. Accept License terms
You
Install Windows Server on a Hyper-V virtual machine
7. Select a partition
Install Windows Server on a Hyper-V virtual machine
7. Select a partition

Install Windows Server on a Hyper-V virtual machine
9. After a successful
Install Windows Server on a Hyper-V virtual machine
9. After a successful

Install Windows Server on a Hyper-V virtual machine
11. The login screen
Install Windows Server on a Hyper-V virtual machine
11. The login screen
Install Windows Server on a Hyper-V virtual machine
13. Check installation settings
Install Windows Server on a Hyper-V virtual machine
13. Check installation settings
Set up a virtualized environment using Oracle VirtualBox
VirtualBox is open-source and
Set up a virtualized environment using Oracle VirtualBox
VirtualBox is open-source and
Set up a virtualized environment using Oracle VirtualBox
Step-By-Step guide will show
Set up a virtualized environment using Oracle VirtualBox
Step-By-Step guide will show
Set up a virtualized environment using Oracle VirtualBox
Step-By-Step guide will show
Set up a virtualized environment using Oracle VirtualBox
Step-By-Step guide will show
Set up a virtualized environment using Oracle VirtualBox
Step-By-Step guide will show
Set up a virtualized environment using Oracle VirtualBox
Step-By-Step guide will show
Create a virtual machine using VirtualBox
VirtualBox
Open Hyper-V Manager.
From the Action pane, click New, and then
Create a virtual machine using VirtualBox
VirtualBox
Open Hyper-V Manager.
From the Action pane, click New, and then
Create a virtual machine using VirtualBox
1. Click on New to create
Create a virtual machine using VirtualBox
1. Click on New to create

Create a virtual machine using VirtualBox
3. Select your downloaded .iso file
4.
Create a virtual machine using VirtualBox
3. Select your downloaded .iso file
4.
Create a virtual machine using VirtualBox
6. Select a new virtual hard
Create a virtual machine using VirtualBox
6. Select a new virtual hard
Create a virtual machine using VirtualBox
8. Virtual machine is created
9.
Create a virtual machine using VirtualBox
8. Virtual machine is created
9.
Install Windows Server on a VirtualBox virtual machine
1. Click Install Now
Install Windows Server on a VirtualBox virtual machine
1. Click Install Now
Install Windows Server on a VirtualBox virtual machine
3. Accept License terms
You
Install Windows Server on a VirtualBox virtual machine
3. Accept License terms
You

Install Windows Server on a VirtualBox virtual machine
5. Select a partition
Install Windows Server on a VirtualBox virtual machine
5. Select a partition
Install Windows Server on a VirtualBox virtual machine
7. After a successful
Install Windows Server on a VirtualBox virtual machine
7. After a successful
Install Windows Server on a VirtualBox virtual machine
9. The login screen
Install Windows Server on a VirtualBox virtual machine
9. The login screen

Install Windows Server on a VirtualBox virtual machine
11. Check installation settings
Install Windows Server on a VirtualBox virtual machine
11. Check installation settings
Practice-1 exercise
Performing an initial Windows Server configuration
This exercises will teach you
Practice-1 exercise
Performing an initial Windows Server configuration
This exercises will teach you
Performing Windows Server initial configuration using Server Manager
This exercise explains the
Performing Windows Server initial configuration using Server Manager
This exercise explains the
Performing Windows Server initial configuration using Server Manager
Joining the server to
Performing Windows Server initial configuration using Server Manager
Joining the server to
Performing Windows Server initial configuration using Server Manager
Enabling Remote Desktop
In the System
Performing Windows Server initial configuration using Server Manager
Enabling Remote Desktop
In the System
Performing Windows Server initial configuration using Server Manager
Setting up the IP
Performing Windows Server initial configuration using Server Manager
Setting up the IP
Performing Windows Server initial configuration using Server Manager
Checking for updates
In the Properties section,
Performing Windows Server initial configuration using Server Manager
Checking for updates
In the Properties section,
Performing Windows Server initial configuration using Server Manager
Turning off IE enhanced
Performing Windows Server initial configuration using Server Manager
Turning off IE enhanced
Performing Windows Server initial configuration using Server Manager
Changing the time zone
In
Performing Windows Server initial configuration using Server Manager
Changing the time zone
In
 Инструкция для подачи обращения/заявления для получения муниципальной услуги Зачисление в образовательное учреждение
 Динамические структуры данных. Указатели
 Centre Monitoring System PH-BC911 (Operation)
 LI-FI световая замена WI-FI
 CoDeSys - общий обзор
 Мастер-класс Получение услуг через Портал государственных и муниципальных услуг
 Плюсы и минусы информационного общества
 Алгоритм и его свойства. Понятие алгоритма и исполнителя. Свойства алгоритма
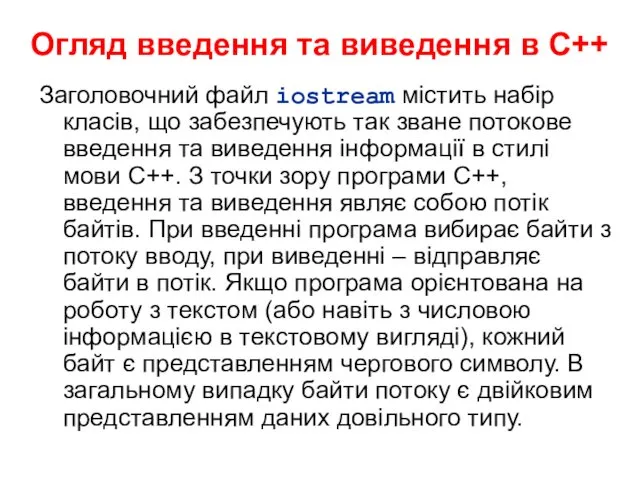 Огляд введення та виведення в С++
 Филатов Андрей В-45
 Безопасность детей в интернете
 Логические основы построения компьютера
 Cистемы электронного документооборота
 Ведение базы данных в MS Access. Технологии баз данных. (Лекция 5)
 Компьютер как средство автоматизации информационных процессов.
 Рабочий стол. Управление мышью
 Верификация программного обеспечения. Дефекты
 Понятие юзабилити
 Файлы и файловые структуры. Компьютер как универсальное устройство для работы с информацией. Информатика. 7 класс
 Орта мектепте химия пәнінен типтік есептер шығаруда ақпараттық технологияны қолдану әдістері
 Современные информационные технологии в образовании
 Разработка web-сайта для ООО Лидер
 Искусственный интеллект, данные и знания. Экспертные системы. Лекция №1
 Информационные модели на графах
 Лекция 1. Системы обработки информации в таможенных органах Российской Федерации
 Кодирование информации
 MVC в Android. Создание простейшего приложения
 Разновидности объектов и их классификация