- Programming Assignment

Содержание
- 2. Assignments 2&3: Build a Simple System to Recognize Coins labeled image original image quarters nickel pennies
- 3. Assign 2: Label and Count Regions labeled image original image 7 regions
- 4. Project Objectives Improve your skills with manipulating stacks and queues. Improve your understanding of recursion. Illustrate
- 5. Flowchart for labeling and counting regions (1) add a new option to your menu called “Count/Label
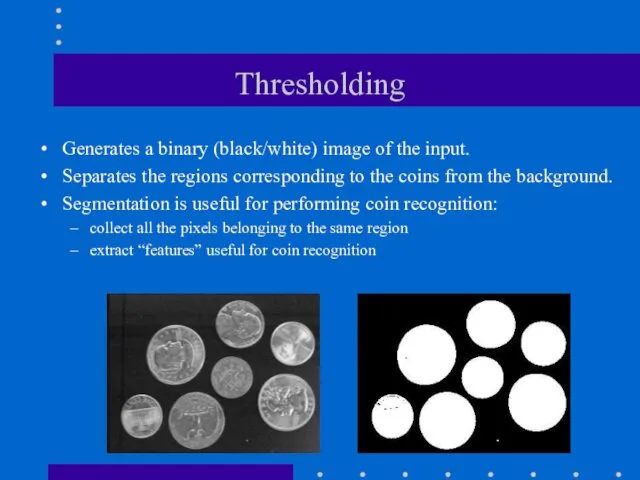
- 6. Thresholding Generates a binary (black/white) image of the input. Separates the regions corresponding to the coins
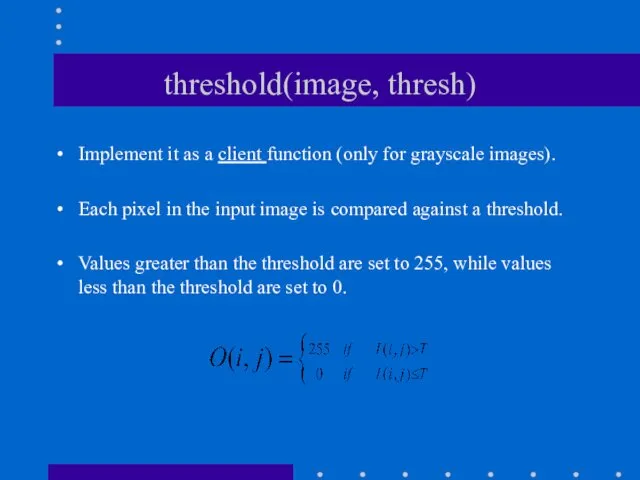
- 7. threshold(image, thresh) Implement it as a client function (only for grayscale images). Each pixel in the
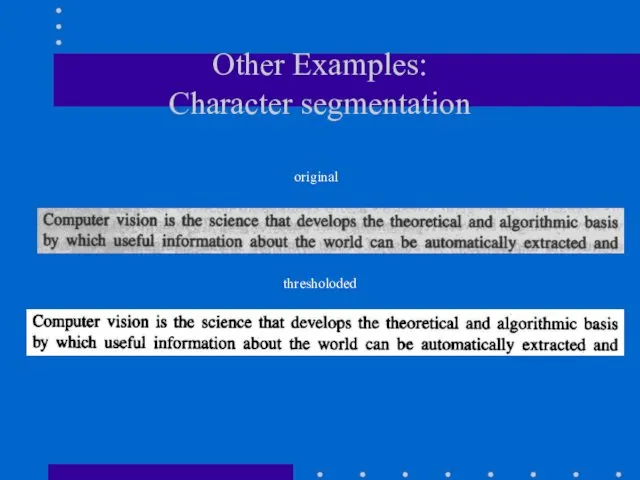
- 8. Other Examples: Character segmentation original thresholoded
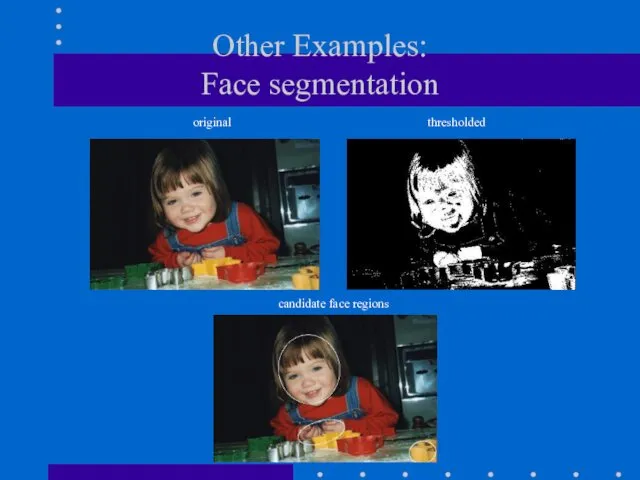
- 9. Other Examples: Face segmentation original thresholded candidate face regions
- 10. How to choose the threshold? original good threshold low threshold high threshold
- 11. displayHistogram(image) Implement it as a client function. The histogram is a bar graph of the pixel
- 12. displayHistogram(image) -- cont’d Use an array of counters to store the pixel frequencies. Display the histogram
- 13. Improving the results of thresholding In most cases, further processing is required to improve the results
- 14. dilate(image) -- client function at least one neighbor is 255 all 8 neighbors are 0
- 15. dilate(cont’d) Dilation “expands” the regions (i.e.,adds a layer of boundary pixels) original thresholded dilated
- 16. erode(image) -- client function all 8 neighbors are 255 at least one neighbor is 0
- 17. erode(image) Erosion “shrinks” the regions (i.e., removes a layer of boundary pixels) original thresholded eroded
- 18. Filling in the holes of regions Apply dilation to fill in the holes. Apply erosion to
- 19. Connected Components Algorithm Finds the connected components in an image and assigns a unique label to
- 20. Connected Components Algorithm (cont’d) 1. Scan the thresholded image to find an unlabeled white (255) pixel
- 21. 8-neighbors of (i,j)
- 22. int connectedComponents(inputImage, outputImage) set outputImage --> 255 (white) // initialization connComp=0; for (i=0; i for(j=0; j
- 23. findComponent(parameters) Implement this as a recursive function. Think what the parameter list should be ...
- 24. Breadth-First-Search (BFS) The main structure used used by BFS is the queue. BFS uses a queue
- 25. findComponentBFS(inputImage, outputImage, i, j, label) Queue.MakeEmpty(); Queue.Enqueue((i,j)); // initialize queue while(!Queue.IsEmpty()) { Queue.Dequeue((pi,pj)); outputImage[pi][pj] = label;
- 26. P1 P2 p10 p3 p4 p10 p3 p4 p3 p4 p4 p5 p5 dequeue dequeue dequeue
- 27. Depth-First-Search (DFS) The main structure used used by DFS is the stack. DFS uses a stack
- 28. findComponentDFS(inputImage, outputImage, i, j, label) Stack.MakeEmpty(); Stack.Push((i,j)); // initialize stack while(!Stack.IsEmpty()) { Stack.Pop((pi,pj)); outputImage[pi][pj] = label;
- 30. Скачать презентацию
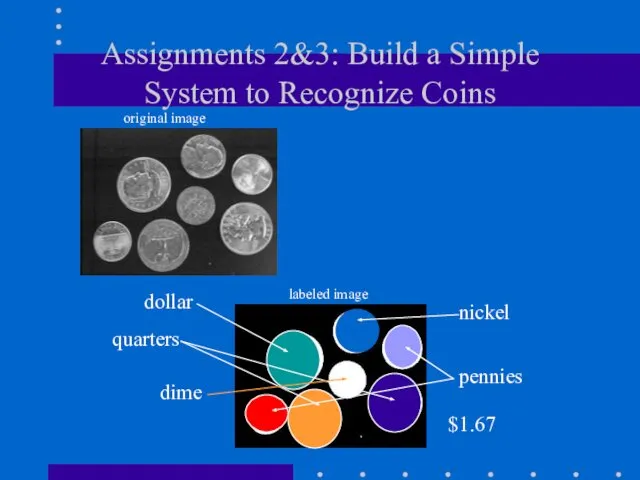
Assignments 2&3: Build a Simple System to Recognize Coins
labeled image
original image
quarters
nickel
pennies
dime
dollar
$1.67
Assignments 2&3: Build a Simple System to Recognize Coins
labeled image
original image
quarters
nickel
pennies
dime
dollar
$1.67
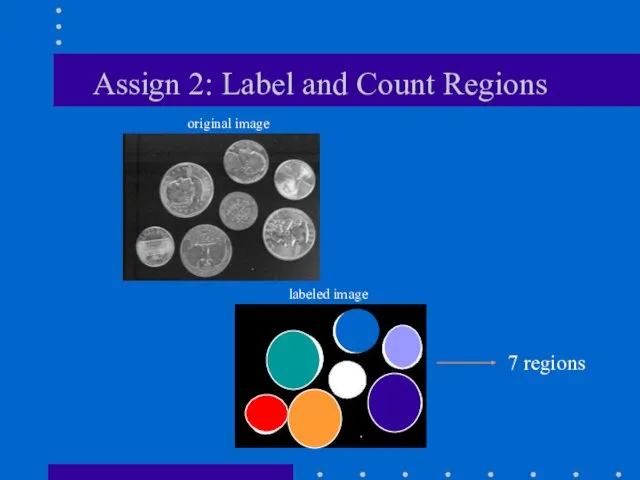
Assign 2: Label and Count Regions
labeled image
original image
7 regions
Assign 2: Label and Count Regions
labeled image
original image
7 regions
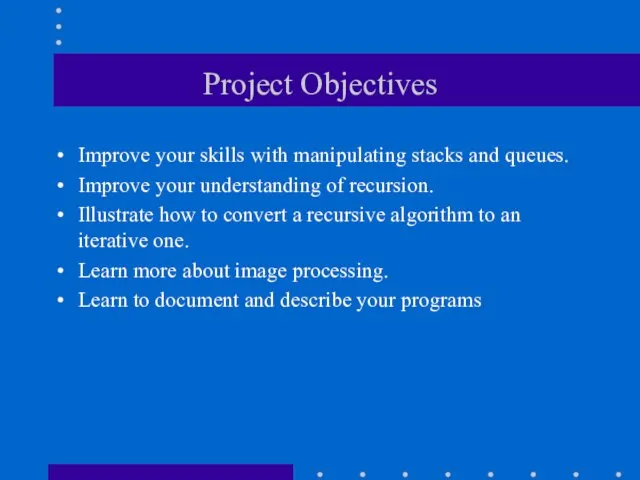
Project Objectives
Improve your skills with manipulating stacks and queues.
Improve your understanding
Project Objectives
Improve your skills with manipulating stacks and queues.
Improve your understanding
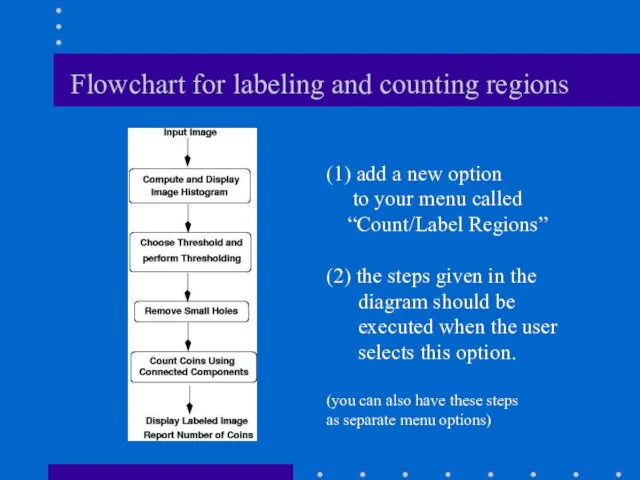
Flowchart for labeling and counting regions
(1) add a new option
to
Flowchart for labeling and counting regions
(1) add a new option
to
Thresholding
Generates a binary (black/white) image of the input.
Separates the regions
Thresholding
Generates a binary (black/white) image of the input.
Separates the regions
threshold(image, thresh)
Implement it as a client function (only for grayscale images).
Each
threshold(image, thresh)
Implement it as a client function (only for grayscale images).
Each
Other Examples:
Character segmentation
original
thresholoded
Other Examples:
Character segmentation
original
thresholoded
Other Examples:
Face segmentation
original
thresholded
candidate face regions
Other Examples:
Face segmentation
original
thresholded
candidate face regions
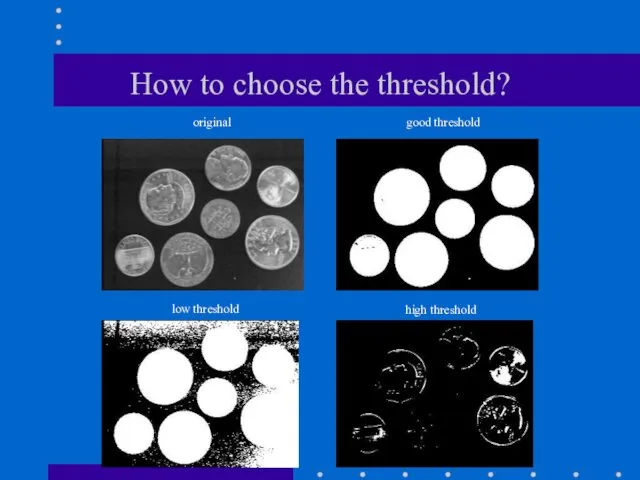
How to choose the threshold?
original
good threshold
low threshold
high threshold
How to choose the threshold?
original
good threshold
low threshold
high threshold
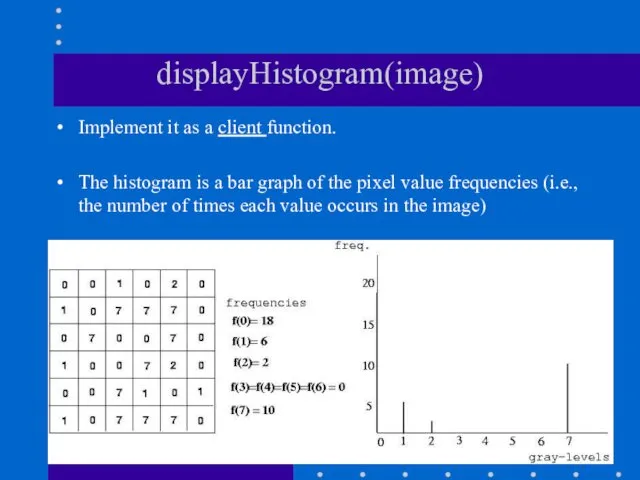
displayHistogram(image)
Implement it as a client function.
The histogram is a bar graph
displayHistogram(image)
Implement it as a client function.
The histogram is a bar graph
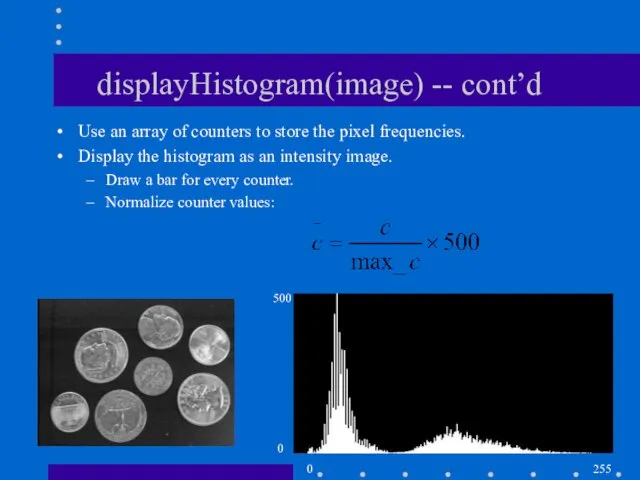
displayHistogram(image) -- cont’d
Use an array of counters to store the pixel
displayHistogram(image) -- cont’d
Use an array of counters to store the pixel
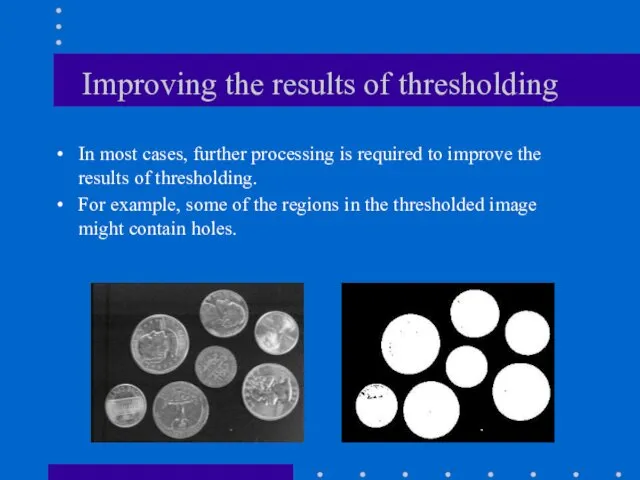
Improving the results of thresholding
In most cases, further processing is required
Improving the results of thresholding
In most cases, further processing is required
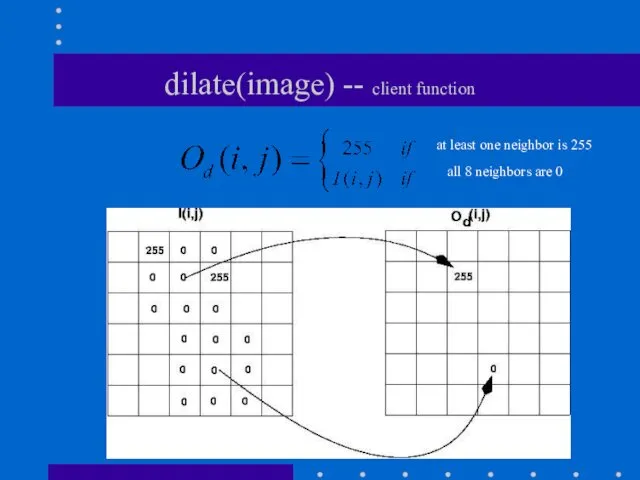
dilate(image) -- client function
at least one neighbor is 255
all
dilate(image) -- client function
at least one neighbor is 255
all
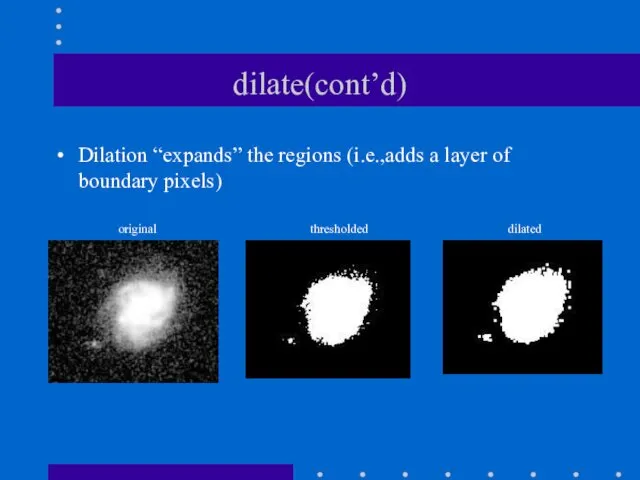
dilate(cont’d)
Dilation “expands” the regions (i.e.,adds a layer of boundary pixels)
original
thresholded
dilated
dilate(cont’d)
Dilation “expands” the regions (i.e.,adds a layer of boundary pixels)
original
thresholded
dilated
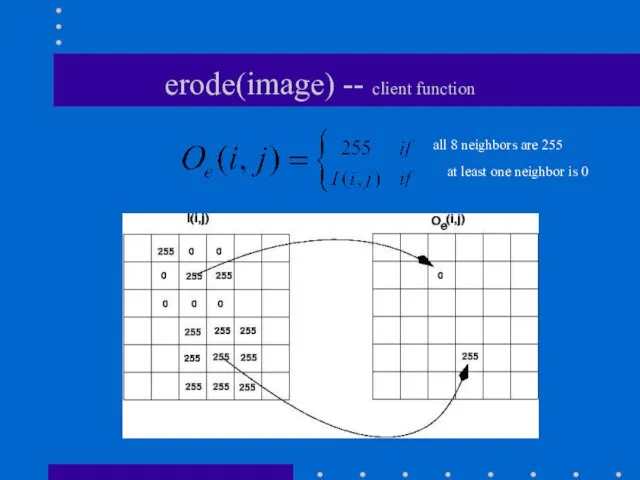
erode(image) -- client function
all 8 neighbors are 255
at least one
erode(image) -- client function
all 8 neighbors are 255
at least one
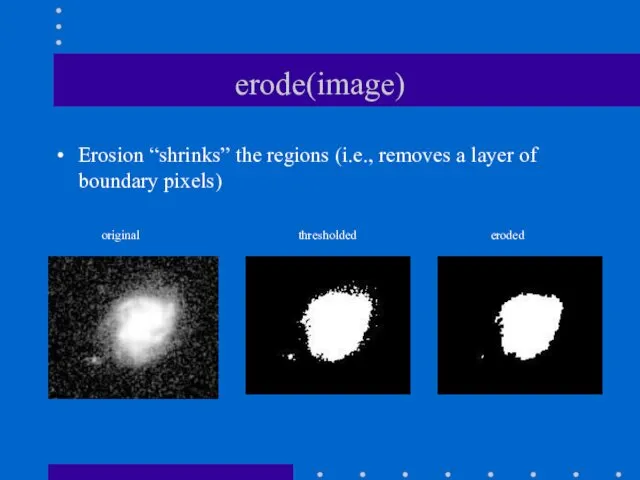
erode(image)
Erosion “shrinks” the regions (i.e., removes a layer of boundary pixels)
original
thresholded
eroded
erode(image)
Erosion “shrinks” the regions (i.e., removes a layer of boundary pixels)
original
thresholded
eroded
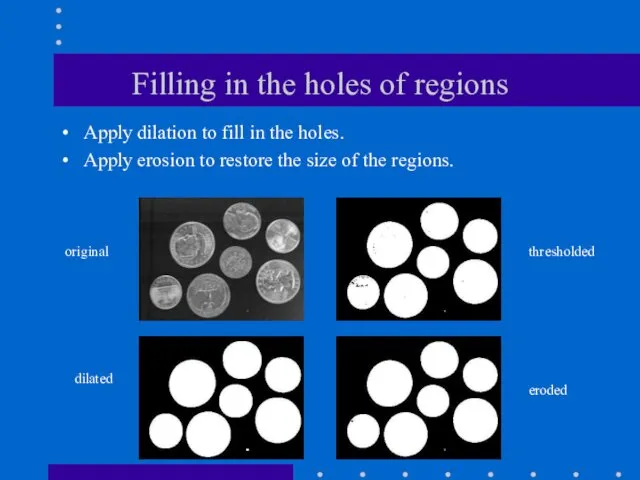
Filling in the holes of regions
Apply dilation to fill in the
Filling in the holes of regions
Apply dilation to fill in the
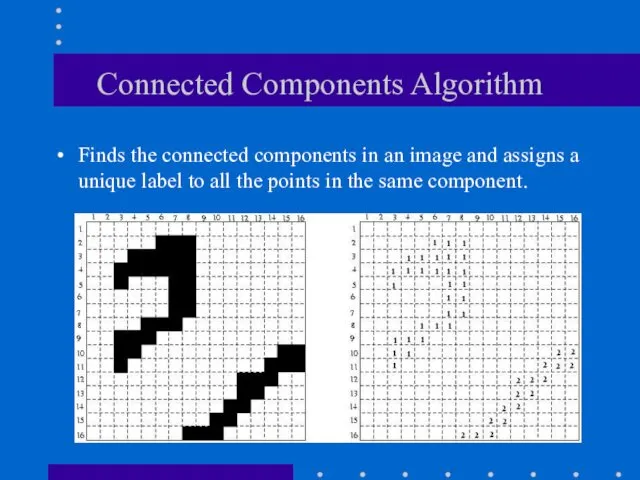
Connected Components Algorithm
Finds the connected components in an image and assigns
Connected Components Algorithm
Finds the connected components in an image and assigns
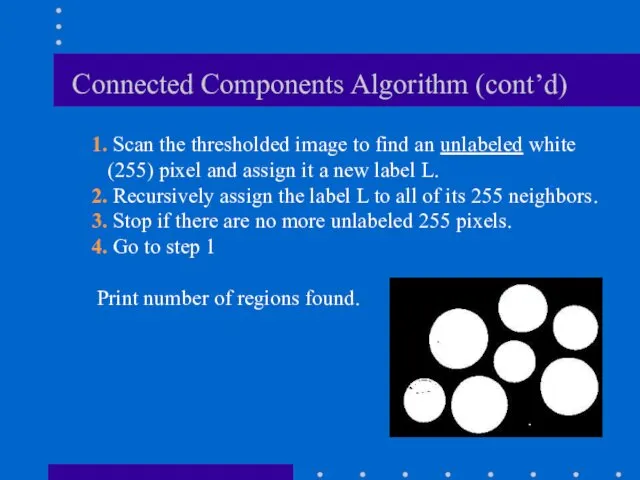
Connected Components Algorithm (cont’d)
1. Scan the thresholded image to find an
Connected Components Algorithm (cont’d)
1. Scan the thresholded image to find an
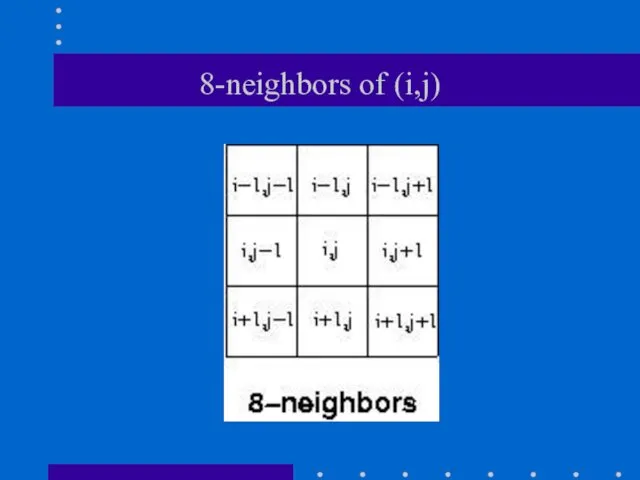
8-neighbors of (i,j)
8-neighbors of (i,j)
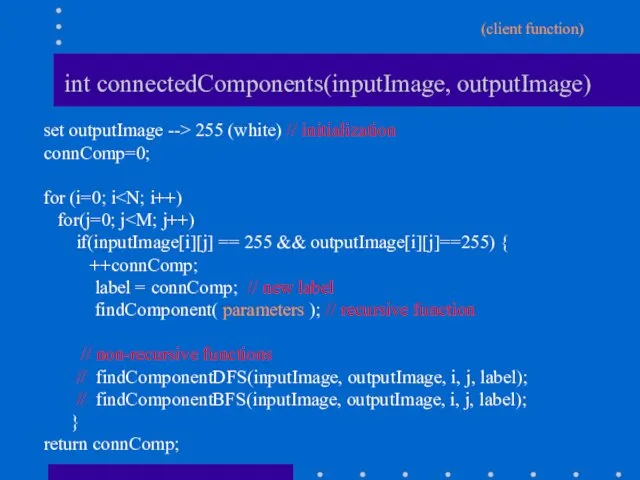
int connectedComponents(inputImage, outputImage)
set outputImage --> 255 (white) // initialization
connComp=0;
for (i=0; i
int connectedComponents(inputImage, outputImage)
set outputImage --> 255 (white) // initialization
connComp=0;
for (i=0; i
findComponent(parameters)
Implement this as a recursive function.
Think what the parameter list should
findComponent(parameters)
Implement this as a recursive function.
Think what the parameter list should
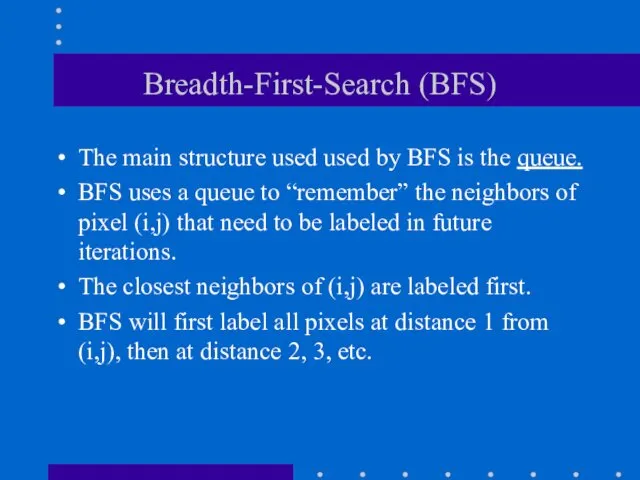
Breadth-First-Search (BFS)
The main structure used used by BFS is the queue.
BFS
Breadth-First-Search (BFS)
The main structure used used by BFS is the queue.
BFS
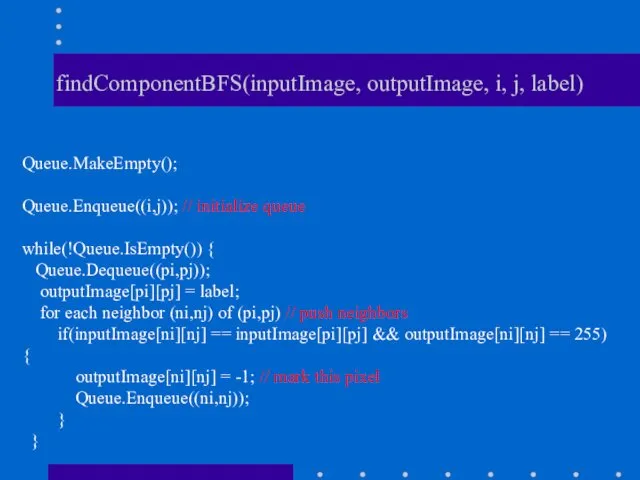
findComponentBFS(inputImage, outputImage, i, j, label)
Queue.MakeEmpty();
Queue.Enqueue((i,j)); // initialize queue
while(!Queue.IsEmpty()) {
Queue.Dequeue((pi,pj));
outputImage[pi][pj]
findComponentBFS(inputImage, outputImage, i, j, label)
Queue.MakeEmpty();
Queue.Enqueue((i,j)); // initialize queue
while(!Queue.IsEmpty()) {
Queue.Dequeue((pi,pj));
outputImage[pi][pj]
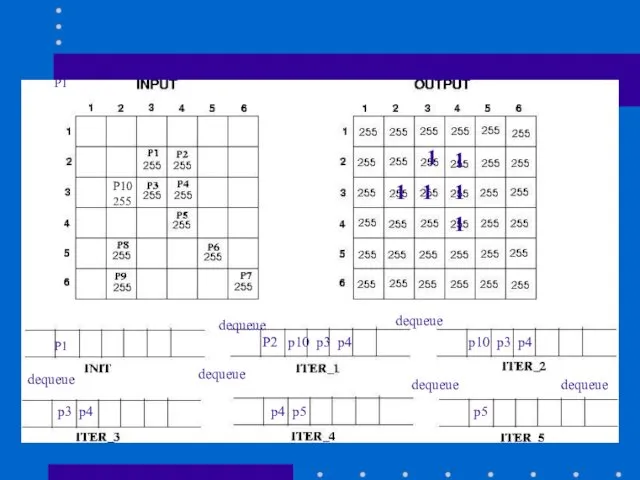
P1
P2 p10 p3 p4
p10 p3 p4
p3 p4
P1
P2 p10 p3 p4
p10 p3 p4
p3 p4
Depth-First-Search (DFS)
The main structure used used by DFS is the stack.
DFS
Depth-First-Search (DFS)
The main structure used used by DFS is the stack.
DFS
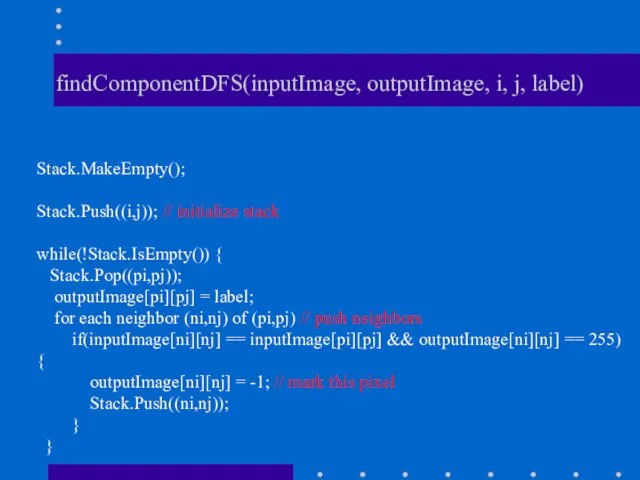
findComponentDFS(inputImage, outputImage, i, j, label)
Stack.MakeEmpty();
Stack.Push((i,j)); // initialize stack
while(!Stack.IsEmpty()) {
Stack.Pop((pi,pj));
outputImage[pi][pj]
findComponentDFS(inputImage, outputImage, i, j, label)
Stack.MakeEmpty();
Stack.Push((i,j)); // initialize stack
while(!Stack.IsEmpty()) {
Stack.Pop((pi,pj));
outputImage[pi][pj]
 Позиционные системы счисления
 Локальные сети. Параметры сетей и их стандарты
 Сбор и подготовка данных
 Современные накопители информации, используемые в вычислительной технике
 Использование технологии веб-квест как средство развития познавательных и творческих способностей учащихся
 Блочные алгоритмы. Блочное шифрование. Сравнение блочных и поточных шифров. Предпосылки создания шифра Фейстеля
 Параллельное программирование. С++. Thread Support Library. Atomic Operations Library
 Функции в Excel
 Организация и средства информационных технологий обеспечения управленческой деятельности
 Поиск публикаций и показатели деятельности ученого в Web of Science
 Бездротові мережі
 Занятие 1. Знакомство с программой Adobe Photoshop
 Microsoft Visual Studio — линейка продуктов компании Microsoft
 Операторы цикла
 Понятие об информации. Представление информации. Информационная деятельность человека.
 Автоматизоване створення запитів у базі даних
 Архітектура операційних систем
 Windows System Programming
 Личный кабинет
 Мир станочника. Аддитивные технологии и 3D-сканирование
 Методы и средства защиты программ от компьютерных вирусов
 46_Yaroslavskaya_Sasha
 Локальные и глобальные сети ЭВМ. Защита информации в сетях. (Тема 6)
 Godseeker. Игра
 Рабочий стол. Управление компьютером с помощью мыши
 Проектирование изделий из листового металла в NX
 Эти люди изменили мир
 Электронные ресурсы для детей и юношества в общедоступных библиотеках: создание и использование