- VHM WebCARE initial work flow (Presentation)

Содержание
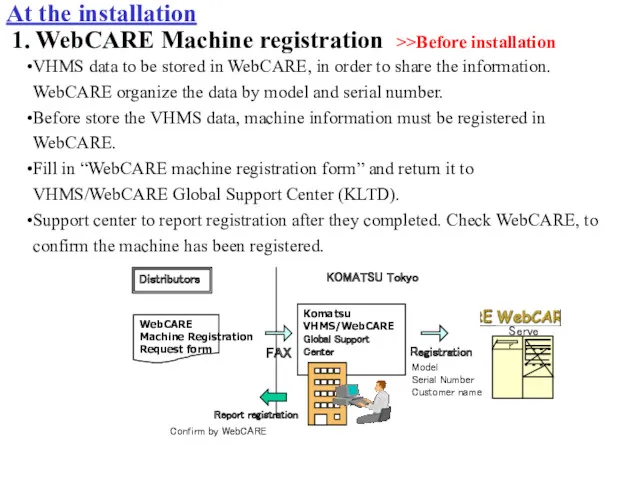
- 2. At the installation 1. WebCARE Machine registration >>Before installation VHMS data to be stored in WebCARE,
- 3. 2. VHMS initial setting >> After the installation At the installation VHMS must have set up
- 4. 3. Customer consent >> After delivery At the installation VHMS data is very confidential and important
- 5. 4. Orbcomm Activation At the installation There are two options depending on the installation method. Factory
- 6. Orbcomm installation work flow Reference : Orbcomm serial number sticker
- 7. Orbcomm Activation Request ・・ 1 week ahead of machine delivery A. Orbcomm factory installation Orbcomm terminal
- 8. Orbcomm Activation Request ・・As soon as terminal arrived B. Orbcomm field installation Orbcomm terminal for field
- 9. 5. Orbcomm initial setting At the installation There are two options depending on the installation method.
- 10. 6 Execute Orbcomm setting after starting the contract. VHMS controller Case 1 ; Machine starts working
- 11. PM-Clinic can be easily done by using “Snap shot” function in VHMS. The time of execution
- 12. VHMS data is saved in the controller, but its memory is limited. If the memory in
- 14. Скачать презентацию
At the installation
1. WebCARE Machine registration >>Before installation
VHMS data to be
At the installation
1. WebCARE Machine registration >>Before installation
VHMS data to be
2. VHMS initial setting >> After the installation
At the installation
VHMS must have
2. VHMS initial setting >> After the installation
At the installation
VHMS must have
3. Customer consent >> After delivery
At the installation
VHMS data is very
3. Customer consent >> After delivery
At the installation
VHMS data is very
4. Orbcomm Activation
At the installation
There are two options depending on the
4. Orbcomm Activation
At the installation
There are two options depending on the
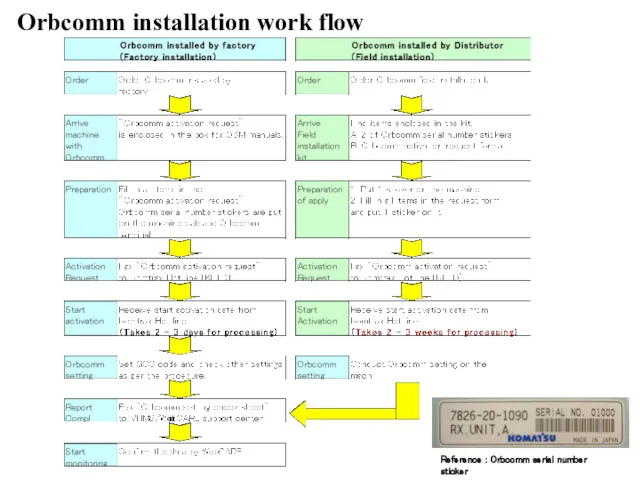
Orbcomm installation work flow
Reference : Orbcomm serial number sticker
Orbcomm installation work flow
Reference : Orbcomm serial number sticker
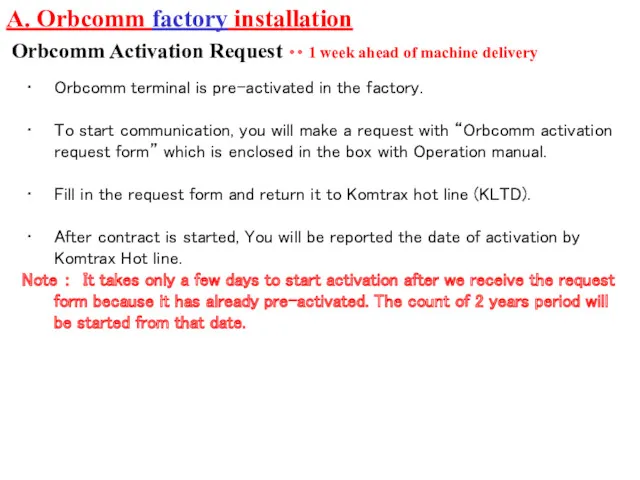
Orbcomm Activation Request ・・ 1 week ahead of machine delivery
A. Orbcomm
Orbcomm Activation Request ・・ 1 week ahead of machine delivery
A. Orbcomm
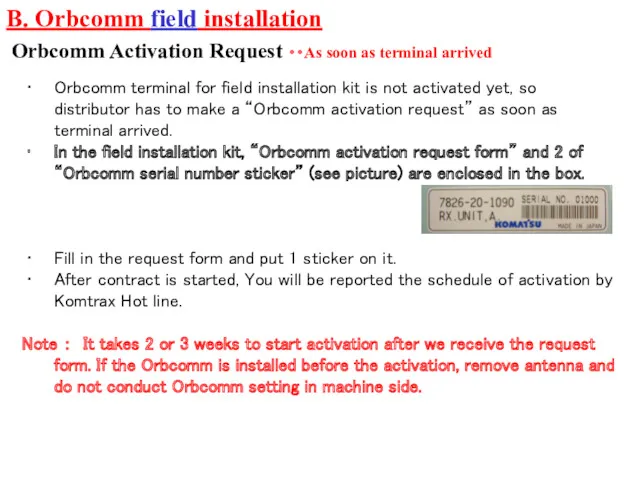
Orbcomm Activation Request ・・As soon as terminal arrived
B. Orbcomm field installation
Orbcomm
Orbcomm Activation Request ・・As soon as terminal arrived
B. Orbcomm field installation
Orbcomm
5. Orbcomm initial setting
At the installation
There are two options depending on
5. Orbcomm initial setting
At the installation
There are two options depending on
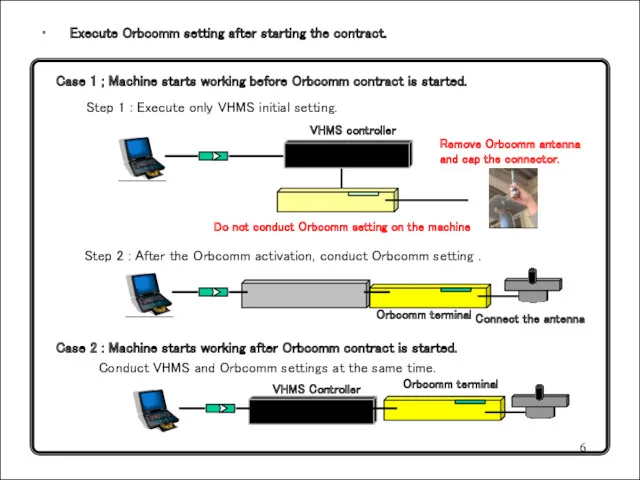
6
Execute Orbcomm setting after starting the contract.
VHMS controller
Case 1 ; Machine
6
Execute Orbcomm setting after starting the contract.
VHMS controller
Case 1 ; Machine
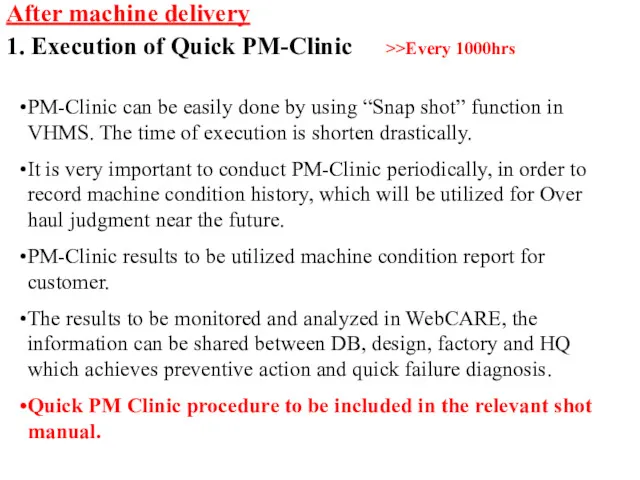
PM-Clinic can be easily done by using “Snap shot” function in
PM-Clinic can be easily done by using “Snap shot” function in
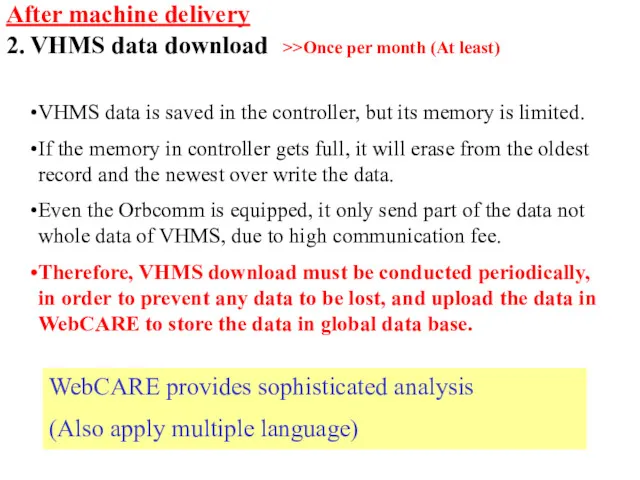
VHMS data is saved in the controller, but its memory is
VHMS data is saved in the controller, but its memory is
 Программирование на ЯВУ Pascal
 Електронні карти місцевості
 Бот для магазина цветов в Telegram
 Применение технологии Web 2.0 в библиотеках
 Презентация к урокуАлгоритм.Свойства алгоритмов
 Информационное общество
 КМиСЗИ. Криптография
 Структура компьютера. Понятие вычислительной системы
 Дизайн-проектирование. Первый семестр
 Использование логических функций Microsoft Excel
 Різновиди фактографічної інформації
 Презентация опыта Формирование мотивации учения
 История развития вычислительной техники
 Классификация ИС
 Google - largest Internet search engine
 Решение задания 7. Вычисления в электронных таблицах. (ОГЭ. 9 класс)
 Знакомство с соцсетями
 Ветвление в Паскале
 Настройка информационной системы домена
 Основы программирования: ТЕМА 11. ОБРАБОТКА СТРОК В ПАСКАЛЕ.
 Линейные методы классификации (метод стохастического градиента)
 Расчетные методики ПП ЭкоСфера-предприятие. Расчет выбросов от нефтехимического оборудования
 Объектно-ориентированное программирование
 Decision structure in C++
 Социальные сети
 Програма автоматичного визначення кодової таблиці текстового файлу
 Анализ данных в реляционных БД на примере СУБД MS Access. Создание запросов, изменяющих таблицы. Создание отчетов
 Фактологические жанры PR-текстов