- Endodontic surgery

Содержание
- 2. EndodonEnEEtic Surgery By Dr. Yousra Nashaat Assoc. Prof of Endodontics October 6 University O6U Dr Yousra
- 3. II. Apical surgery (periradicular) 60-80% of endodontic surgery. Definition: Surgical management in the apical part of
- 4. Any apical surgery includes Pre-surgical work-up : 1- The surgeon must explain to the patient the
- 5. A complete sterile set of Surgical armamentarium O6U Dr Yousra Nashaat
- 6. Surgeon preparation Surgeon washes his face & puts on a mask & cap. Sterile gloves are
- 7. Anesthesia & pain control (Local anesthesia ) i- Desired level of anesthesia. ii- Desired level of
- 8. Surgical Procedure I- Incision A cut made with a sharp blade through the tissue. Firm incision
- 9. II- Flap design Exposure of surgical site Aim 1) Reflection of the soft tissue overlying the
- 10. Principles and Guidelines for Flap Design 1- Wide flap base for adequate blood supply Healing 3-Width
- 11. Principles and Guidelines for Flap Design 6- Full thickness flap should be raised to maintain the
- 12. Types of flaps of Surgical flap 1. Full mucoperiosteal flaps Advantages: 1. Easy to reposition 2.Minimal
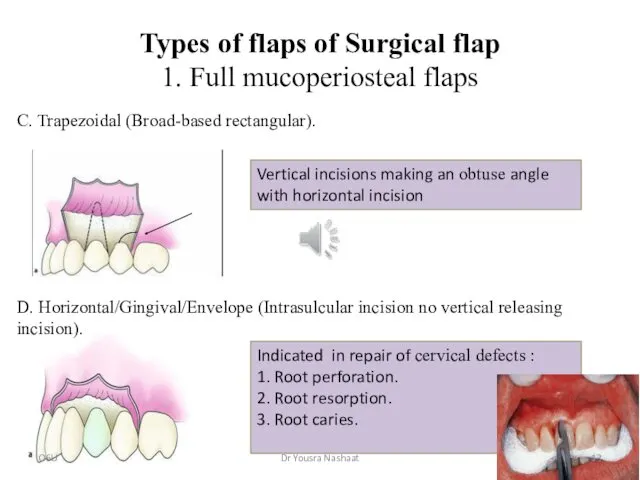
- 13. Types of flaps of Surgical flap 1. Full mucoperiosteal flaps C. Trapezoidal (Broad-based rectangular). Vertical incisions
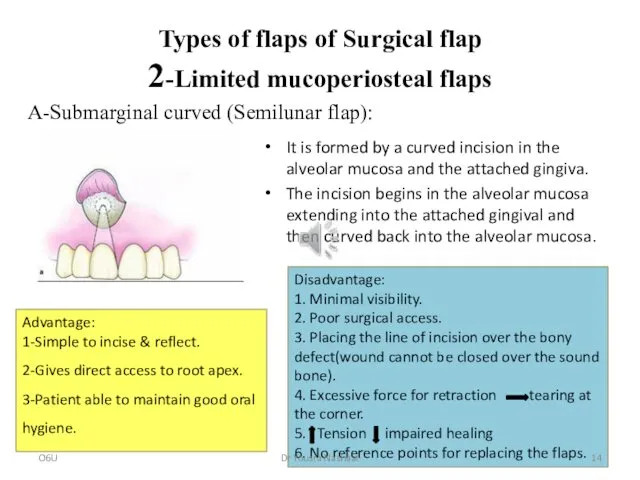
- 14. Types of flaps of Surgical flap 2-Limited mucoperiosteal flaps It is formed by a curved incision
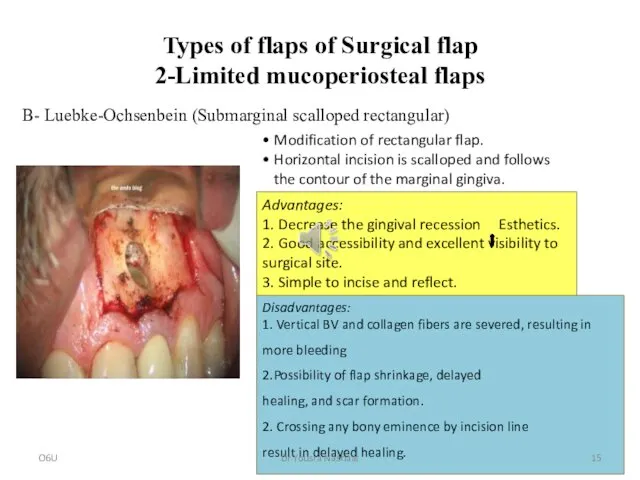
- 15. Types of flaps of Surgical flap 2-Limited mucoperiosteal flaps • Modification of rectangular flap. • Horizontal
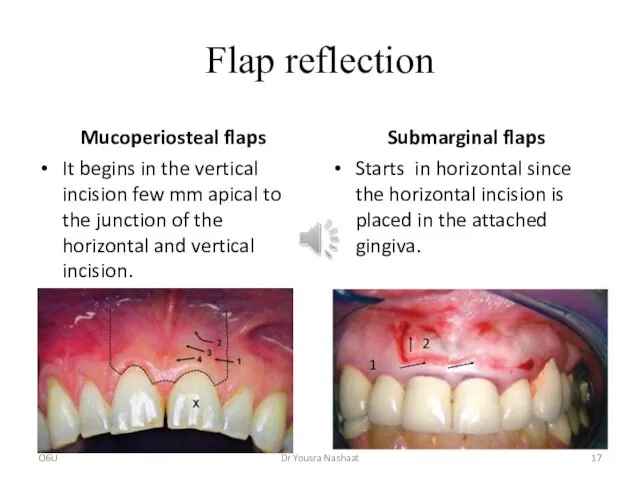
- 16. Flap reflection It is the process of separating the soft tissues (gingiva, mucosa and periosteum) from
- 17. Flap reflection Mucoperiosteal flaps It begins in the vertical incision few mm apical to the junction
- 18. Flap retraction Aim: Provides both visual and operative access to the periradicular and radicular tissues. Instruments:
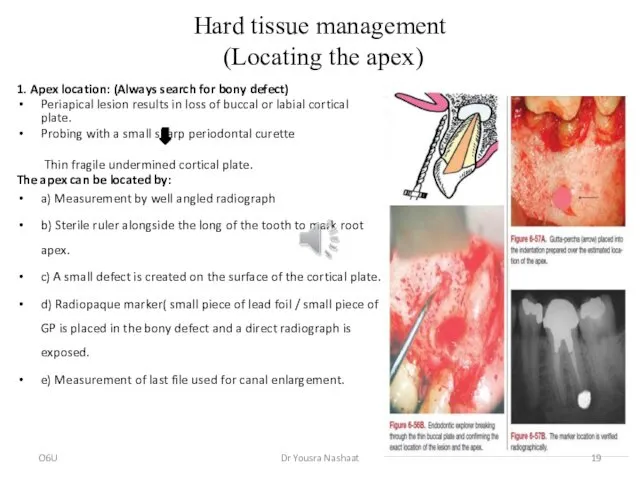
- 19. Hard tissue management (Locating the apex) 1. Apex location: (Always search for bony defect) Periapical lesion
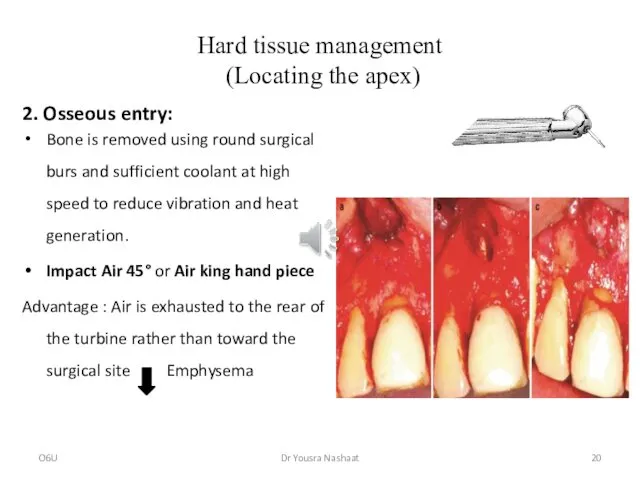
- 20. Hard tissue management (Locating the apex) 2. Osseous entry: Bone is removed using round surgical burs
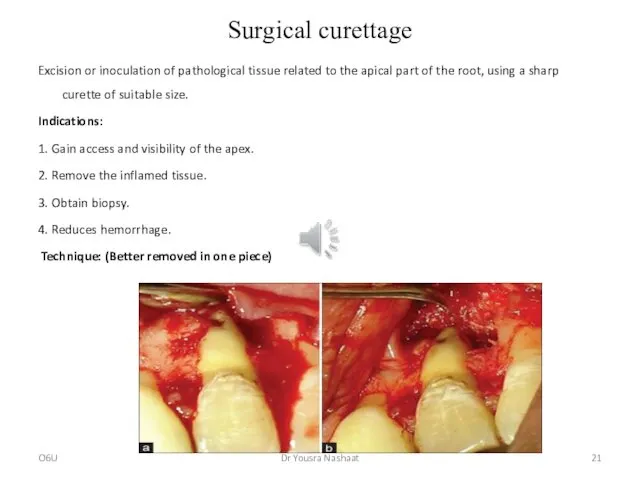
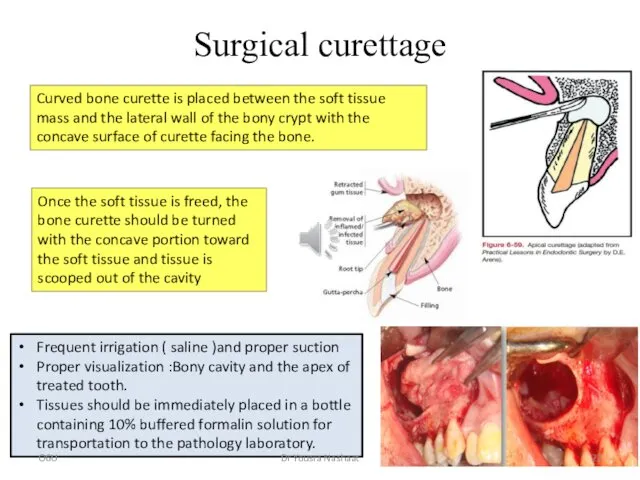
- 21. Surgical curettage Excision or inoculation of pathological tissue related to the apical part of the root,
- 22. Surgical curettage Curved bone curette is placed between the soft tissue mass and the lateral wall
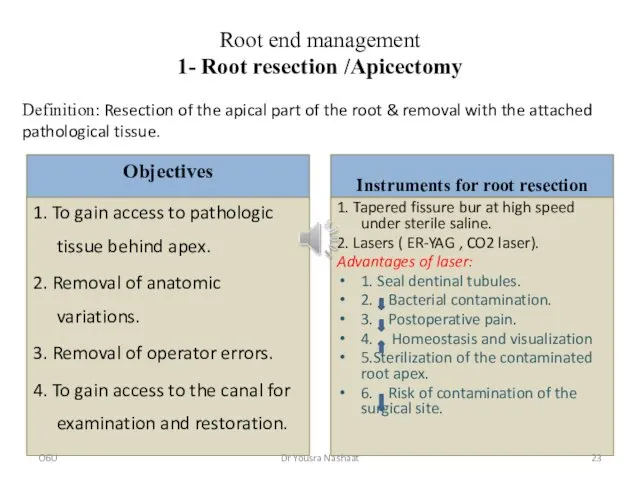
- 23. Root end management 1- Root resection /Apicectomy Objectives 1. To gain access to pathologic tissue behind
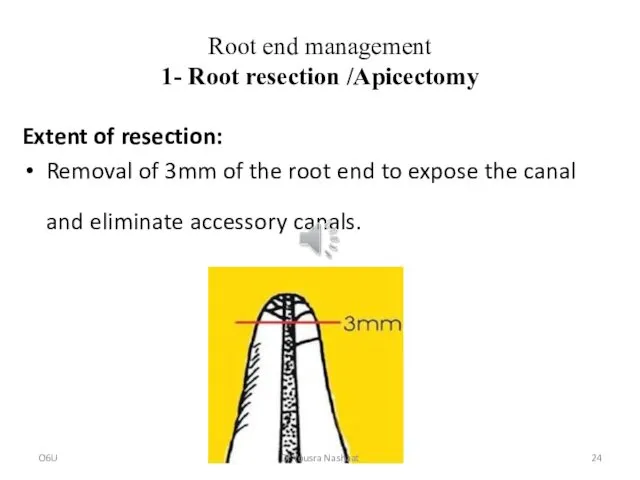
- 24. Root end management 1- Root resection /Apicectomy Extent of resection: Removal of 3mm of the root
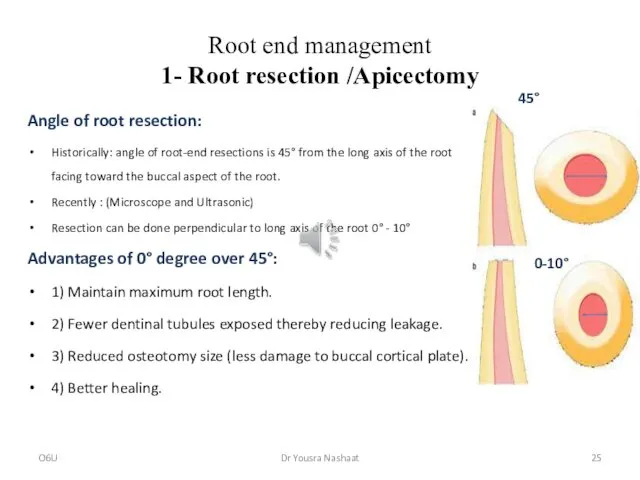
- 25. Root end management 1- Root resection /Apicectomy Angle of root resection: Historically: angle of root-end resections
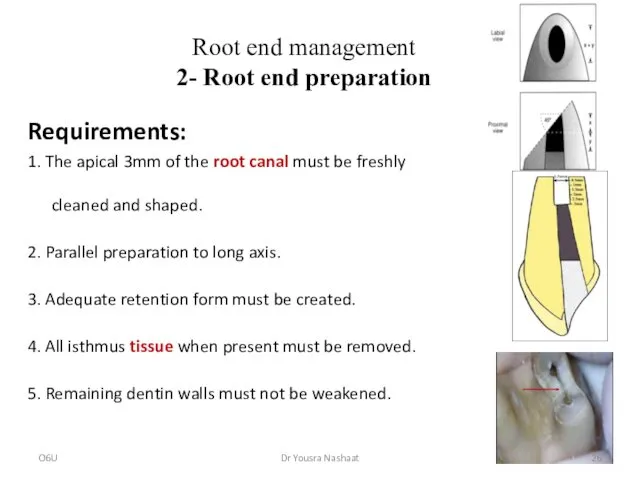
- 26. Root end management 2- Root end preparation Requirements: 1. The apical 3mm of the root canal
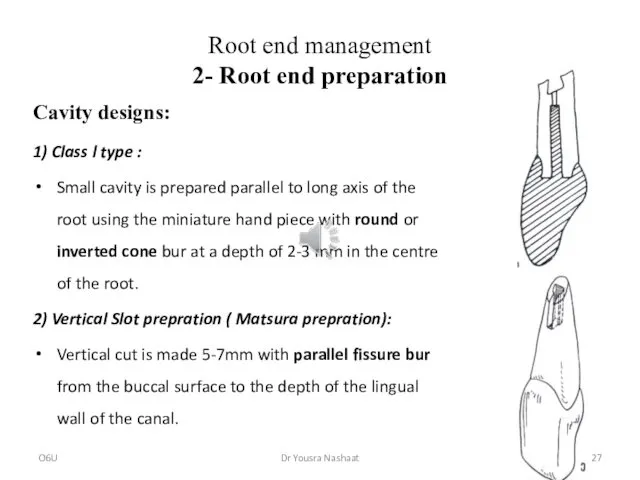
- 27. Root end management 2- Root end preparation Cavity designs: 1) Class l type : Small cavity
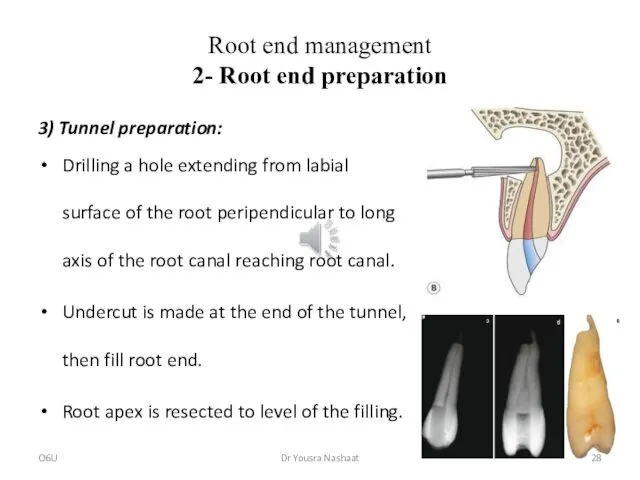
- 28. Root end management 2- Root end preparation 3) Tunnel preparation: Drilling a hole extending from labial
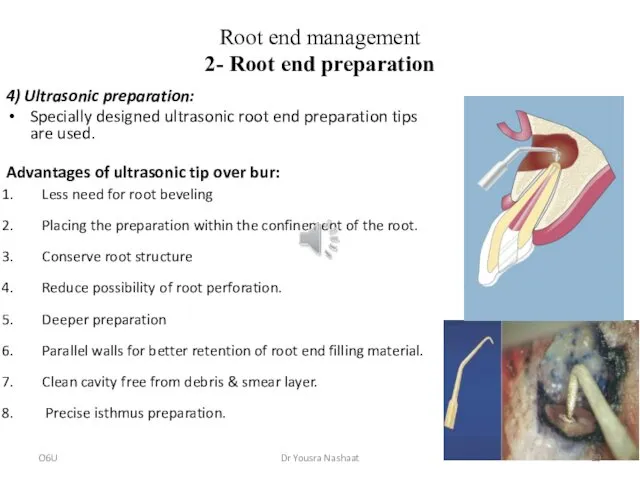
- 29. Root end management 2- Root end preparation 4) Ultrasonic preparation: Specially designed ultrasonic root end preparation
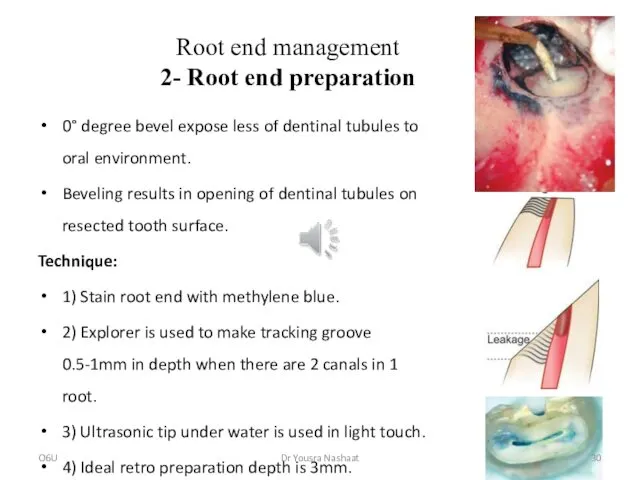
- 30. Root end management 2- Root end preparation 0° degree bevel expose less of dentinal tubules to
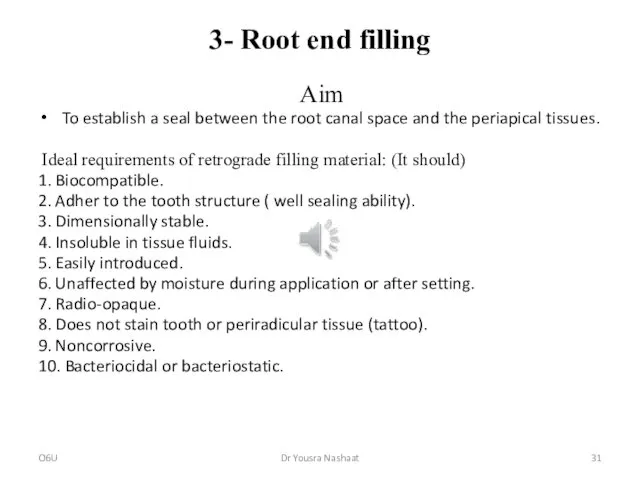
- 31. 3- Root end filling Aim To establish a seal between the root canal space and the
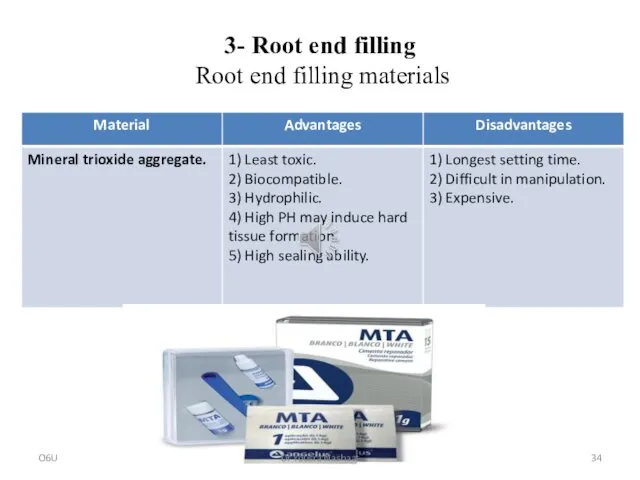
- 32. 3- Root end filling Root end filling materials O6U Dr Yousra Nashaat
- 33. 3- Root end filling Root end filling materials O6U Dr Yousra Nashaat
- 34. 3- Root end filling Root end filling materials O6U Dr Yousra Nashaat
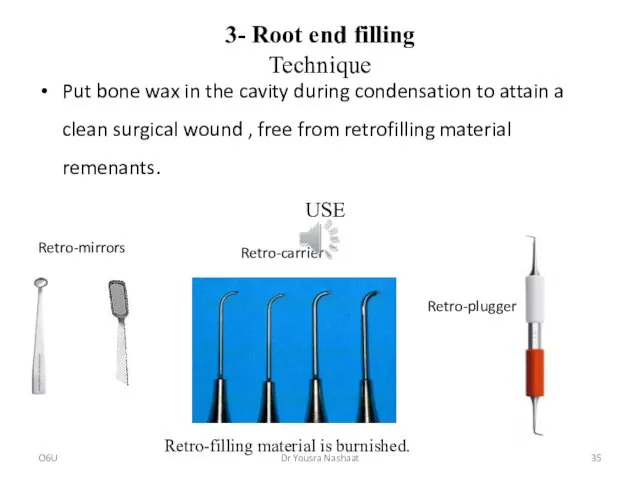
- 35. 3- Root end filling Technique Put bone wax in the cavity during condensation to attain a
- 37. Скачать презентацию
EndodonEnEEtic Surgery
By
Dr. Yousra Nashaat
Assoc. Prof of Endodontics
October 6 University
O6U
Dr Yousra Nashaat
EndodonEnEEtic Surgery
By
Dr. Yousra Nashaat
Assoc. Prof of Endodontics
October 6 University
O6U
Dr Yousra Nashaat
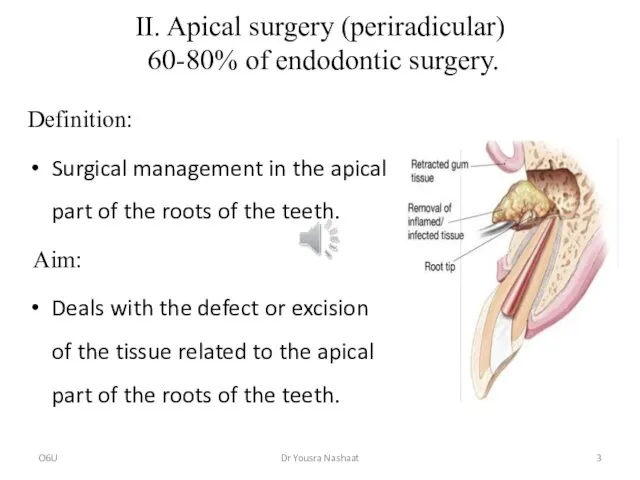
II. Apical surgery (periradicular)
60-80% of endodontic surgery.
Definition:
Surgical management in the
II. Apical surgery (periradicular)
60-80% of endodontic surgery.
Definition:
Surgical management in the

Any apical surgery includes
Pre-surgical work-up :
1- The surgeon must explain to
Any apical surgery includes
Pre-surgical work-up :
1- The surgeon must explain to

A complete sterile set of Surgical armamentarium
O6U
Dr Yousra Nashaat
A complete sterile set of Surgical armamentarium
O6U
Dr Yousra Nashaat

Surgeon preparation
Surgeon washes his face & puts on a mask
Surgeon preparation
Surgeon washes his face & puts on a mask
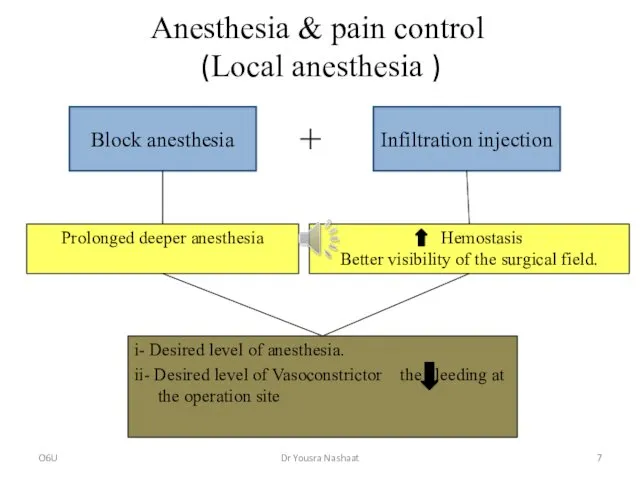
Anesthesia & pain control (Local anesthesia )
i- Desired level of anesthesia.
ii-
Anesthesia & pain control (Local anesthesia )
i- Desired level of anesthesia.
ii-
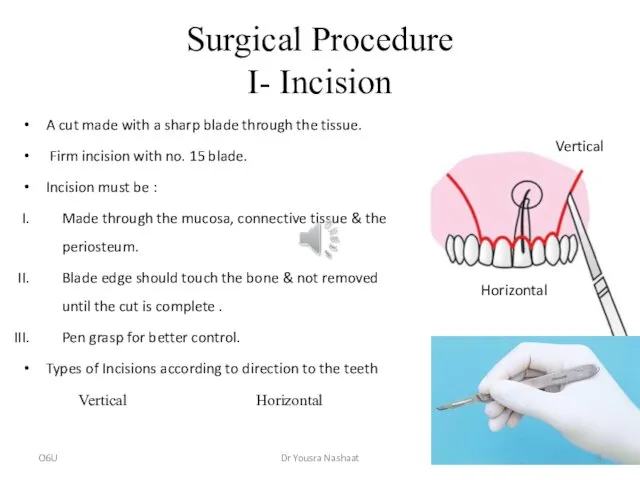
Surgical Procedure
I- Incision
A cut made with a sharp blade through the
Surgical Procedure
I- Incision
A cut made with a sharp blade through the
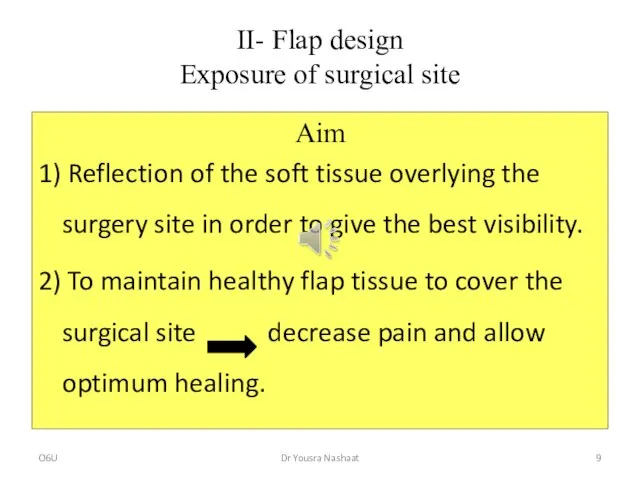
II- Flap design
Exposure of surgical site
Aim
1) Reflection of the soft
II- Flap design
Exposure of surgical site
Aim
1) Reflection of the soft
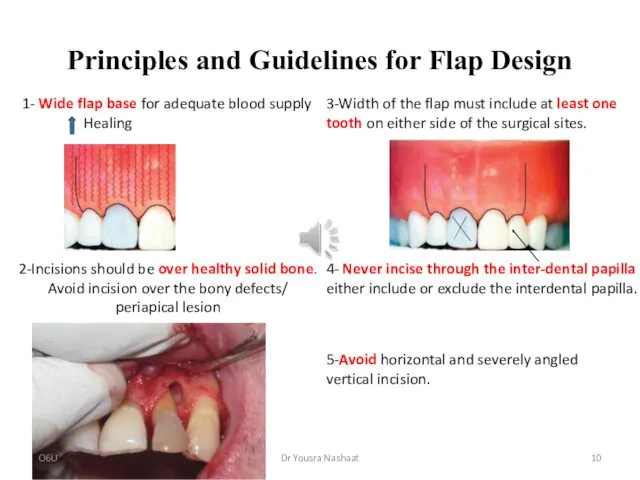
Principles and Guidelines for Flap Design
1- Wide flap base for adequate
Principles and Guidelines for Flap Design
1- Wide flap base for adequate
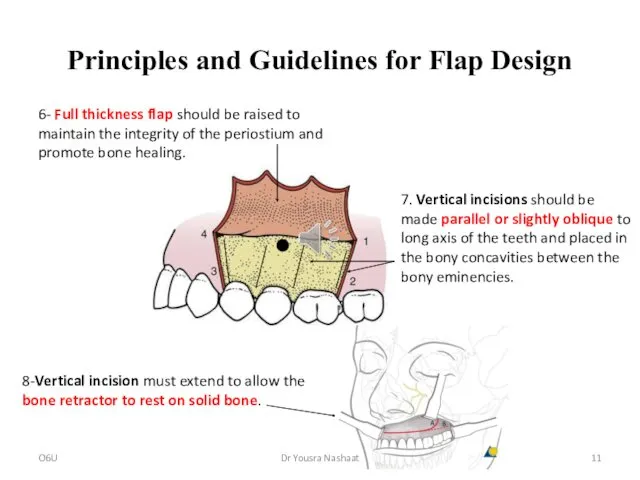
Principles and Guidelines for Flap Design
6- Full thickness flap should be
Principles and Guidelines for Flap Design
6- Full thickness flap should be
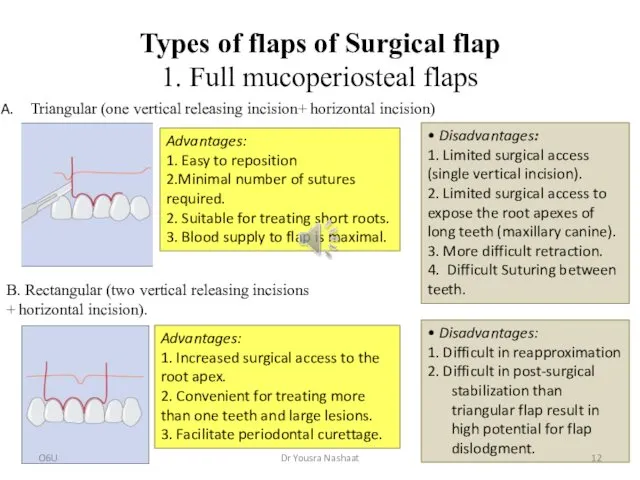
Types of flaps of Surgical flap
1. Full mucoperiosteal flaps
Advantages:
1. Easy to
Types of flaps of Surgical flap
1. Full mucoperiosteal flaps
Advantages:
1. Easy to
Types of flaps of Surgical flap
1. Full mucoperiosteal flaps
C. Trapezoidal (Broad-based
Types of flaps of Surgical flap
1. Full mucoperiosteal flaps
C. Trapezoidal (Broad-based
Types of flaps of Surgical flap
2-Limited mucoperiosteal flaps
It is formed by
Types of flaps of Surgical flap
2-Limited mucoperiosteal flaps
It is formed by
Types of flaps of Surgical flap
2-Limited mucoperiosteal flaps
• Modification of rectangular
Types of flaps of Surgical flap
2-Limited mucoperiosteal flaps
• Modification of rectangular
Flap reflection
It is the process of separating the soft tissues (gingiva,
Flap reflection
It is the process of separating the soft tissues (gingiva,
Flap reflection
Mucoperiosteal flaps
It begins in the vertical incision few mm apical
Flap reflection
Mucoperiosteal flaps
It begins in the vertical incision few mm apical

Flap retraction
Aim:
Provides both visual and operative access to the periradicular and
Flap retraction
Aim:
Provides both visual and operative access to the periradicular and
Hard tissue management
(Locating the apex)
1. Apex location: (Always search for
Hard tissue management
(Locating the apex)
1. Apex location: (Always search for
Hard tissue management
(Locating the apex)
2. Osseous entry:
Bone is removed using
Hard tissue management
(Locating the apex)
2. Osseous entry:
Bone is removed using
Surgical curettage
Excision or inoculation of pathological tissue related to the apical
Surgical curettage
Excision or inoculation of pathological tissue related to the apical
Surgical curettage
Curved bone curette is placed between the soft tissue mass
Surgical curettage
Curved bone curette is placed between the soft tissue mass
Root end management
1- Root resection /Apicectomy
Objectives
1. To gain access to pathologic
Root end management
1- Root resection /Apicectomy
Objectives
1. To gain access to pathologic
Root end management
1- Root resection /Apicectomy
Extent of resection:
Removal of 3mm of
Root end management
1- Root resection /Apicectomy
Extent of resection:
Removal of 3mm of
Root end management
1- Root resection /Apicectomy
Angle of root resection:
Historically: angle of
Root end management
1- Root resection /Apicectomy
Angle of root resection:
Historically: angle of
Root end management
2- Root end preparation
Requirements:
1. The apical 3mm of the
Root end management
2- Root end preparation
Requirements:
1. The apical 3mm of the
Root end management
2- Root end preparation
Cavity designs:
1) Class l type :
Small
Root end management
2- Root end preparation
Cavity designs:
1) Class l type :
Small
Root end management
2- Root end preparation
3) Tunnel preparation:
Drilling a hole extending
Root end management
2- Root end preparation
3) Tunnel preparation:
Drilling a hole extending
Root end management
2- Root end preparation
4) Ultrasonic preparation:
Specially designed ultrasonic root
Root end management
2- Root end preparation
4) Ultrasonic preparation:
Specially designed ultrasonic root
Root end management
2- Root end preparation
0° degree bevel expose less of
Root end management
2- Root end preparation
0° degree bevel expose less of
3- Root end filling
Aim
To establish a seal between the root
3- Root end filling
Aim
To establish a seal between the root

3- Root end filling
Root end filling materials
O6U
Dr Yousra Nashaat
3- Root end filling
Root end filling materials
O6U
Dr Yousra Nashaat

3- Root end filling
Root end filling materials
O6U
Dr Yousra Nashaat
3- Root end filling
Root end filling materials
O6U
Dr Yousra Nashaat
3- Root end filling
Root end filling materials
O6U
Dr Yousra Nashaat
3- Root end filling
Root end filling materials
O6U
Dr Yousra Nashaat
3- Root end filling
Technique
Put bone wax in the cavity during condensation
3- Root end filling
Technique
Put bone wax in the cavity during condensation
 Введение в клиническую психологию
 Endocrine pathology
 ВИЧ-инфекция у беременных женщин
 Физическое воспитание: организация, медицинский контроль
 Злоякісні новоутворення геніталій. Рак зовнішніх статевих органів
 Качество жизни и психическое здоровье пациентов с бронхиальной астмой
 Жатыр түтігінің және аналық безінің ісіктері. Емдеу әдістері мен негіздері. Алдын-алу
 Інфекція та інфекційний процес. Основи епідеміології
 Сергей Сергеевич Юдин
 Остеохондропатии и остеодистрофии
 Сезімдік жүйелер немесе талдағыштар
 Стоматиты и гельминтозы у детей
 Center of vision correction ASTANA VISION
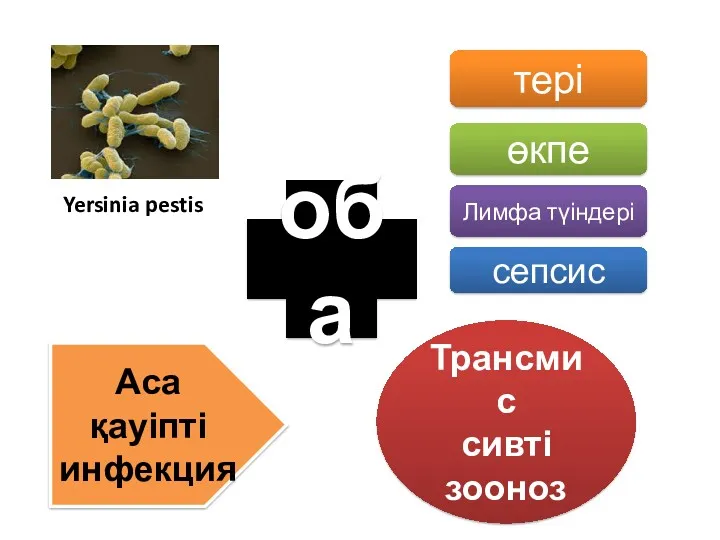 Оба - аса қауіпті инфекция
 Сестринская помощь при пиелонефритах
 Корь, её симптомы и профилактика
 Первая помощь пострадавшим в ДТП
 Современные методы нейродиагностики. МРТ для животных
 Иммунитет и проблемы питания жителей современного города
 Содержание фармакологии и ее задачи. Основные понятия общей фармакологии
 Особенности опухолей у детей. Общие принципы диагностики и лечения
 Синдром Дабина-Джонсона
 Первая помощь при неотложных состояниях, вызванных заболеваниями
 Помощь при рвоте, кормление тяжело больного пациента
 Операции на органах шеи
 Як зберегти здоров’я. Корисні та шкідливі звички
 Клиент-центрированный подход К. Роджерса
 Инфекции Передаваемые Половым Путем