- Dräger X-am 5000 / X-am 5600 Video basic training

Содержание
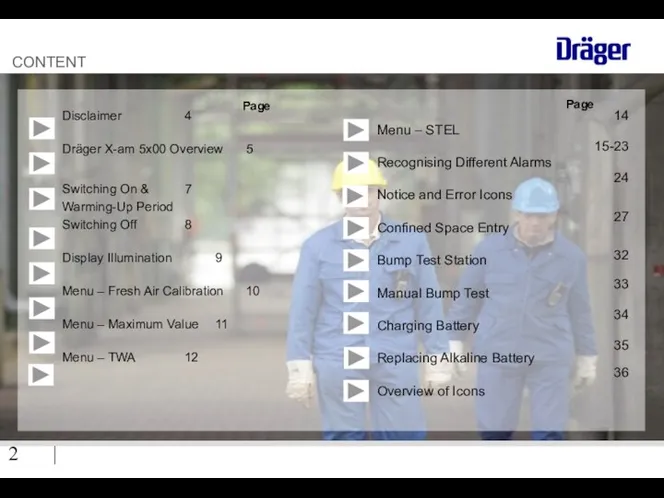
- 2. | CONTENT Disclaimer 4 Dräger X-am 5x00 Overview 5 Switching On & 7 Warming-Up Period Switching
- 3. General Information
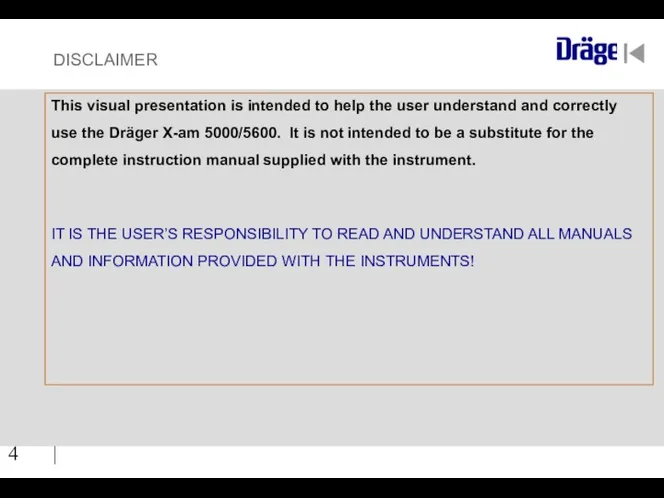
- 4. | DISCLAIMER This visual presentation is intended to help the user understand and correctly use the
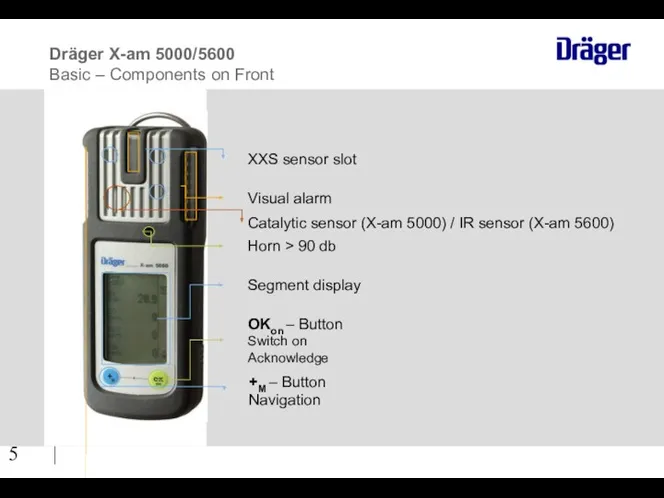
- 5. | XXS sensor slot Visual alarm Catalytic sensor (X-am 5000) / IR sensor (X-am 5600) Segment
- 6. Operation X-am 5000/5600
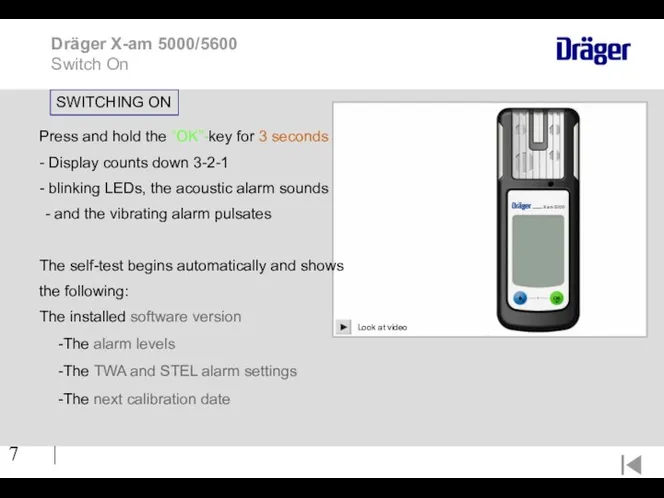
- 7. | Dräger X-am 5000/5600 Switch On Press and hold the “OK”-key for 3 seconds - Display
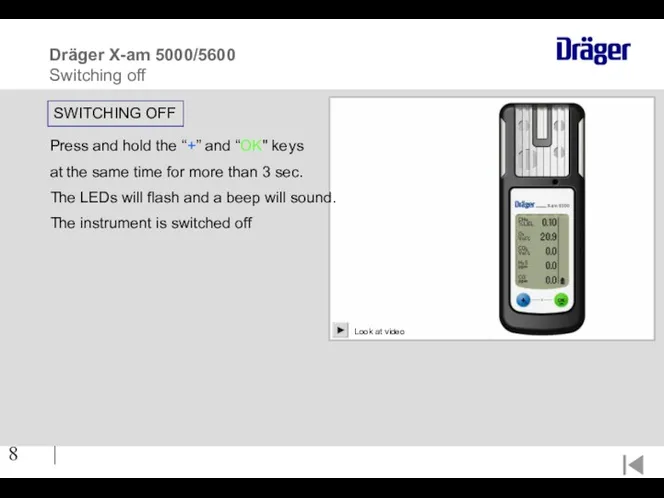
- 8. | Dräger X-am 5000/5600 Switching off Press and hold the “+” and “OK" keys at the
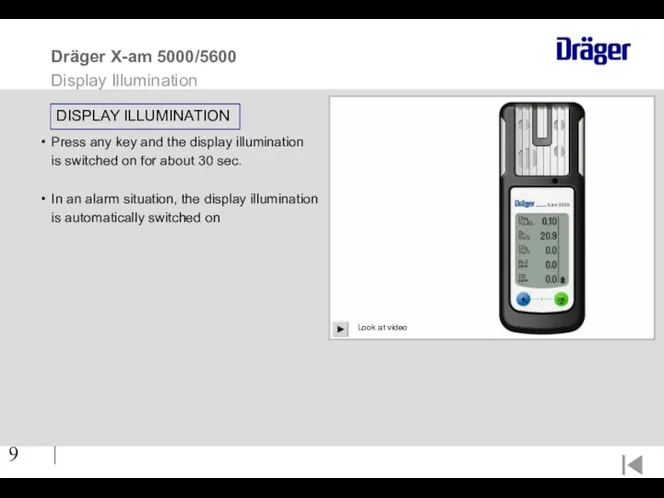
- 9. | Press any key and the display illumination is switched on for about 30 sec. In
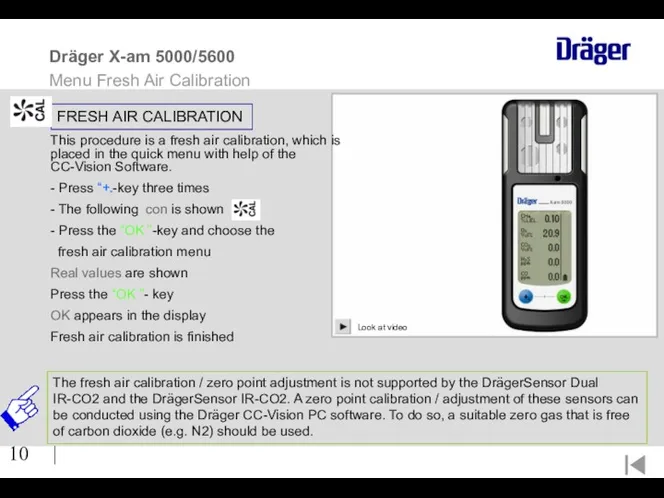
- 10. | Dräger X-am 5000/5600 Menu Fresh Air Calibration FRESH AIR CALIBRATION This procedure is a fresh
- 11. | Dräger X-am 5000/5600 Menu Maximum Value MENU MAXIMUM VALUE The function Max Value displays the
- 12. | TWA (Time Weighted Average) is the time-weighted average gas concentration (normally over an 8 hour
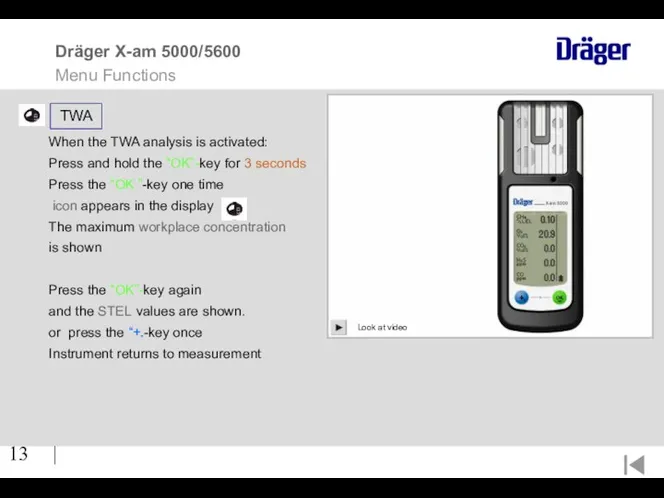
- 13. | TWA When the TWA analysis is activated: Press and hold the “OK”-key for 3 seconds
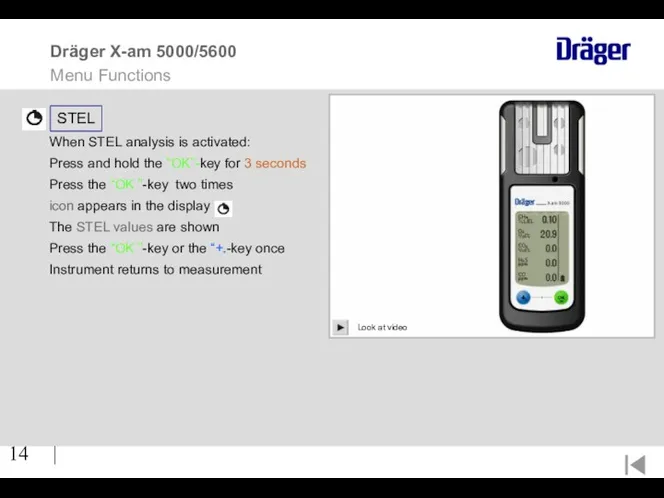
- 14. | Dräger X-am 5000/5600 Menu Functions When STEL analysis is activated: Press and hold the “OK”-key
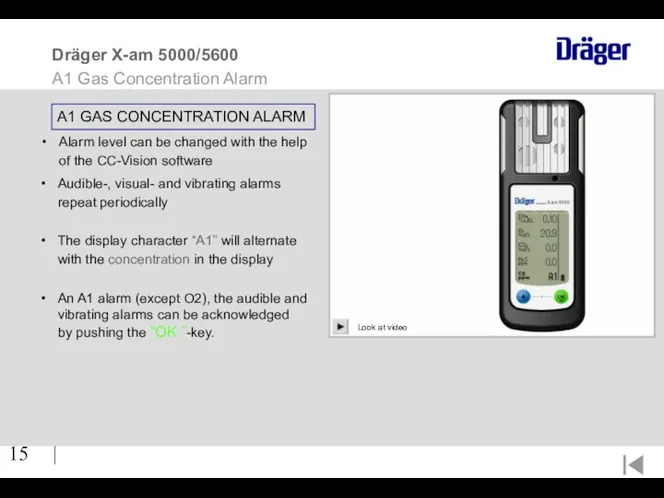
- 15. | Alarm level can be changed with the help of the CC-Vision software Dräger X-am 5000/5600
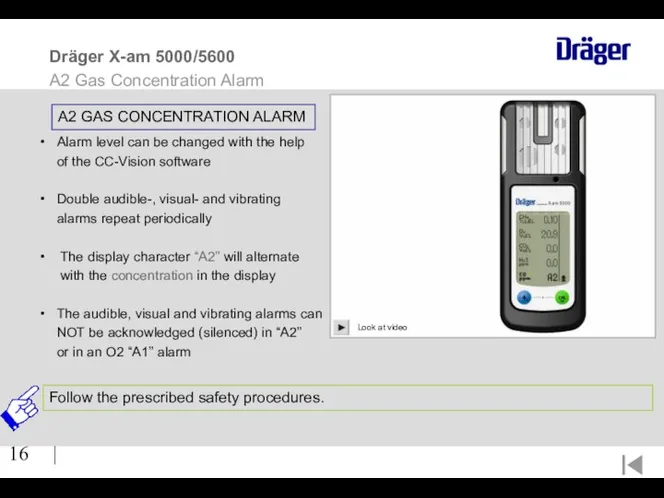
- 16. | Alarm level can be changed with the help of the CC-Vision software Double audible-, visual-
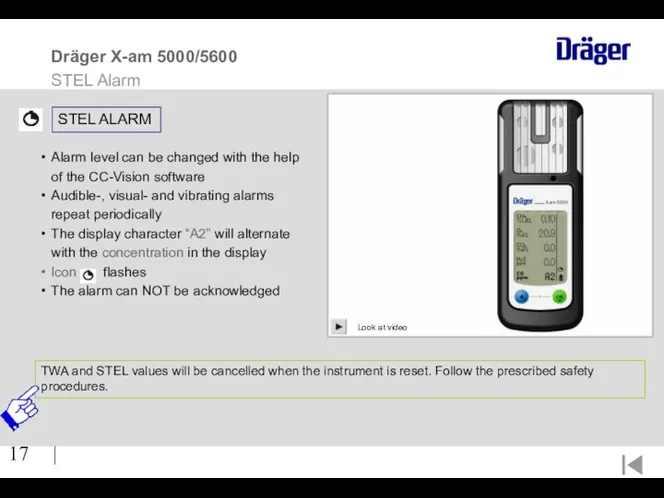
- 17. | TWA and STEL values will be cancelled when the instrument is reset. Follow the prescribed
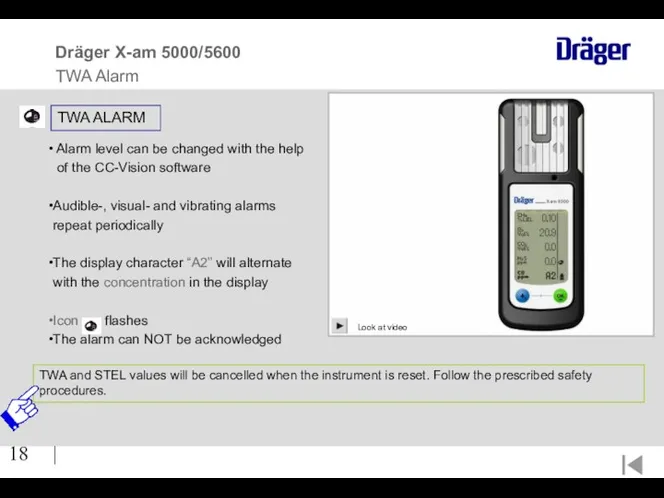
- 18. | TWA and STEL values will be cancelled when the instrument is reset. Follow the prescribed
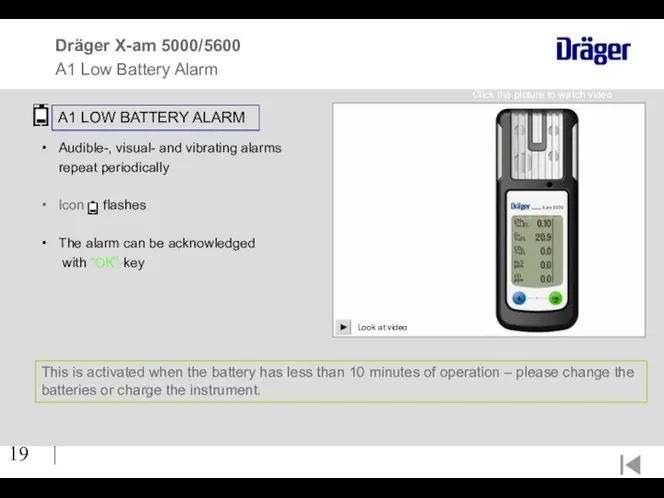
- 19. | Dräger X-am 5000/5600 A1 Low Battery Alarm Click the picture to watch video This is
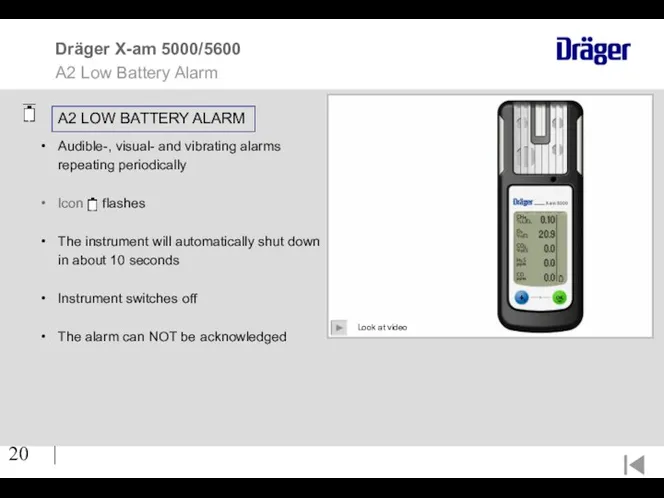
- 20. | A2 LOW BATTERY ALARM Dräger X-am 5000/5600 A2 Low Battery Alarm Audible-, visual- and vibrating
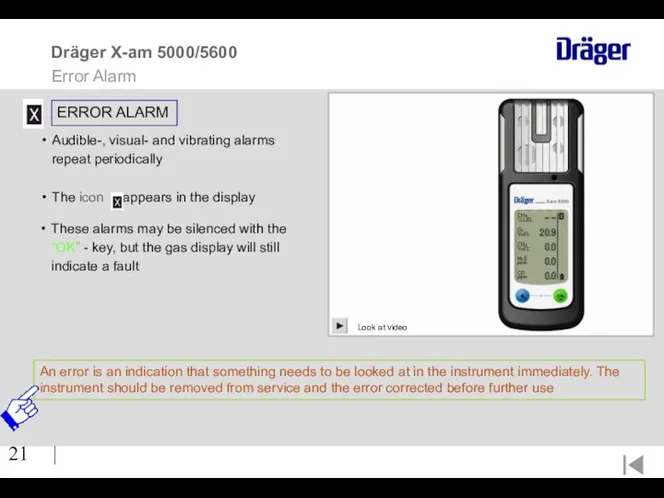
- 21. | Dräger X-am 5000/5600 Error Alarm ERROR ALARM An error is an indication that something needs
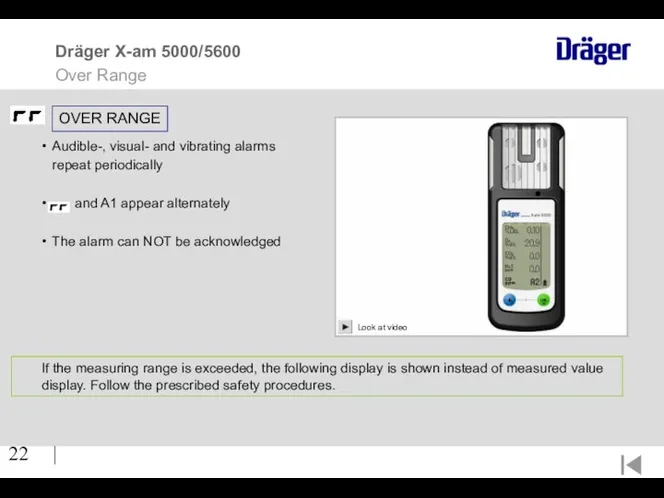
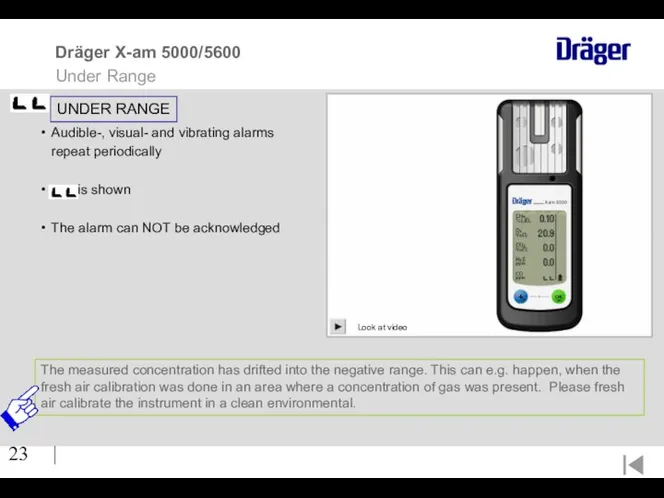
- 22. | Audible-, visual- and vibrating alarms repeat periodically and A1 appear alternately The alarm can NOT
- 23. | Look at video UNDER RANGE Audible-, visual- and vibrating alarms repeat periodically is shown The
- 24. | Press the “OK ”-key to acknowledge Press the “OK ”-key again An Error code is
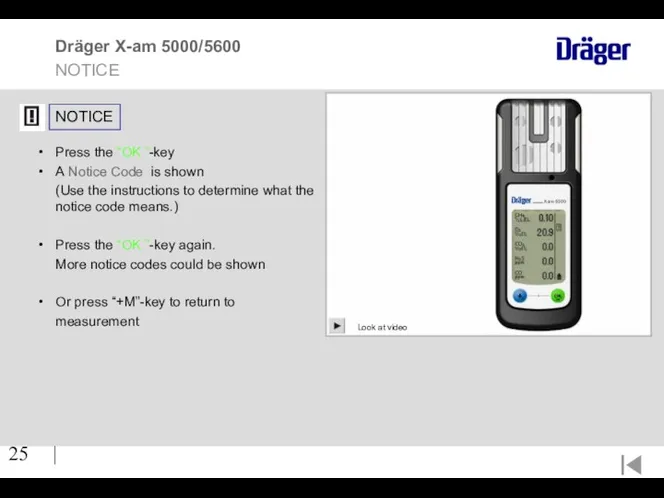
- 25. | Press the “OK ”-key A Notice Code is shown (Use the instructions to determine what
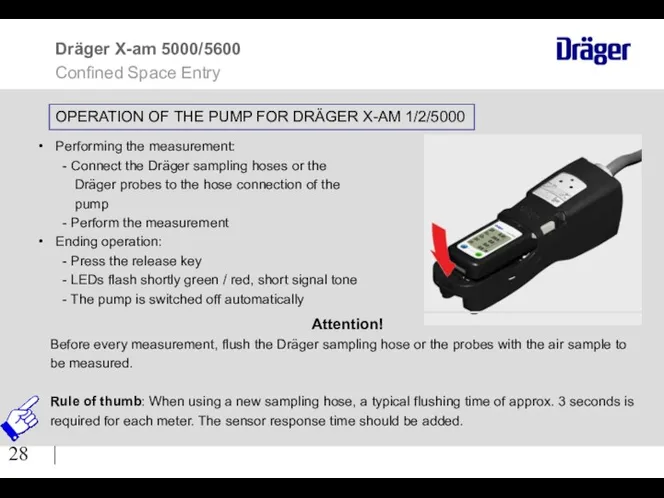
- 26. Operation Pump for X-am 1/2/5000
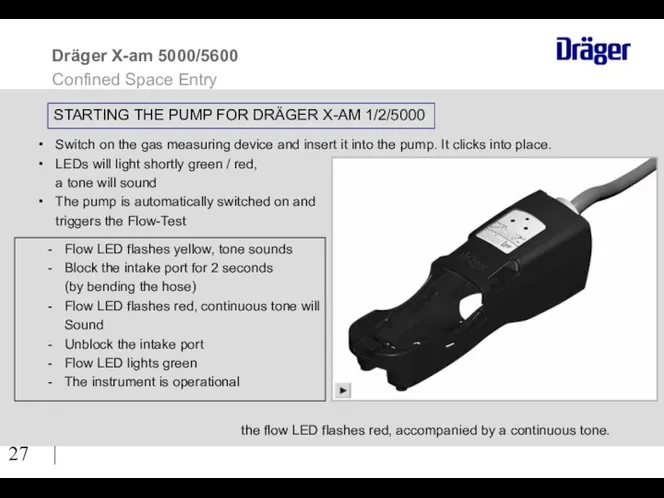
- 27. | Switch on the gas measuring device and insert it into the pump. It clicks into
- 28. | Attention! Before every measurement, flush the Dräger sampling hose or the probes with the air
- 29. Function test and Maintenance
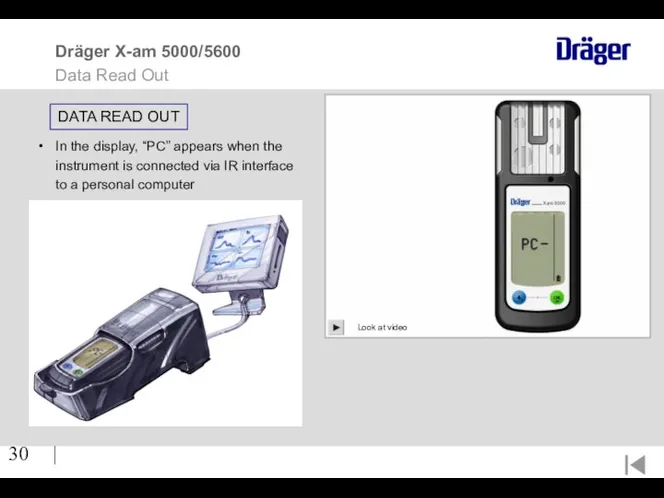
- 30. | DATA READ OUT Dräger X-am 5000/5600 Data Read Out Look at video In the display,
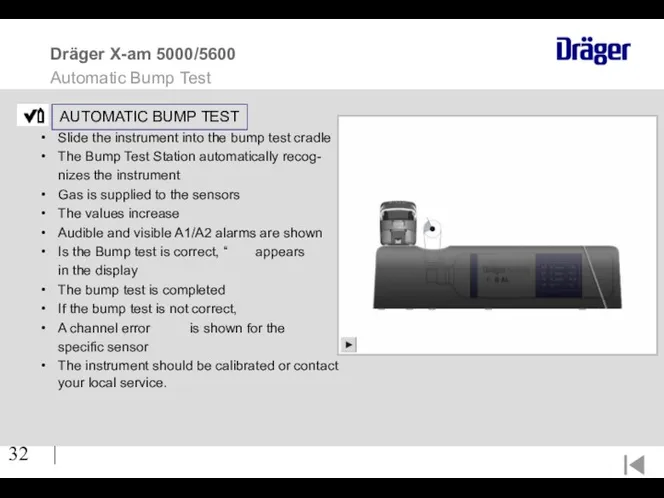
- 31. | A „Bump Test“ is a function test. Before using the instrument, it is important to
- 32. | AUTOMATIC BUMP TEST Dräger X-am 5000/5600 Automatic Bump Test Slide the instrument into the bump
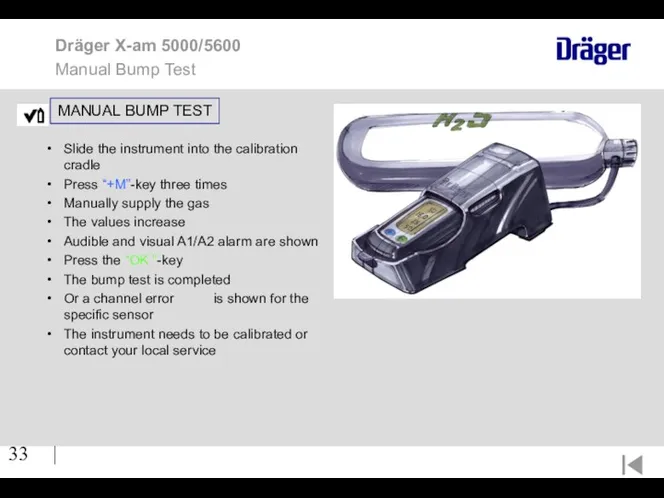
- 33. | MANUAL BUMP TEST Slide the instrument into the calibration cradle Press “+M”-key three times Manually
- 34. | Do not charge underground or in areas, where explosions can occur! There is a danger
- 35. | Do not charge the battery in explosion hazard areas. Alkaline-Batteries are part of the Ex-approval.
- 36. | Dräger X-am 5000/5600 Overview of the icons Special symbols provide a quick message about the
- 38. Скачать презентацию
|
CONTENT
Disclaimer 4
Dräger X-am 5x00 Overview 5
Switching On & 7
Warming-Up Period
Switching Off 8
Display
|
CONTENT
Disclaimer 4
Dräger X-am 5x00 Overview 5
Switching On & 7
Warming-Up Period
Switching Off 8
Display
General Information
General Information
|
DISCLAIMER
This visual presentation is intended to help the user
|
DISCLAIMER
This visual presentation is intended to help the user
|
XXS sensor slot
Visual alarm
Catalytic sensor (X-am 5000) / IR
|
XXS sensor slot
Visual alarm
Catalytic sensor (X-am 5000) / IR
Operation X-am 5000/5600
Operation X-am 5000/5600
|
Dräger X-am 5000/5600
Switch On
Press and hold the “OK”-key for
|
Dräger X-am 5000/5600
Switch On
Press and hold the “OK”-key for
|
Dräger X-am 5000/5600
Switching off
Press and hold the “+”
|
Dräger X-am 5000/5600
Switching off
Press and hold the “+”
|
Press any key and the display illumination
is switched on
|
Press any key and the display illumination
is switched on
|
Dräger X-am 5000/5600
Menu Fresh Air Calibration
FRESH AIR
|
Dräger X-am 5000/5600
Menu Fresh Air Calibration
FRESH AIR

|
Dräger X-am 5000/5600
Menu Maximum Value
MENU MAXIMUM VALUE
The function
|
Dräger X-am 5000/5600
Menu Maximum Value
MENU MAXIMUM VALUE
The function
|
TWA (Time Weighted Average) is the time-weighted average gas
|
TWA (Time Weighted Average) is the time-weighted average gas
|
TWA
When the TWA analysis is activated:
Press and hold
|
TWA
When the TWA analysis is activated:
Press and hold
|
Dräger X-am 5000/5600
Menu Functions
When STEL analysis is activated:
Press
|
Dräger X-am 5000/5600
Menu Functions
When STEL analysis is activated:
Press
|
Alarm level can be changed with the help
of the
|
Alarm level can be changed with the help
of the
|
Alarm level can be changed with the help
of the
|
Alarm level can be changed with the help
of the
|
TWA and STEL values will be cancelled when the
|
TWA and STEL values will be cancelled when the
|
TWA and STEL values will be cancelled when the
|
TWA and STEL values will be cancelled when the
|
Dräger X-am 5000/5600
A1 Low Battery Alarm
Click the picture
|
Dräger X-am 5000/5600
A1 Low Battery Alarm
Click the picture
|
A2 LOW BATTERY ALARM
Dräger X-am 5000/5600
A2 Low Battery
|
A2 LOW BATTERY ALARM
Dräger X-am 5000/5600
A2 Low Battery
|
Dräger X-am 5000/5600
Error Alarm
ERROR ALARM
An error is an
|
Dräger X-am 5000/5600
Error Alarm
ERROR ALARM
An error is an
|
Audible-, visual- and vibrating alarms
repeat periodically
and A1
|
Audible-, visual- and vibrating alarms
repeat periodically
and A1
|
Look at video
UNDER RANGE
Audible-, visual- and vibrating alarms
repeat
|
Look at video
UNDER RANGE
Audible-, visual- and vibrating alarms
repeat

|
Press the “OK ”-key to acknowledge
Press the “OK ”-key
|
Press the “OK ”-key to acknowledge
Press the “OK ”-key
|
Press the “OK ”-key
A Notice Code is shown
(Use
|
Press the “OK ”-key
A Notice Code is shown
(Use
Operation Pump for X-am 1/2/5000
Operation Pump for X-am 1/2/5000
|
Switch on the gas measuring device and insert it
|
Switch on the gas measuring device and insert it
|
Attention!
Before every measurement, flush the Dräger sampling hose or
|
Attention!
Before every measurement, flush the Dräger sampling hose or

Function test and Maintenance
Function test and Maintenance
|
DATA READ OUT
Dräger X-am 5000/5600
Data Read Out
Look at
|
DATA READ OUT
Dräger X-am 5000/5600
Data Read Out
Look at
|
A „Bump Test“ is a function test. Before using
|
A „Bump Test“ is a function test. Before using
|
AUTOMATIC BUMP TEST
Dräger X-am 5000/5600
Automatic Bump Test
Slide the instrument
|
AUTOMATIC BUMP TEST
Dräger X-am 5000/5600
Automatic Bump Test
Slide the instrument
|
MANUAL BUMP TEST
Slide the instrument into the calibration cradle
|
MANUAL BUMP TEST
Slide the instrument into the calibration cradle
|
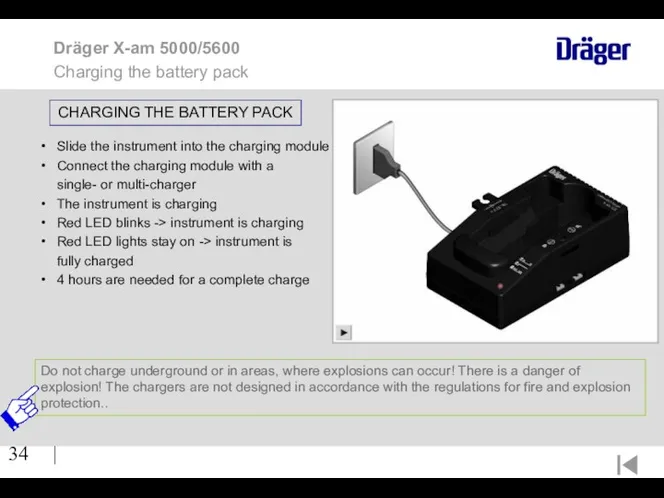
Do not charge underground or in areas, where explosions
|
Do not charge underground or in areas, where explosions
|
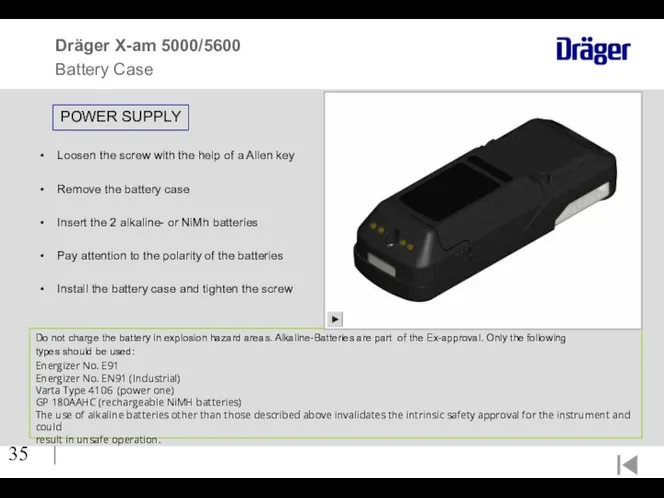
Do not charge the battery in explosion hazard areas.
|
Do not charge the battery in explosion hazard areas.
|
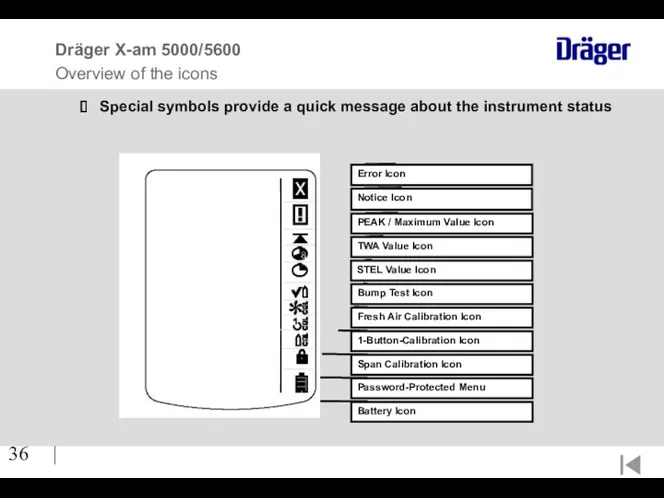
Dräger X-am 5000/5600
Overview of the icons
Special symbols provide a
|
Dräger X-am 5000/5600
Overview of the icons
Special symbols provide a
 Сеть магазинов RCF-СТАРТ
 Инструменты для роста продаж и персонализации сайта под интересы аудитории
 Контент-маркетинг
 1001 ночь о чем должен говорить лидер мнений
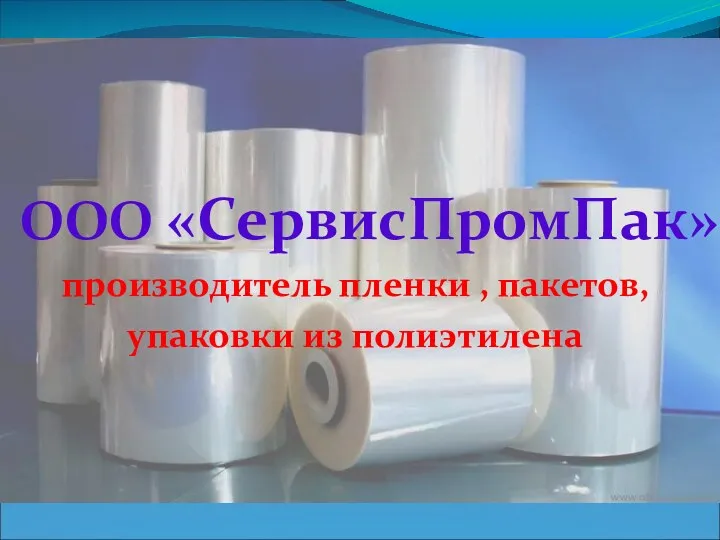 ООО СервисПромПак
 Премия человек года
 Комплекс маркетинга
 ЖК Чистая слобода
 Київстар – мобільний оператор №1 та один з найкращих брендів України
 Представленность товара в торговых точках. Витрина и накопитель
 Whitepod hotel, Швейцария
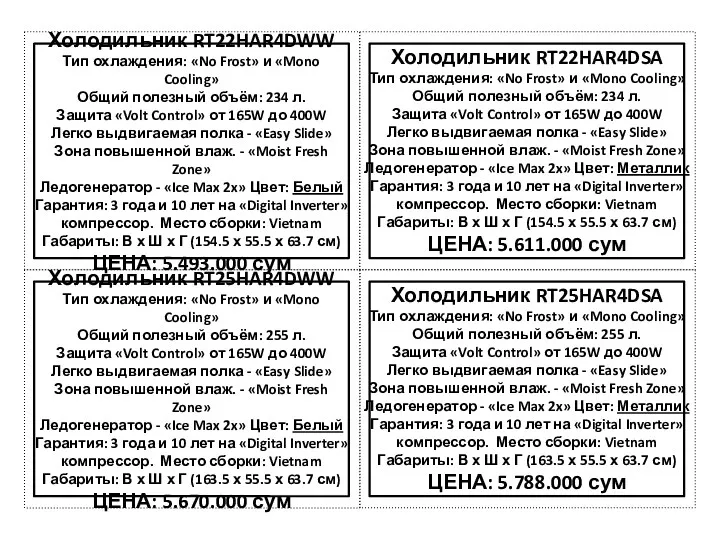 Ценники на большие холодильники Samsung 2021
 Сервисное обслуживание как фактор конкурентоспособности организации на примере ОАО УКХ ММЗ
 Подарочный набор Лояльный клиент
 Gold stock development
 Разработка хоккейного бара по модели Convas
 Предложение: выпускной
 Маркетинг образовательных услуг. Лекция 7
 Customer Decision Making
 Сущность, цели, элементы территориального маркетинга
 Позиционирование товара на рынке
 Повышение пропускной способности воздушных линий электропередачи за счет внедрения инновационных проводов
 Как стать поставщиком X5. Заключение контракта
 Нетворкинг в действии
 Маркетинговая среда организации
 The Walt Pr
 Введение стандарта клиентоориентированного обслуживания
 Vichi. Надійний захист від уф-випромінювання протягом всього року