- VGA Test 2019

Содержание
- 2. Agenda 1. Install OS 2. SIP Download Test Process Flash VBIOS& Memory Test 5. Test Result
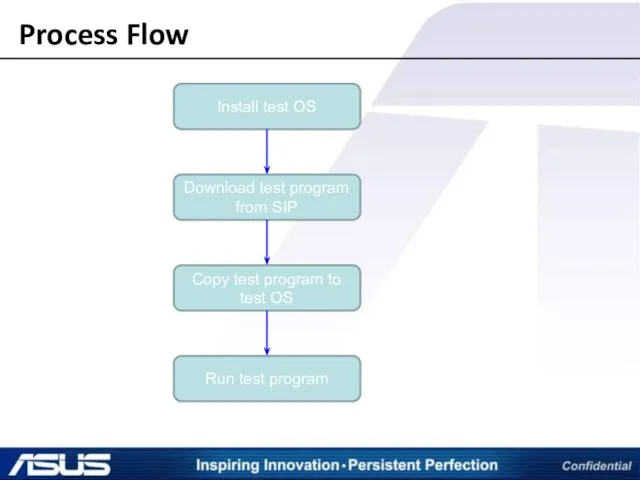
- 3. Process Flow Install test OS Download test program from SIP Copy test program to test OS
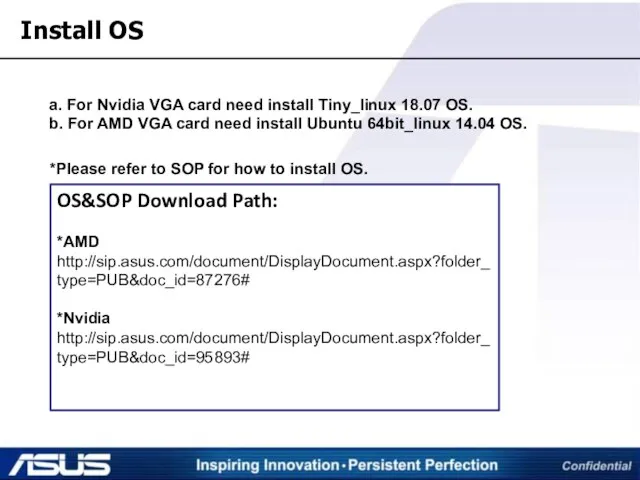
- 4. Install OS a. For Nvidia VGA card need install Tiny_linux 18.07 OS. b. For AMD VGA
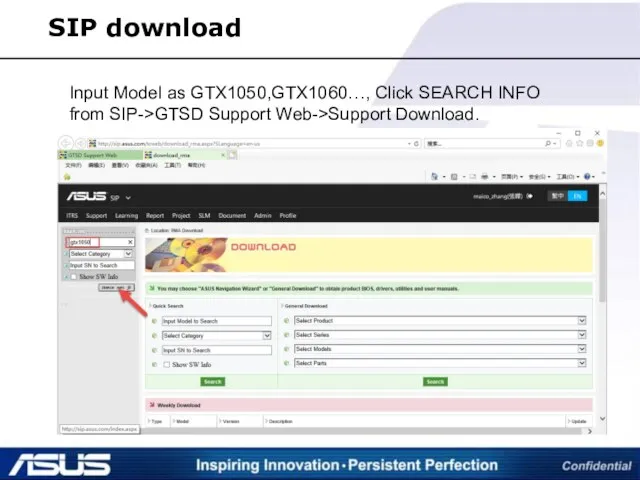
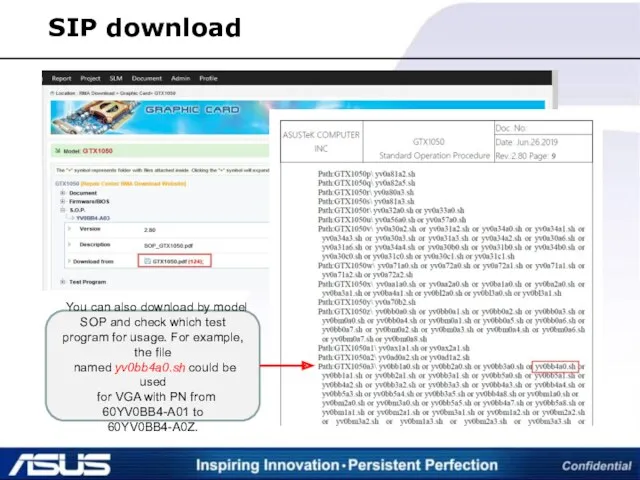
- 5. SIP download Input Model as GTX1050,GTX1060…, Click SEARCH INFO from SIP->GTSD Support Web->Support Download.
- 6. SIP download Down load test program in SIP by Part_No. Check Part_No. with VGA card
- 7. SIP download You can also download by model SOP and check which test program for usage.
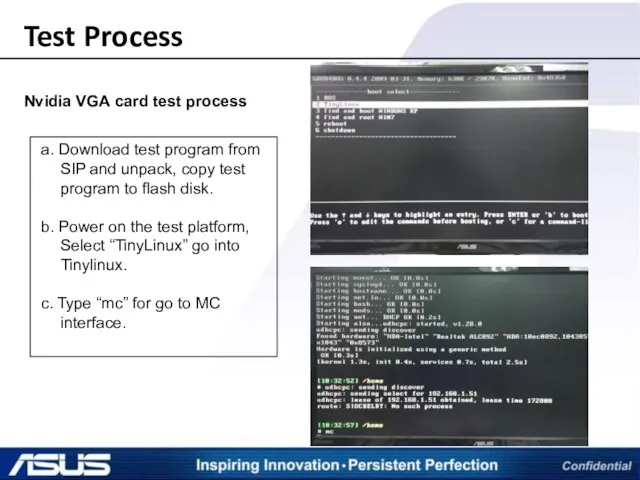
- 8. Test Process Nvidia VGA card test process a. Download test program from SIP and unpack, copy
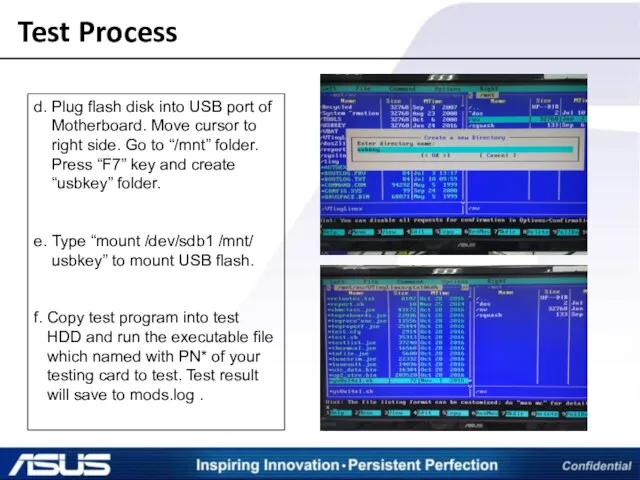
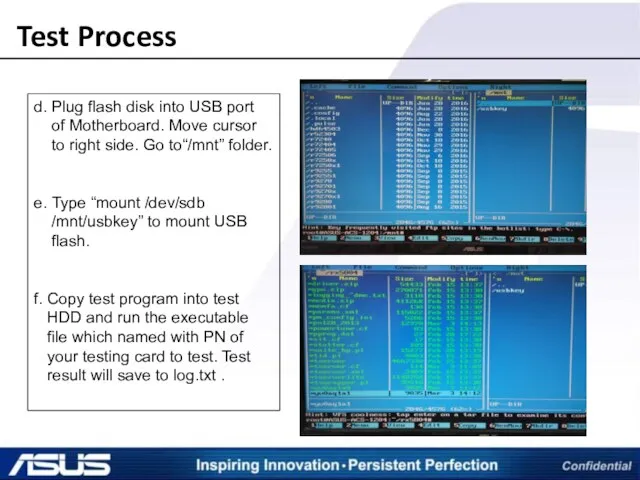
- 9. Test Process d. Plug flash disk into USB port of Motherboard. Move cursor to right side.
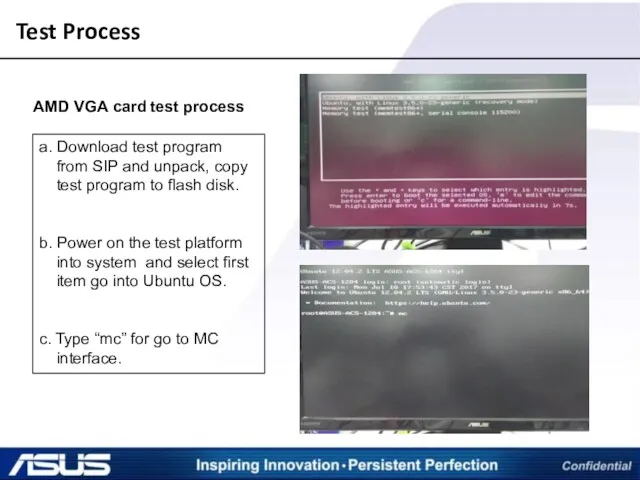
- 10. Test Process AMD VGA card test process a. Download test program from SIP and unpack, copy
- 11. Test Process d. Plug flash disk into USB port of Motherboard. Move cursor to right side.
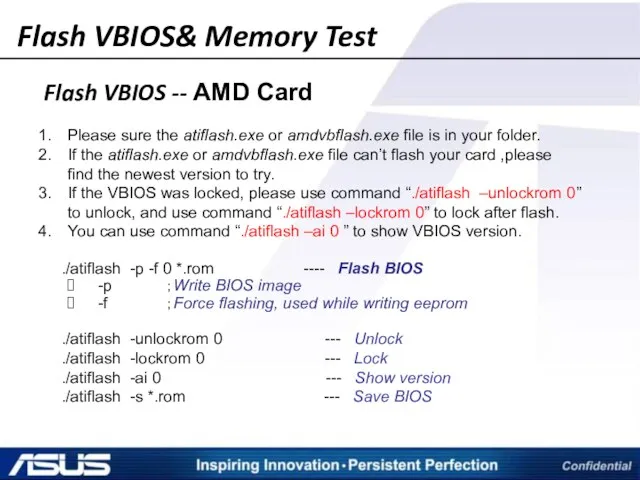
- 12. Flash VBIOS& Memory Test Flash VBIOS -- AMD Card Please sure the atiflash.exe or amdvbflash.exe file
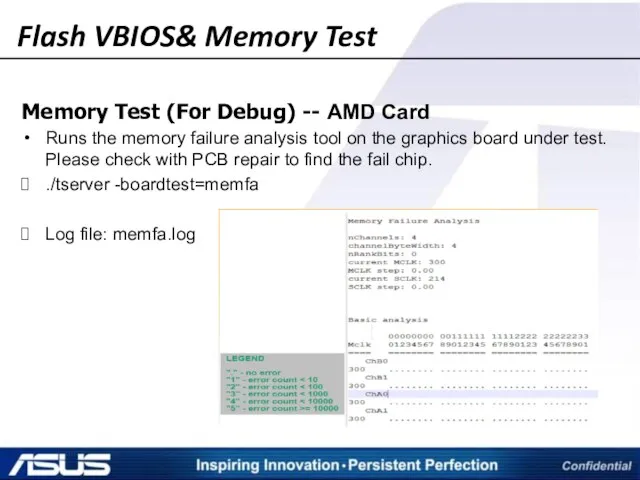
- 13. Flash VBIOS& Memory Test Memory Test (For Debug) -- AMD Card Runs the memory failure analysis
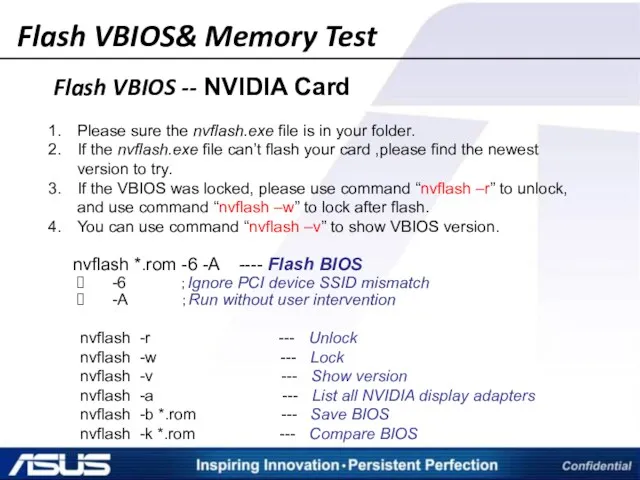
- 14. Flash VBIOS& Memory Test Flash VBIOS -- NVIDIA Card Please sure the nvflash.exe file is in
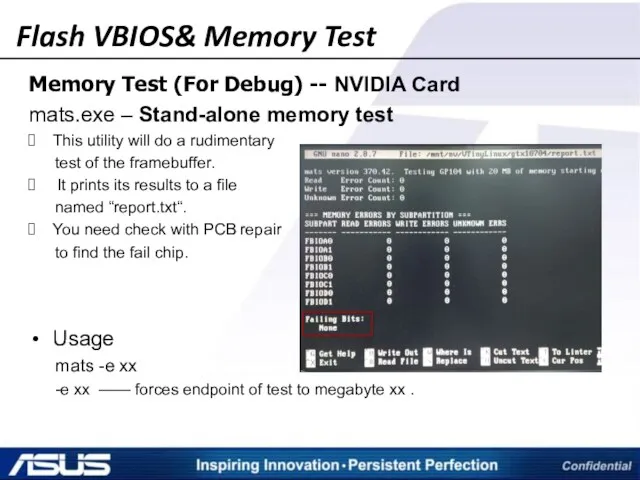
- 15. Flash VBIOS& Memory Test Memory Test (For Debug) -- NVIDIA Card mats.exe – Stand-alone memory test
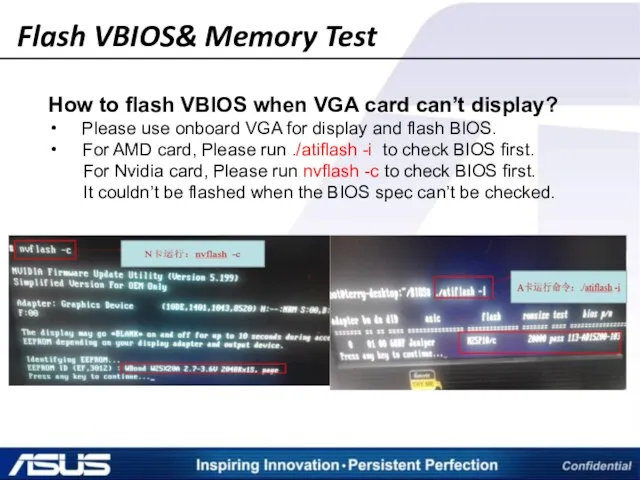
- 16. Flash VBIOS& Memory Test How to flash VBIOS when VGA card can’t display? Please use onboard
- 17. For Nvidia RTX series, you can use diag test for debug memory. . If the diagnostic
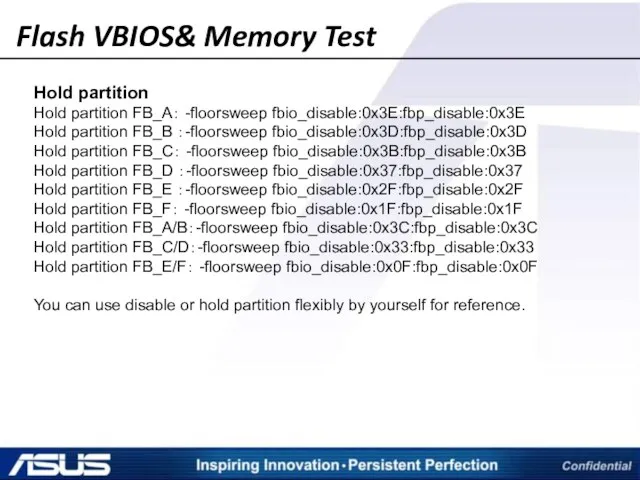
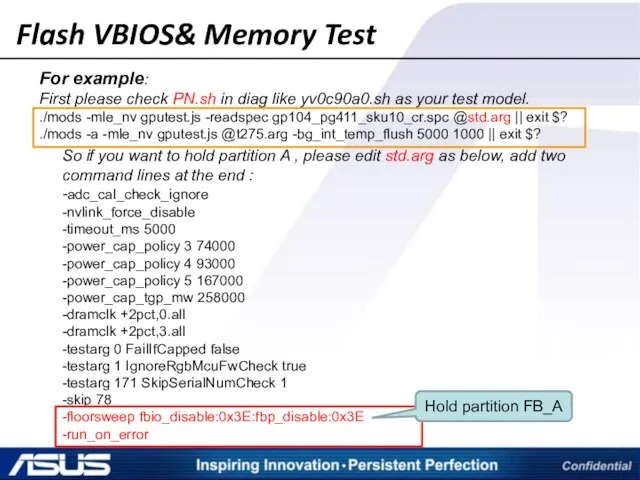
- 18. Flash VBIOS& Memory Test Hold partition Hold partition FB_A: -floorsweep fbio_disable:0x3E:fbp_disable:0x3E Hold partition FB_B :-floorsweep fbio_disable:0x3D:fbp_disable:0x3D
- 19. Flash VBIOS& Memory Test So if you want to hold partition A , please edit std.arg
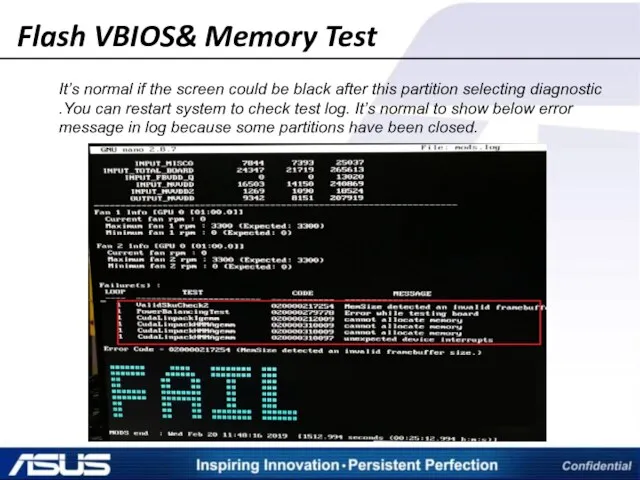
- 20. Flash VBIOS& Memory Test It’s normal if the screen could be black after this partition selecting
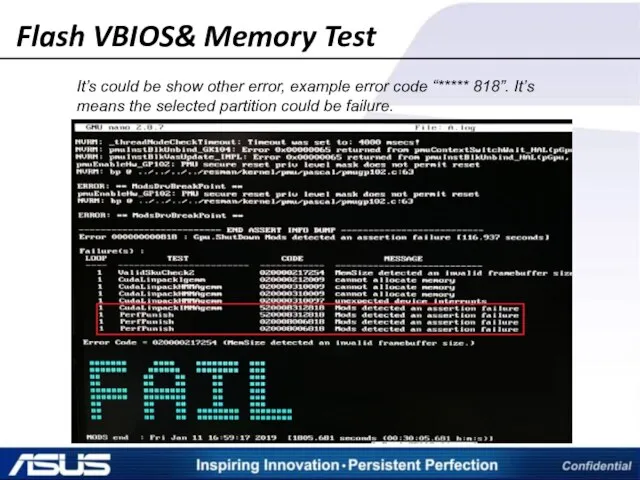
- 21. Flash VBIOS& Memory Test It’s could be show other error, example error code “***** 818”. It’s
- 22. 1. Download VGA Upload Tool from SIP and unpacked. Copy to USB flash. Download site:http://sip.asus.com/document/DisplayDocument.aspx?folder_type=PUB&doc_id=208968# Test
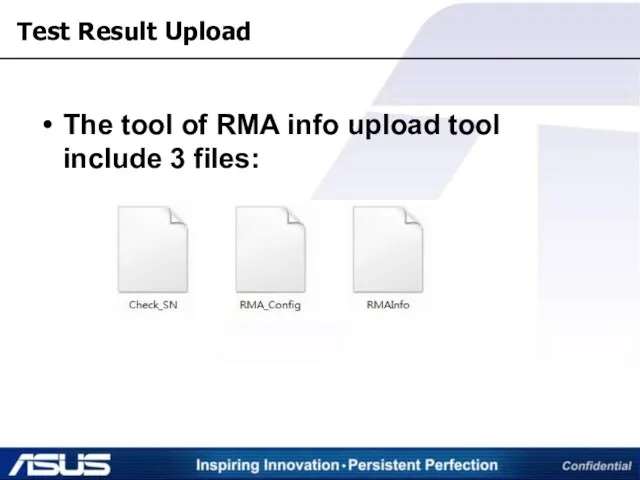
- 23. Test Result Upload The tool of RMA info upload tool include 3 files:
- 24. 2. Power on the test platform. And into Linux OS. Type “mc“ go to MC interface.
- 25. 3. Press “F4” to edit the RMA_Config file when using the tool first time. First line
- 26. 4. Press “F5” to copy 3 file of the tool to the test program folder by
- 27. 5. Run Check_SN and type in your VGA SN which need to be testing. The SN
- 28. 6. Run Diag test and the diag name is same as the PN of your VGA
- 29. 7. After Diag test is finished ,run RMAInfo and the test result will be sent to
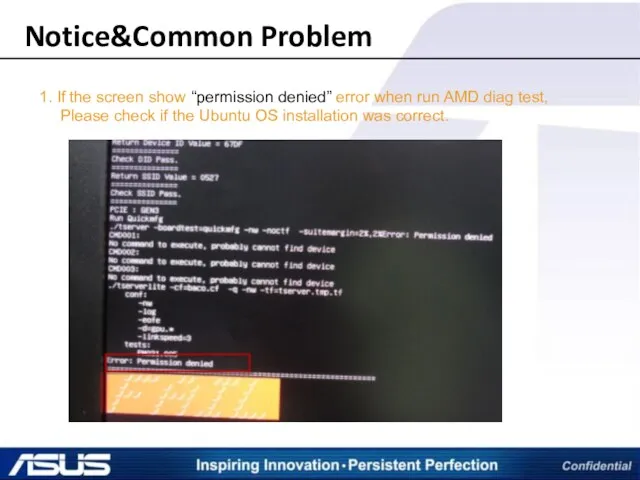
- 30. Notice&Common Problem 1. If the screen show “permission denied” error when run AMD diag test, Please
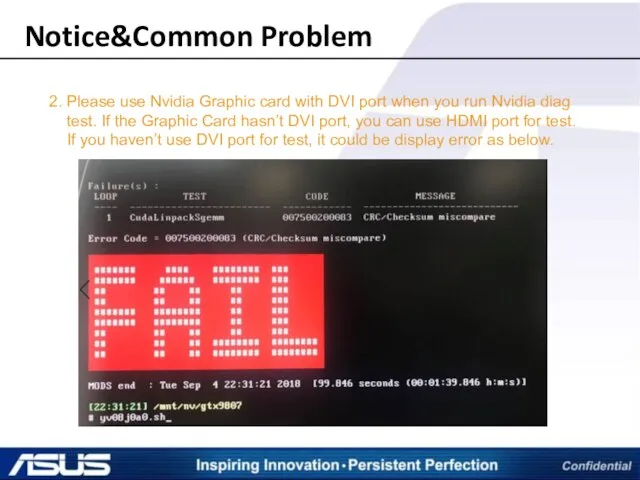
- 31. Notice&Common Problem 2. Please use Nvidia Graphic card with DVI port when you run Nvidia diag
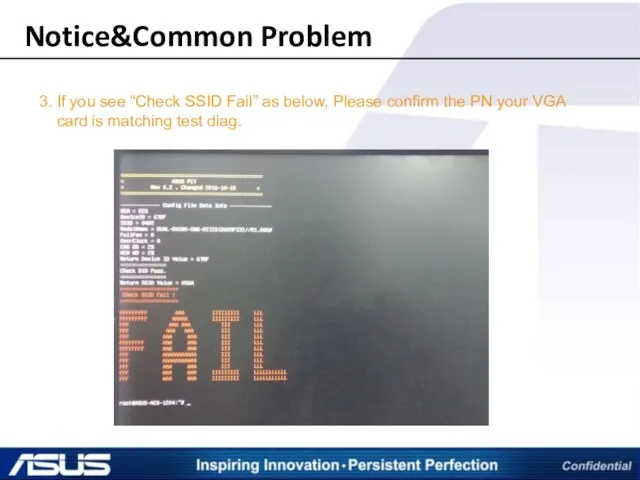
- 32. Notice&Common Problem 3. If you see “Check SSID Fail” as below, Please confirm the PN your
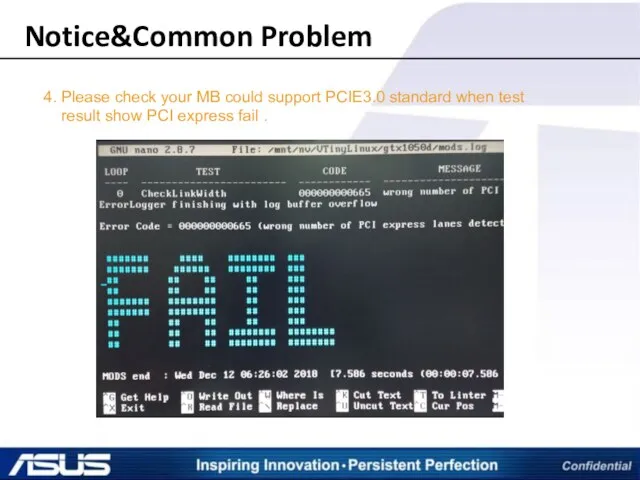
- 33. Notice&Common Problem 4. Please check your MB could support PCIE3.0 standard when test result show PCI
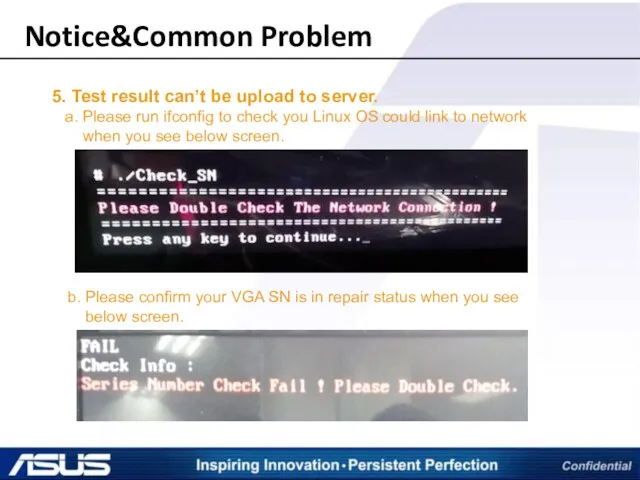
- 34. Notice&Common Problem 5. Test result can’t be upload to server. a. Please run ifconfig to check
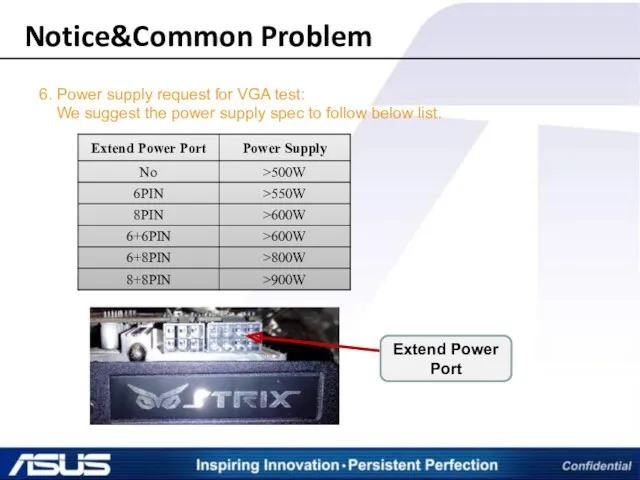
- 35. Notice&Common Problem 6. Power supply request for VGA test: We suggest the power supply spec to
- 37. Скачать презентацию
Agenda
1. Install OS
2. SIP Download
Test Process
Flash VBIOS& Memory Test
5. Test
Agenda
1. Install OS
2. SIP Download
Test Process
Flash VBIOS& Memory Test
5. Test
Process Flow
Install test OS
Download test program from SIP
Copy test program
Process Flow
Install test OS
Download test program from SIP
Copy test program
Install OS
a. For Nvidia VGA card need install Tiny_linux 18.07
Install OS
a. For Nvidia VGA card need install Tiny_linux 18.07
SIP download
Input Model as GTX1050,GTX1060…, Click SEARCH INFO from SIP->GTSD Support
SIP download
Input Model as GTX1050,GTX1060…, Click SEARCH INFO from SIP->GTSD Support

SIP download
Down load test program in SIP by Part_No.
Check Part_No. with
SIP download
Down load test program in SIP by Part_No.
Check Part_No. with
SIP download
You can also download by model SOP and check
SIP download
You can also download by model SOP and check
Test Process
Nvidia VGA card test process
a. Download test program from
Test Process
Nvidia VGA card test process
a. Download test program from
Test Process
d. Plug flash disk into USB port of
Test Process
d. Plug flash disk into USB port of
Test Process
AMD VGA card test process
a. Download test program
from
Test Process
AMD VGA card test process
a. Download test program
from
Test Process
d. Plug flash disk into USB port
of Motherboard.
Test Process
d. Plug flash disk into USB port
of Motherboard.
Flash VBIOS& Memory Test
Flash VBIOS -- AMD Card
Please sure the
Flash VBIOS& Memory Test
Flash VBIOS -- AMD Card
Please sure the
Flash VBIOS& Memory Test
Memory Test (For Debug) -- AMD Card
Runs
Flash VBIOS& Memory Test
Memory Test (For Debug) -- AMD Card
Runs
Flash VBIOS& Memory Test
Flash VBIOS -- NVIDIA Card
Please sure the
Flash VBIOS& Memory Test
Flash VBIOS -- NVIDIA Card
Please sure the
Flash VBIOS& Memory Test
Memory Test (For Debug) -- NVIDIA Card
Flash VBIOS& Memory Test
Memory Test (For Debug) -- NVIDIA Card
Flash VBIOS& Memory Test
How to flash VBIOS when VGA card
Flash VBIOS& Memory Test
How to flash VBIOS when VGA card
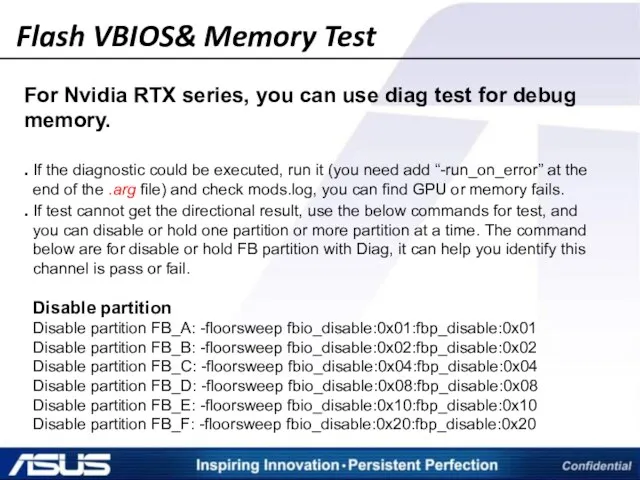
For Nvidia RTX series, you can use diag test for debug
For Nvidia RTX series, you can use diag test for debug
Flash VBIOS& Memory Test
Hold partition
Hold partition FB_A: -floorsweep fbio_disable:0x3E:fbp_disable:0x3E
Hold partition
Flash VBIOS& Memory Test
Hold partition
Hold partition FB_A: -floorsweep fbio_disable:0x3E:fbp_disable:0x3E
Hold partition
Flash VBIOS& Memory Test
So if you want to hold partition
Flash VBIOS& Memory Test
So if you want to hold partition
Flash VBIOS& Memory Test
It’s normal if the screen could be
Flash VBIOS& Memory Test
It’s normal if the screen could be
Flash VBIOS& Memory Test
It’s could be show other error, example
Flash VBIOS& Memory Test
It’s could be show other error, example

1. Download VGA Upload Tool from SIP and unpacked. Copy
1. Download VGA Upload Tool from SIP and unpacked. Copy
Test Result Upload
The tool of RMA info upload tool include
Test Result Upload
The tool of RMA info upload tool include
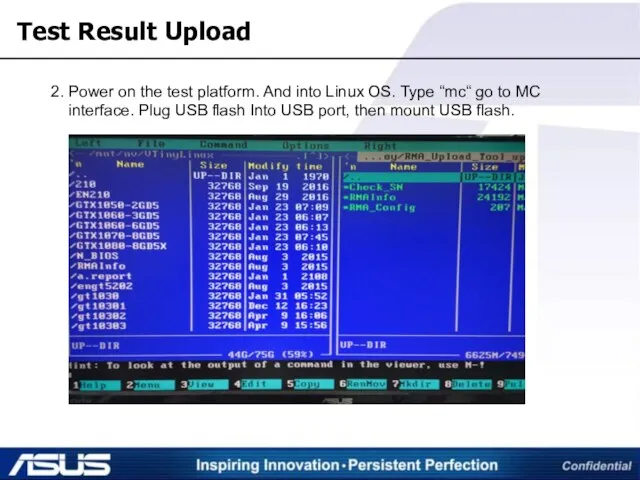
2. Power on the test platform. And into Linux OS. Type
2. Power on the test platform. And into Linux OS. Type
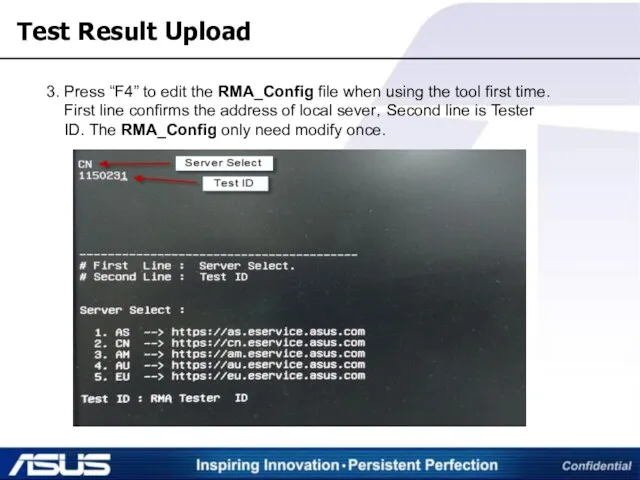
3. Press “F4” to edit the RMA_Config file when using the
3. Press “F4” to edit the RMA_Config file when using the
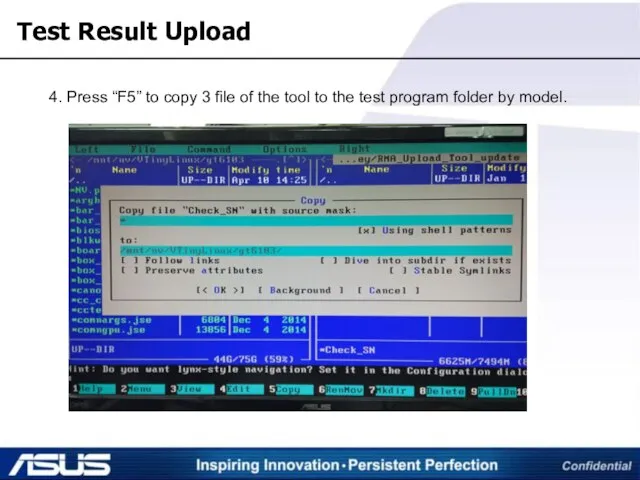
4. Press “F5” to copy 3 file of the tool to
4. Press “F5” to copy 3 file of the tool to
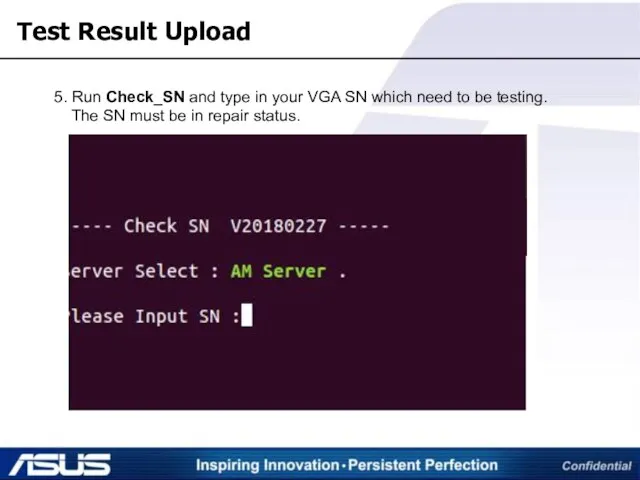
5. Run Check_SN and type in your VGA SN which need
5. Run Check_SN and type in your VGA SN which need
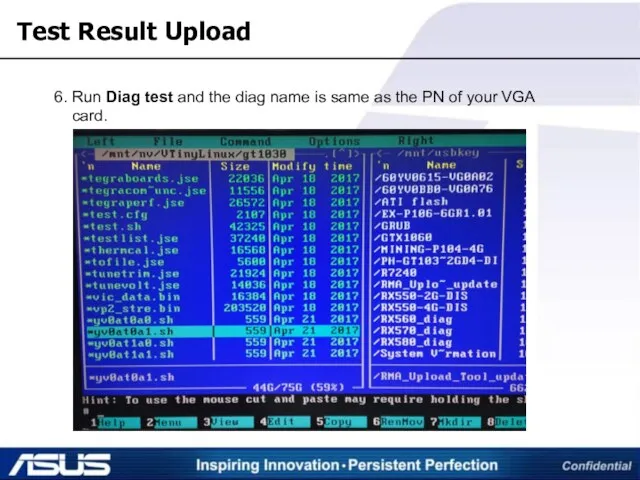
6. Run Diag test and the diag name is same as
6. Run Diag test and the diag name is same as
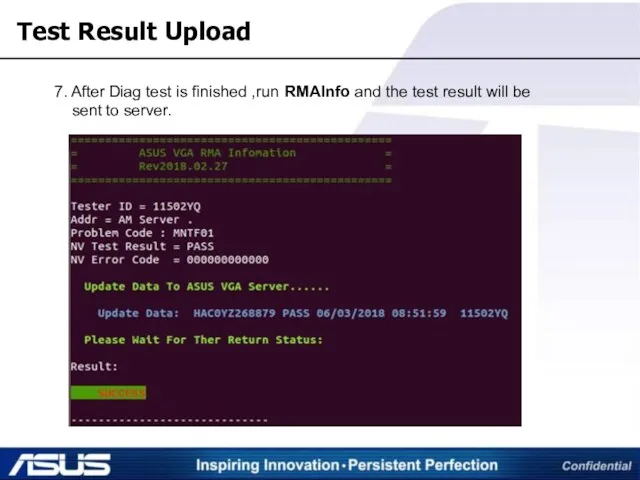
7. After Diag test is finished ,run RMAInfo and the test
7. After Diag test is finished ,run RMAInfo and the test
Notice&Common Problem
1. If the screen show “permission denied” error when run
Notice&Common Problem
1. If the screen show “permission denied” error when run
Notice&Common Problem
2. Please use Nvidia Graphic card with DVI port when
Notice&Common Problem
2. Please use Nvidia Graphic card with DVI port when
Notice&Common Problem
3. If you see “Check SSID Fail” as below, Please
Notice&Common Problem
3. If you see “Check SSID Fail” as below, Please
Notice&Common Problem
4. Please check your MB could support PCIE3.0 standard when
Notice&Common Problem
4. Please check your MB could support PCIE3.0 standard when
Notice&Common Problem
5. Test result can’t be upload to server.
a. Please
Notice&Common Problem
5. Test result can’t be upload to server.
a. Please
Notice&Common Problem
6. Power supply request for VGA test:
We suggest the
Notice&Common Problem
6. Power supply request for VGA test:
We suggest the
 1С:Документооборот 8. Настройка прав доступа
 Путешествие по клавиатуре. Урок-игра
 Помехоустойчивое кодирование сообщений
 Multithreading (Java, C#, C++)
 Функциональная схема компьютера
 Основные понятия в области защиты ПО
 Час кода. Викторина
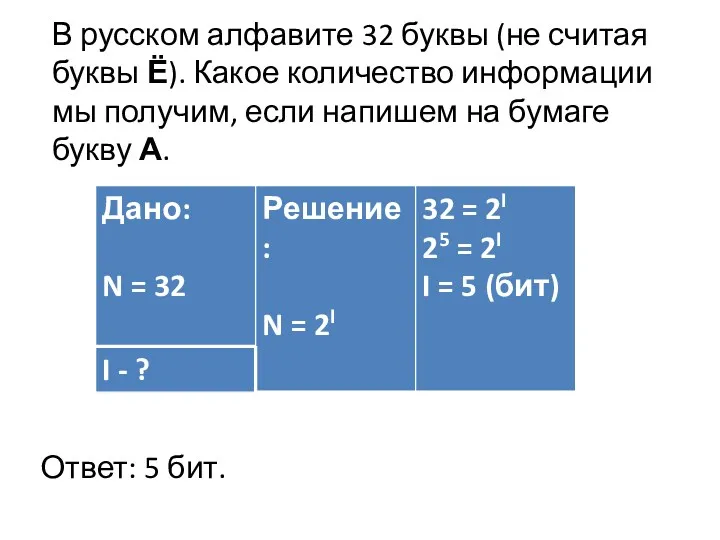 Презентация по теме Алфавитный подход для подсчёта количества информации в сообщении
 Диаграмма развертывания языка UML 2 (Лекция 8)
 Мультимедиа технологии. Назначение мультимедиа-продуктов и области их применения
 Форматиране на текст в уеб страница
 Методика для чайников. Вопросы по методике
 Курс повышения квалификации SMM-специалист
 Инструкция по установке MS SQL SERVER
 Создание таблицы в текстовом редакторе Microsoft Word 2010 и её редактирование с помощью вкладки Макет
 Технологии аналитики и визуализации больших данных (лекция № 7)
 МДК 02.02. Web-программирование. Язык РНР. Работа с формой
 Вычислительные системы, сети и телекоммуникации. Введение
 Получение хеша. Cookies и сессии, авторизация на сайте, организация доступа к разделам сайта при помощи сессии
 Протокол разделения секрета и другие протоколы
 Функциональные возможности Microsoft Office
 Устройство компьютера (§32-37)
 Як користуватися інформаційними ресурсами платформи Web of Science
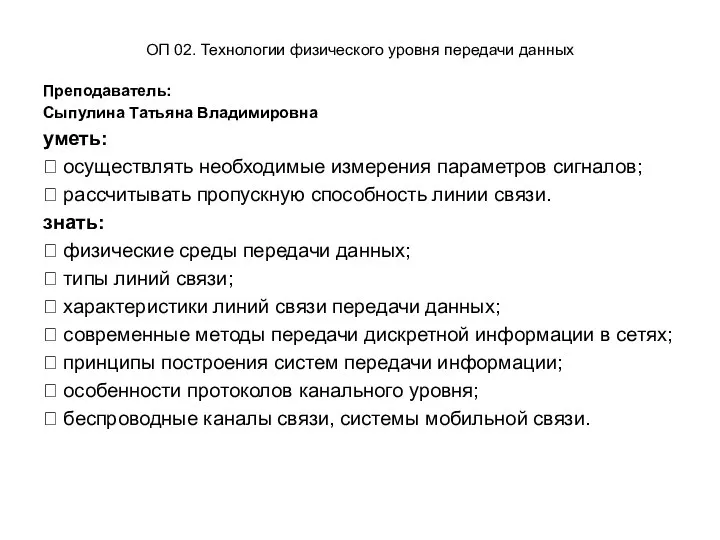 Технологии физического уровня передачи данных. Компьютерные сети
 Модели и их свойства
 KnockoutJS
 Библиотека в социальных сетях
 Вредоносные и антивирусные программы. Компьютерные черви и защита от них